


Jayly's Cinematic Runtime v1.0.5
- By
Jayly's Cinematic Runtime controls your camera in Minecraft. This add-on provides support for mobile and console.
RuntimeMCPEDL.png
Description
Jayly's Cinematic Runtime controls your camera to change perspectives and designing cinematic scenes within Minecraft. This tool can be used in mobile and console platforms.
⚠️ This article is about the Cinematic Editor with cross-platform support. For the Cinematic Editor extension which uses the Bedrock Editor engine, see Cinematic Editor extension: https://mcpedl.com/jayly-cinematic-editor/
Cinematic Runtime full Wiki
Creating a Scene
The runtime add-on now supports creating and editing a Minecraft scene without the Editor, by sacrificing the fancy UI given by Minecraft Editor engine.
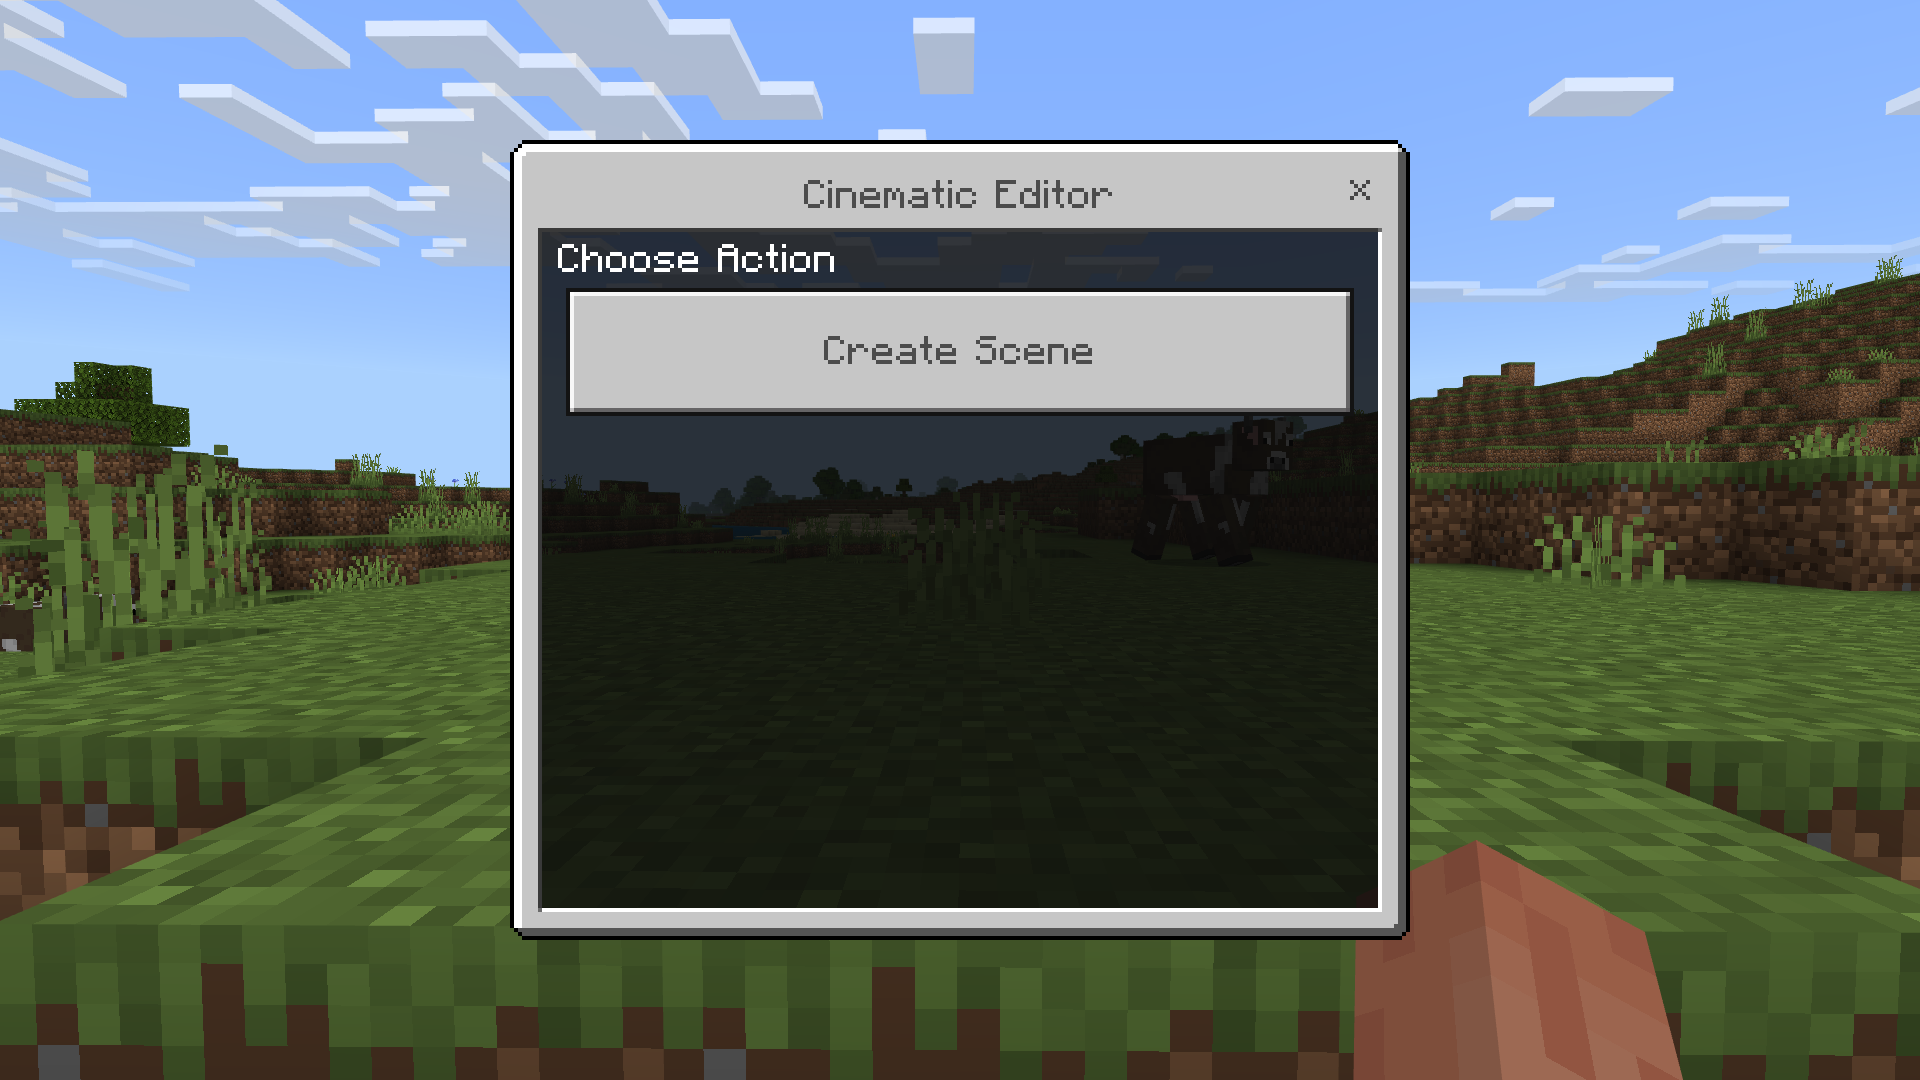
Start by running the following command:
/function cinematic/editor
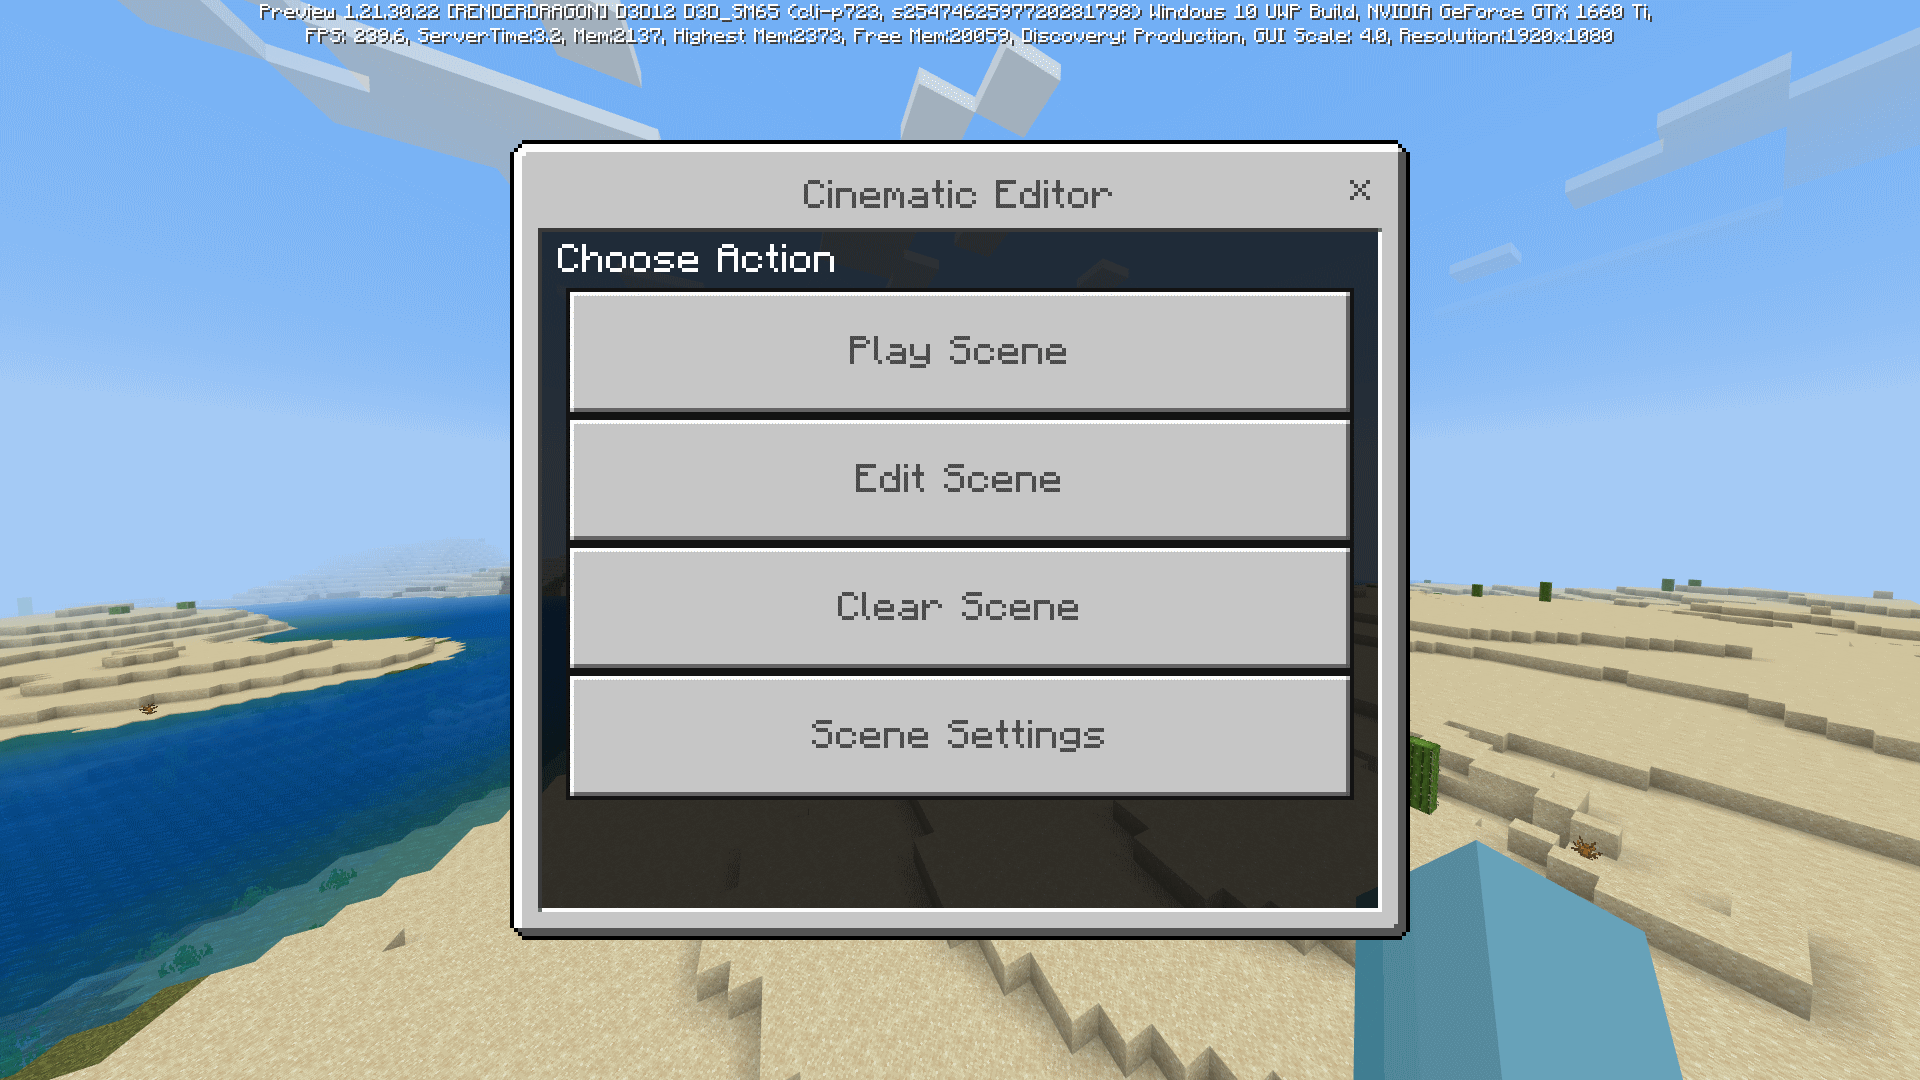
When executed, this form should appear when you have not created a scene:
Scene Editor Mode
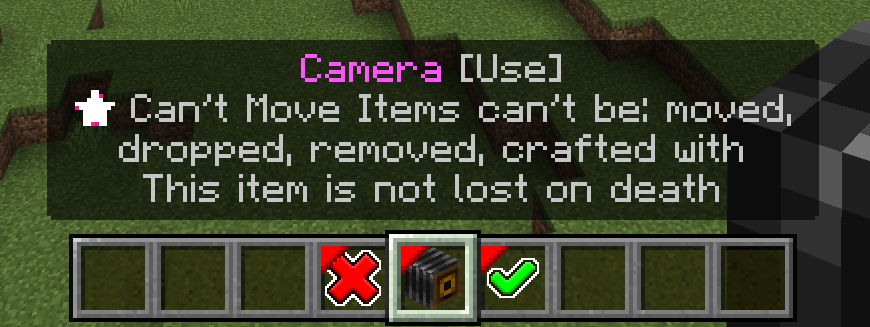
After pressing the create scene button, you will enter Scene Editor mode. There will be 3 items in your hotbar, and your whole inventory will be cleared until you exit scene editor mode:
Exit without saving scene
Exits scene editor without saving the scene using the Cancel item.
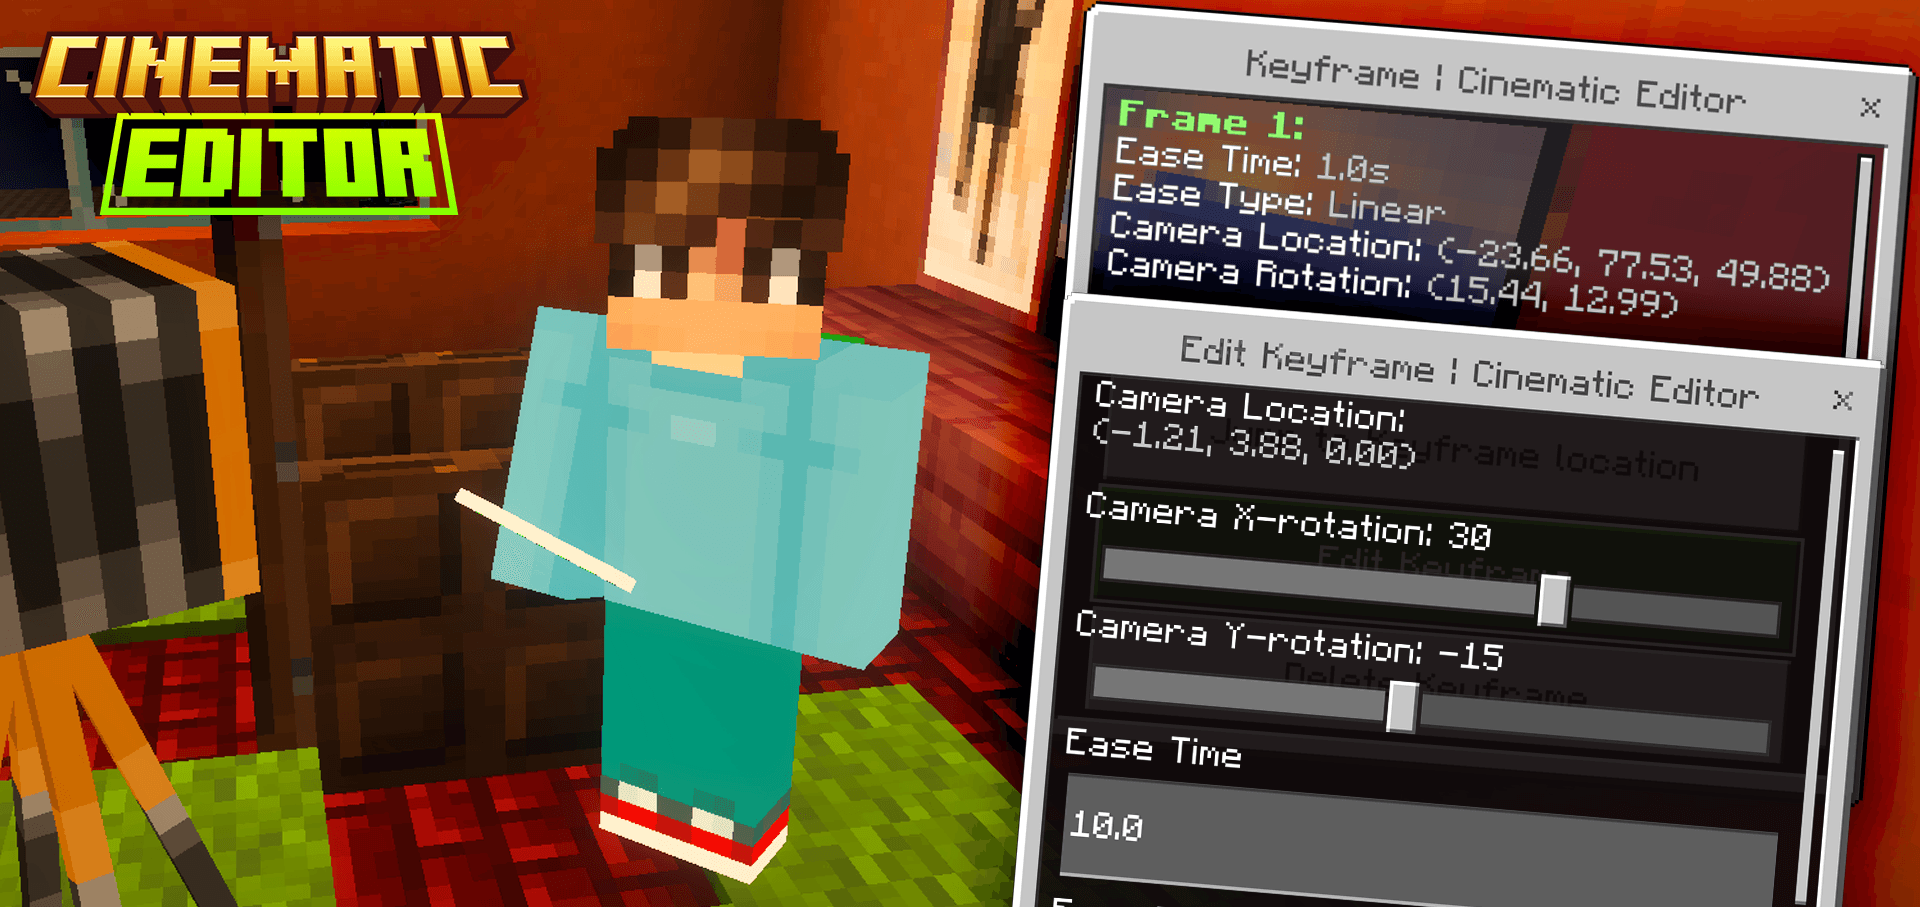
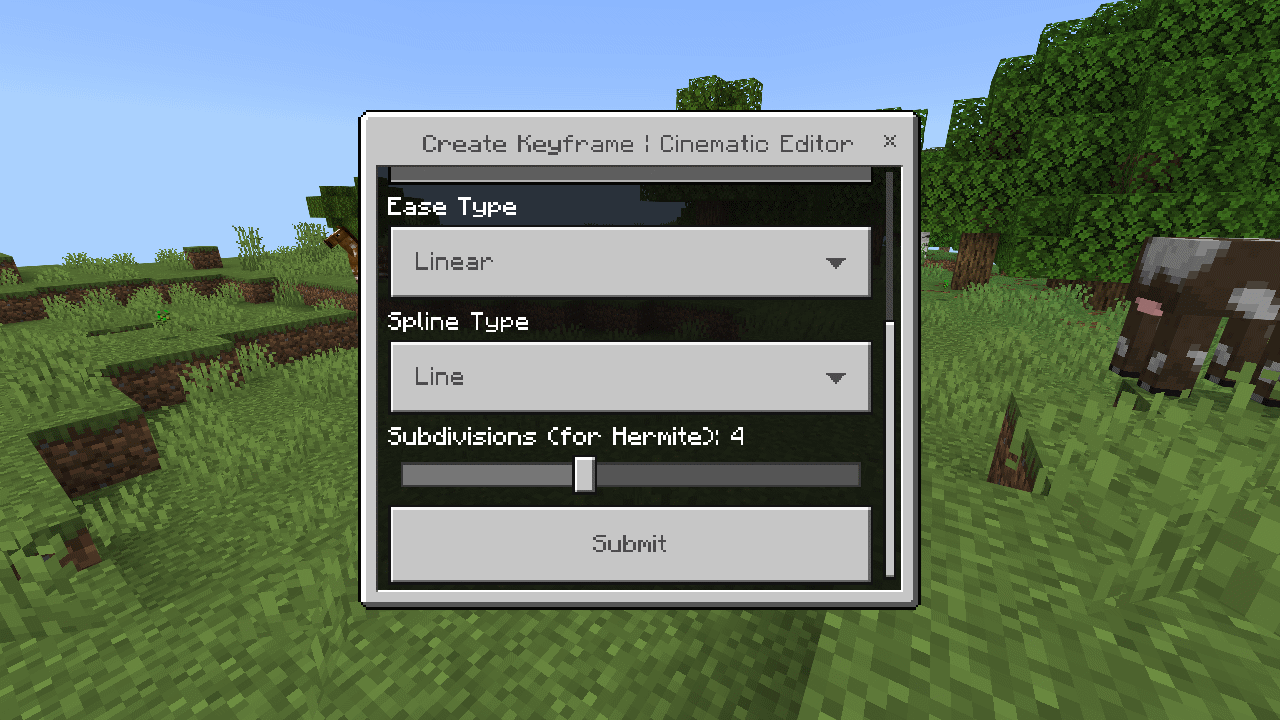
Create keyframe
Create a keyframe using the camera item. Not to be confused with Minecraft's camera item.
When using this item a keyframe will be saved temperatory to a scene.
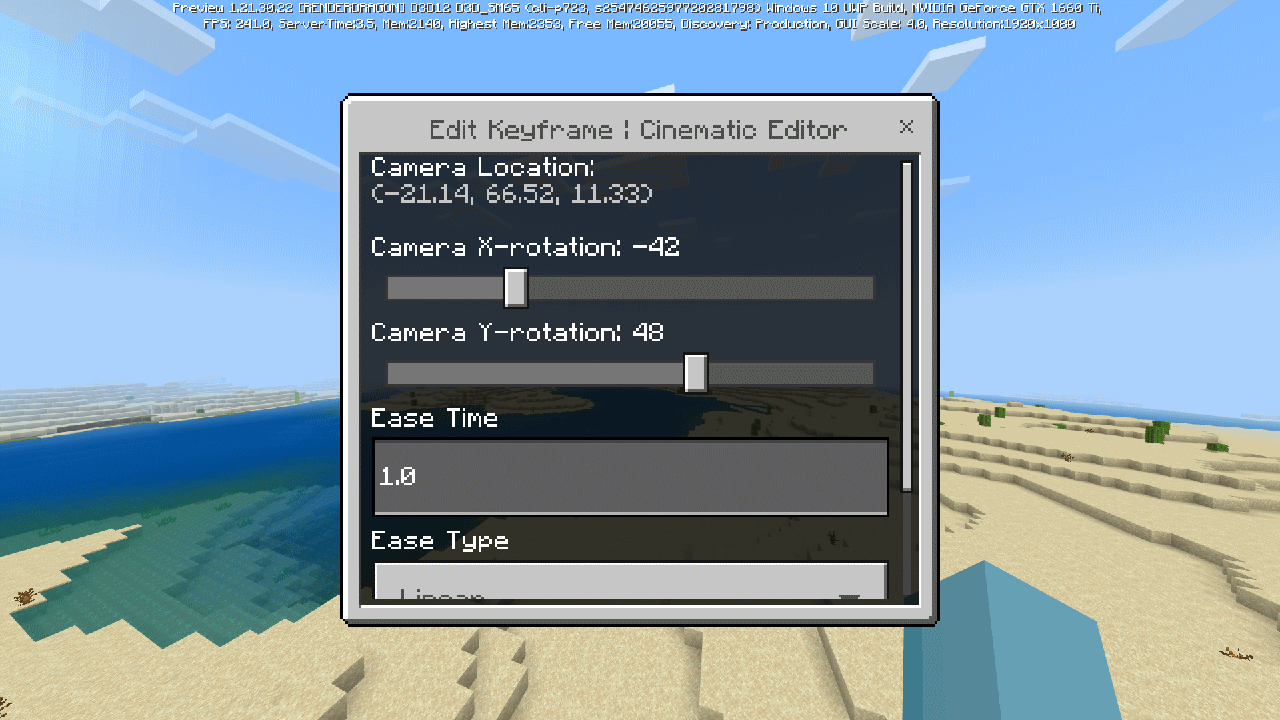
It will also asks you to set values of ease type and ease time, which you can change it later after exiting scene editor mode.
Saving Scene
Using the Confirm item will save the scene to the world.
Edit Existing Scene
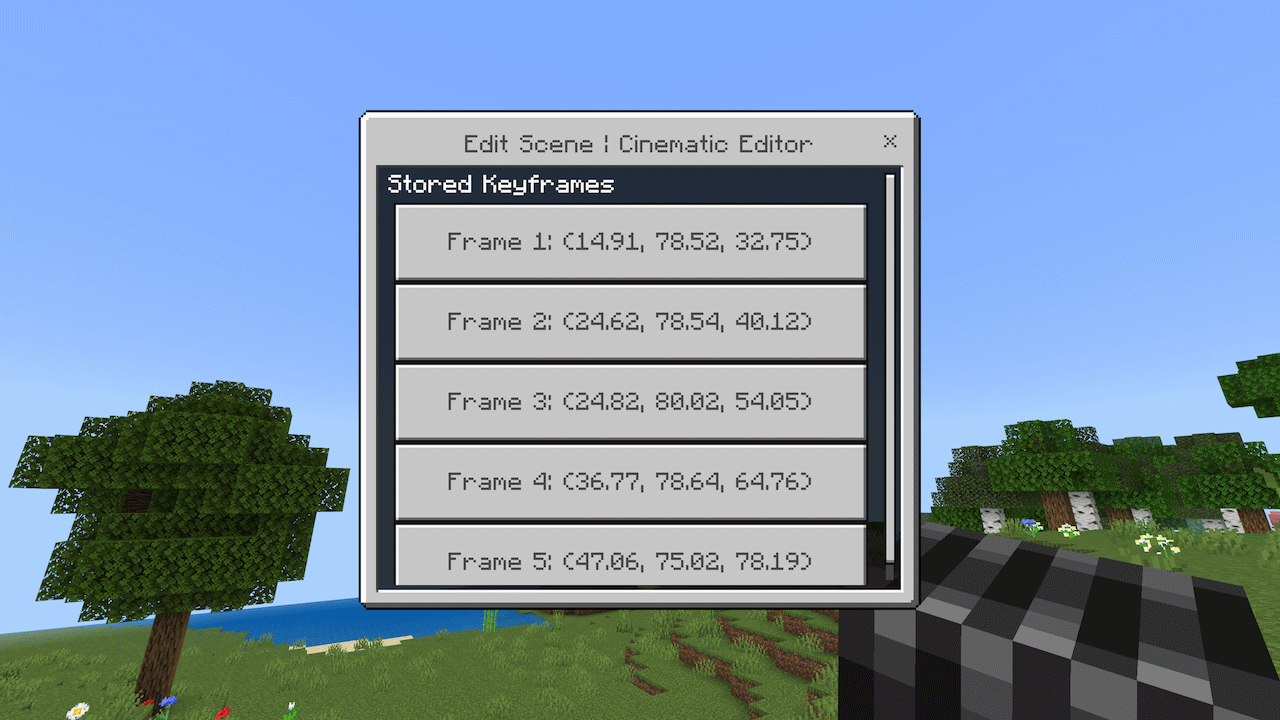
Once you have created an existing scene and when you decide to edit that scene, enter /function cinematic/editor command and you will be greeted with different panel:
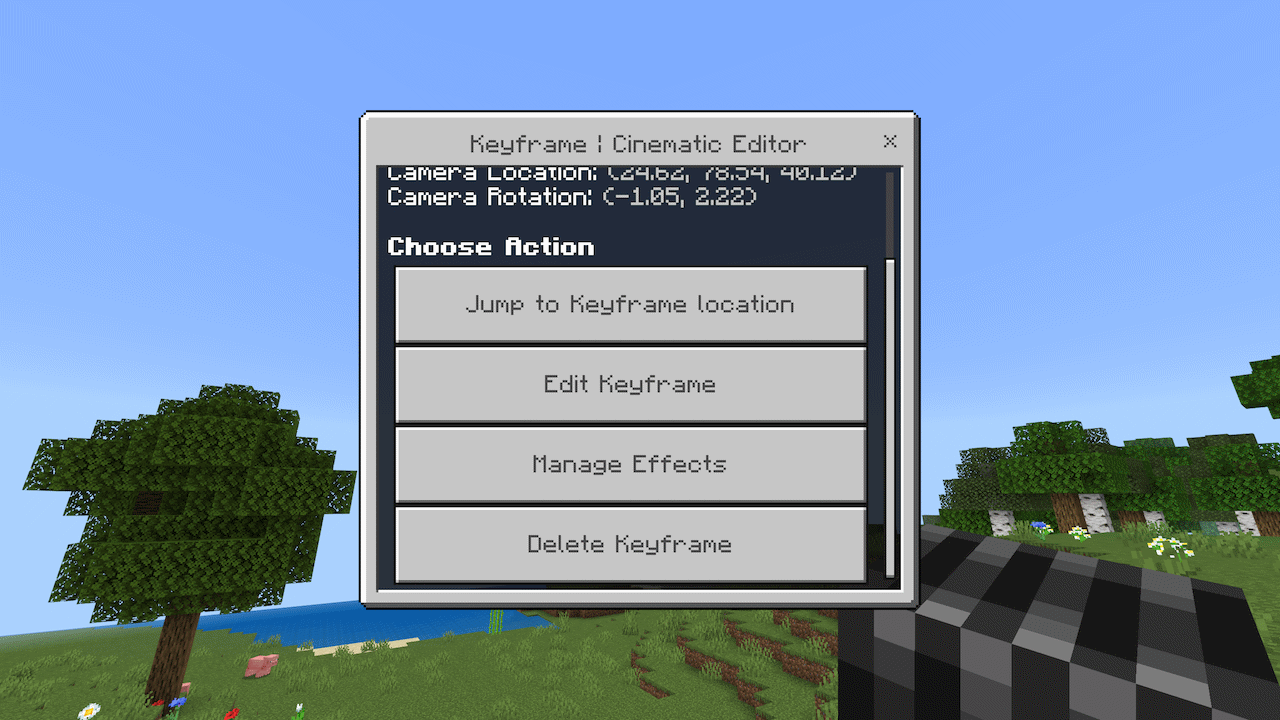
Select a keyframe then select Edit Keyframe, which brings you back to the form seen in Create Keyframe.
You can also delete a keyframe from existing scene.
Scene Settings
This screen controls the HUD visibility when playing a scene using the Runtime Add-On.
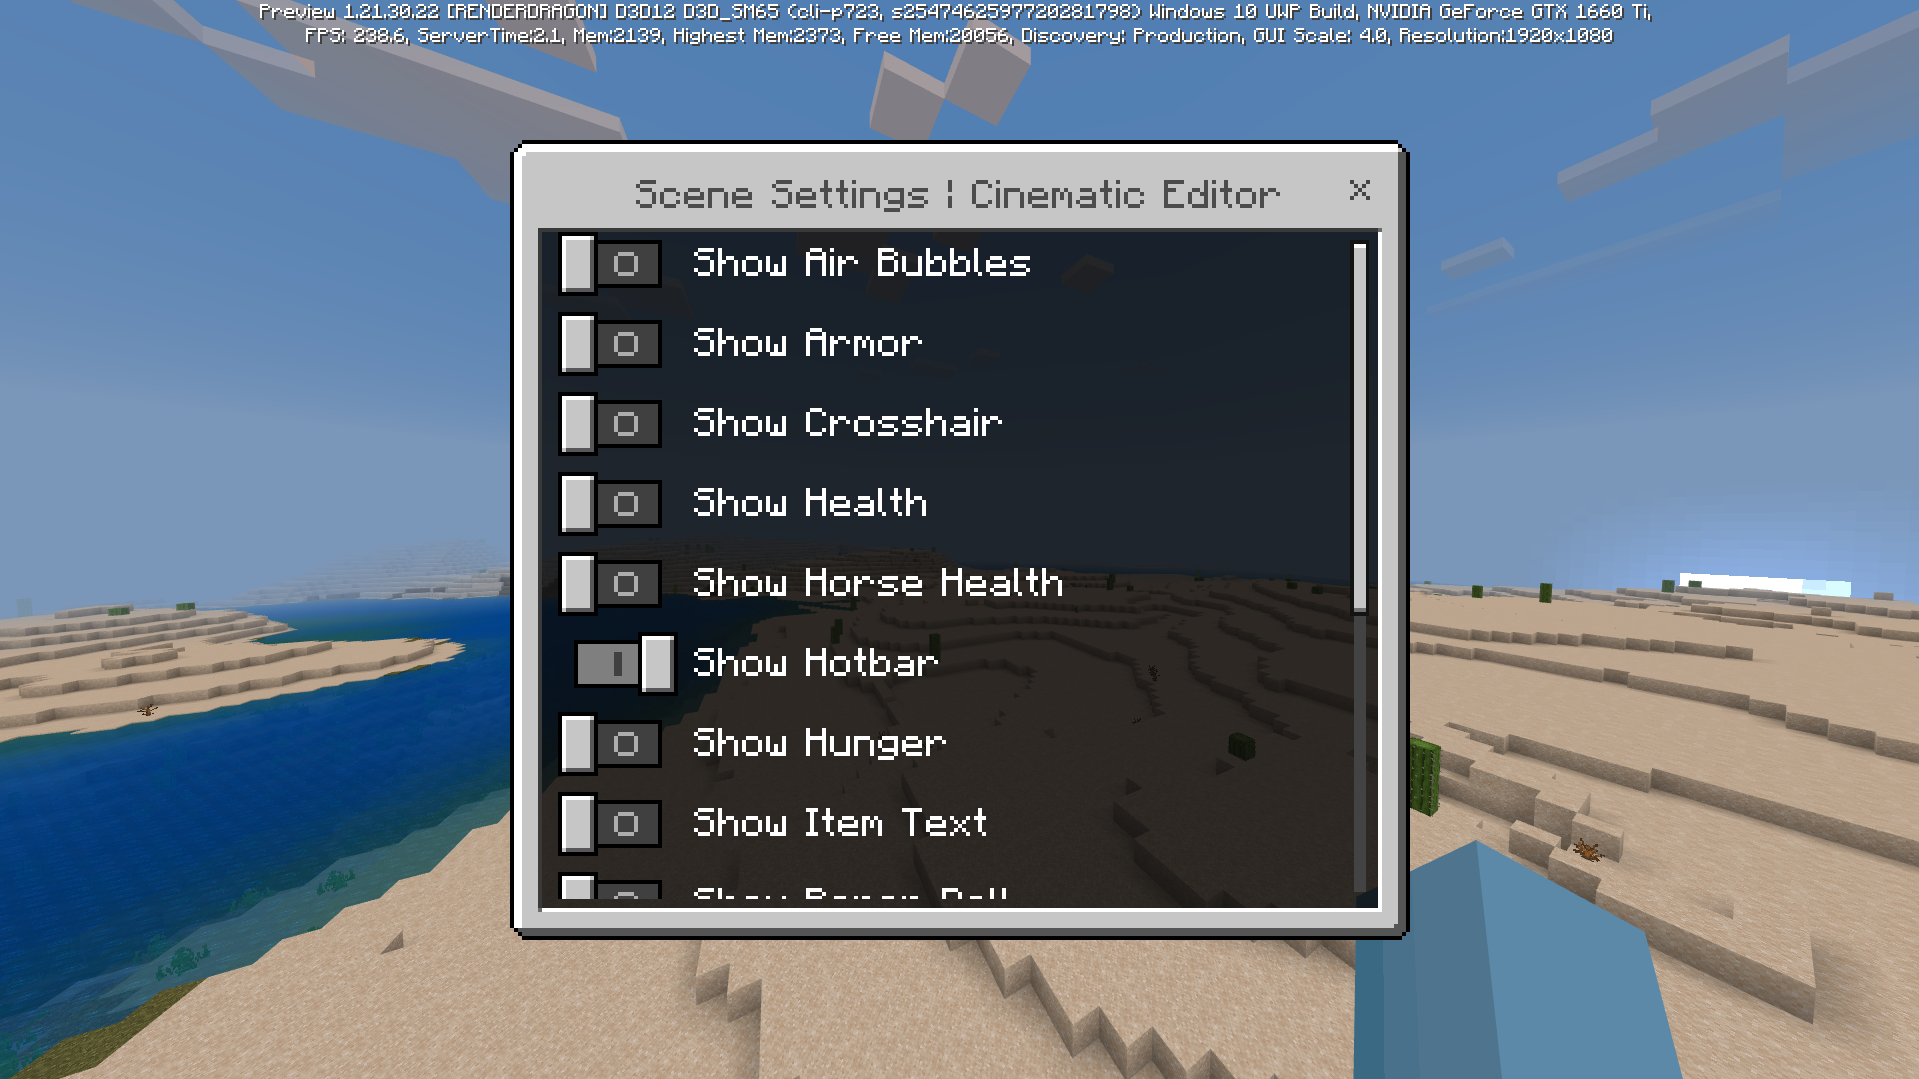
- Show Hunger - Shows hunger bar element.
- Show Paper Doll - Shows'paper doll' on-screen representation of the player.
- Show Armor - Shows armor element on the HUD.
- Show Tool Tips - Shows tool tip elements of the HUD.
- Show Touch Controls - Shows touch controls elements of the HUD. Depending on the players' platform, these elements may never show up.
- Show Cross Hair - Shows cross-hair section of the HUD.
- Show Hotbar - Shows hotbar inventory area element of the HUD.
- Show Health - Shows health element of the HUD.
- Show Progress Bar - Shows progress bar element of the HUD.
- Show Air Bubbles - Shows air bubble status element of the HUD.
- Show Horse Health - Shows visual representation of the players' ride element of the HUD.
- Show Status Effects - Shows status effects element of the HUD.
- Show Item Text - Shows item text element.
Keyframe Effects
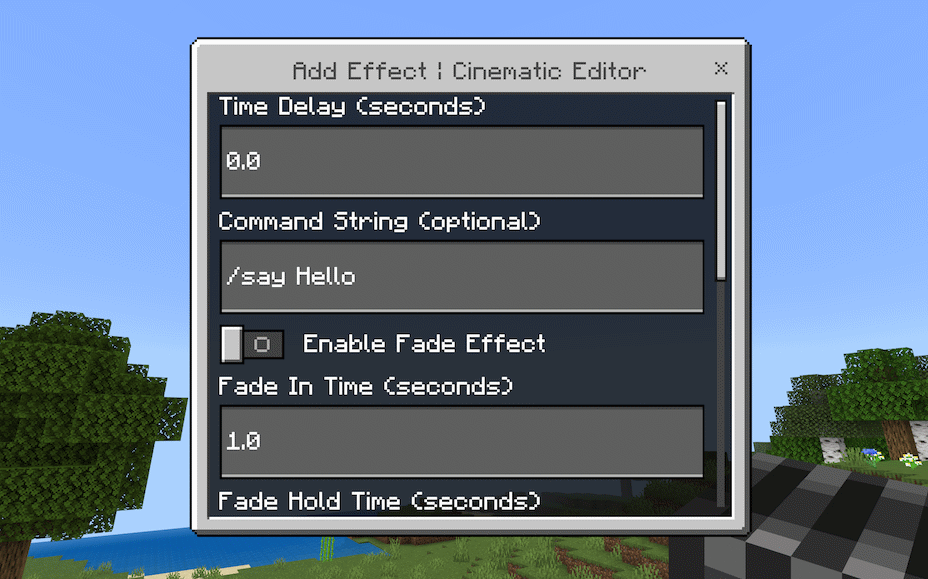
Effects that can be added to a keyframe in the runtime add-on are:
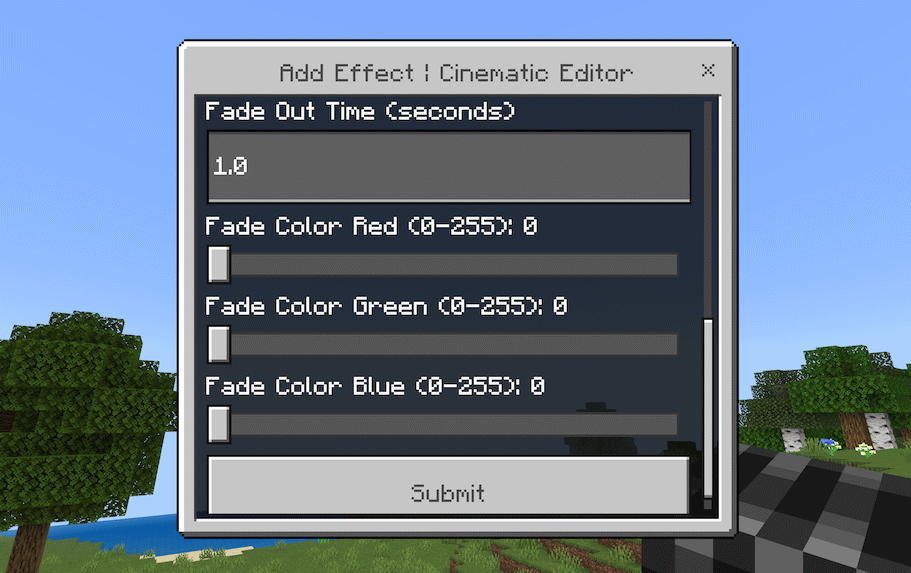
Fade Properties: This feature allows you to control the screen fade effect, similar to what a player sees when sleeping in a bed. Since the mechanic already exists in the game, the panel provides a way to customize it specifically for that keyframe. You can adjust:
Fade In: How long the fade takes to appear.
Fade Hold: How long the screen stays faded.
Fade Out Time: How long it takes for the fade to clear.
Fade Color: The specific color used for the fade effect.
Fade Color Red: The red component of the fade color.
Fade Color Green: The green component of the fade color.
Fade Color Blue: The blue component of the fade color.
Frame Time / Command Execution: This allows you to set specific timestamps (Frame Time) to trigger in-game commands. When the camera timeline reaches that specific point, the assigned command will automatically execute.
Enable Fade Effect: Toggles the fade effect on or off for that keyframe.
Installation
Download files CinematicRuntime_v1.x.x.mcaddon to access Cinematic Runtime / Cinematic Editor with cross-platform support.
Open the downloaded Cinematic Runtime's .mcaddon file should import the packs.
The Jayly's Cinematic Runtime v1.0.5 Team

Owner


![Script Interpreter [v1.21.120+] project image](https://media.forgecdn.net/avatars/thumbnails/1196/576/256/256/638772338464793284.png)