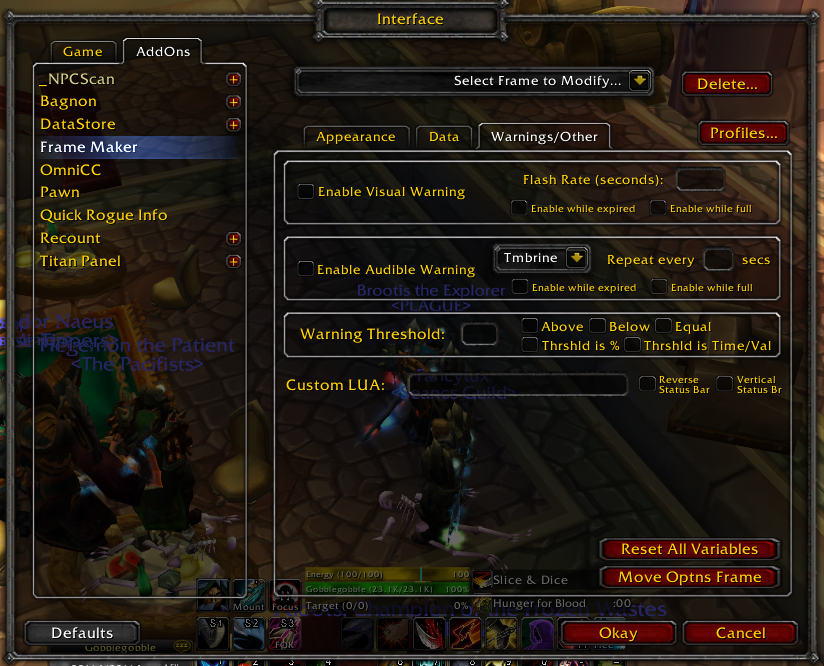
About Frame Maker
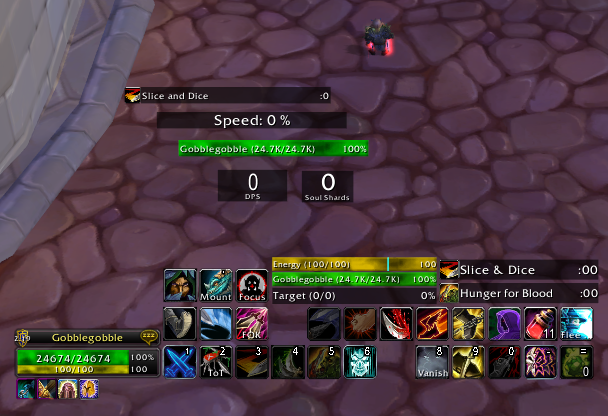
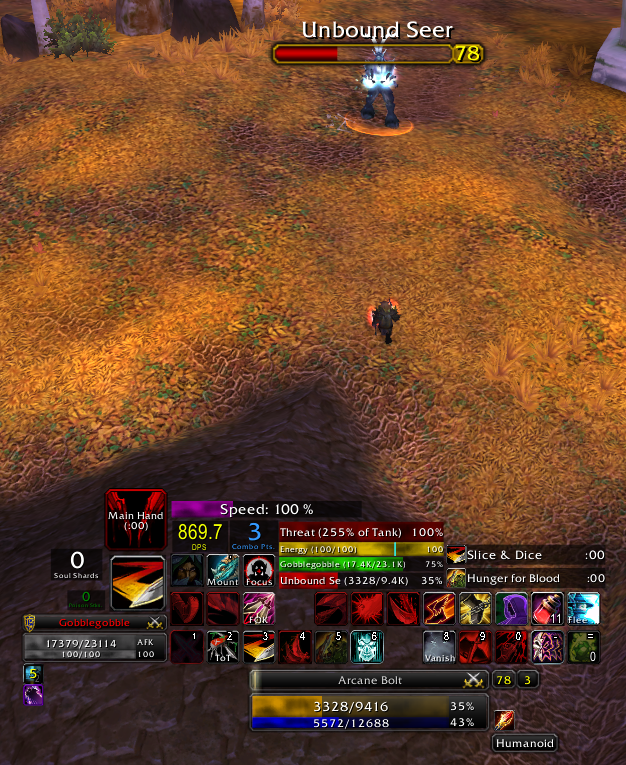
Frame Maker is a customizable frame interface for WoW. It allows the user to create any number of frames to display virtually any information available in-game. Data can be displayed as a status bar, as text, or as an indicator image, all of which are infinitely customizable to the user's liking. Virtually any in-game data can be monitored and displayed in one or more of these formats. For example, it is simple to create a status bar that monitors a buff, debuff, and/or cooldown of a spell or item. But other data can be monitored as well, such as the health of any unit, mana, energy, rage, combo points, stacks of a buff or debuff, gear duribility, DPS, experience, reputation - there are many possibilities. (A full list of data types that can be monitored are listed below.)
Frame Maker also allows the setting of various warnings which can be triggered when the monitored value crosses a user-set threshold. Warnings may be visual, in the form of a flashing the frame at a customizable rate, or audible, in the form of a sound played once or repetitively, the rate and sound itself being customizable. Everything is customizable, from the color, texture, image, size, etc. of the frame, to the exact data monitored and the way that data is displayed. Even the warnings can be customized.
Creating a Frame
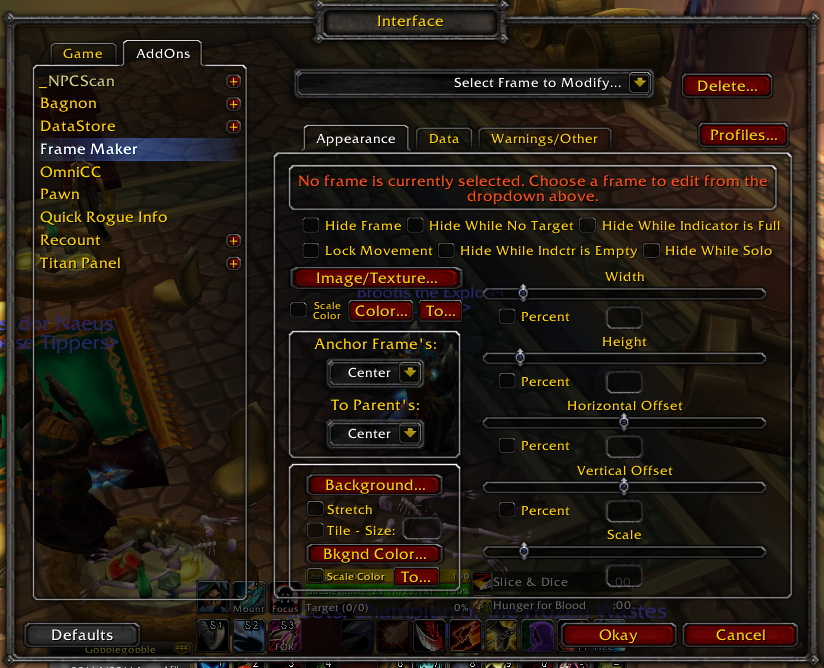
Frame creation and settings are modified in the WoW Interface Addon Options. Choose Frame Maker from the list of addons. To create a new frame click the dropdown menu at the top and choose "New..." You will need to name the frame (the name serves no purpose to the user other than identifying which frame is being modified in the options). The name must be a unique name. Then, set the type of frame (a status bar, an indicator/background frame, or a text frame). Status bars are indicators that slide/get bigger or smaller depending on the value of the monitored data. Background/Indicator frames can be static images or backgrounds or can be used as an indicator where the shown background image or texture and color changes whenever monitored data crosses a set threshold. Text frames show static and/or variable text (text frames may only be created as a child of another frame). Buttons are clickable frames that allow changeable actions when clicked (with different actions available for all types of modifiers such as shift-clicks, right-clicks, shift-alt-right clicks, etc.). This means that you must first create a status bar or a background/indicator frame and then create a second frame which will be text.
Creating a parent for a frame allows a set of frames to "stick" to each other. That way you can make more complex displays of information that stay together as a single frame. For example, you could create a status bar that shows the player's health. You could then create a child frame of the status bar that displays the amount of health as text on top of the status bar. As a child of the status bar, whenever the status bar is moved or resized, the text will stay with it in the same position.
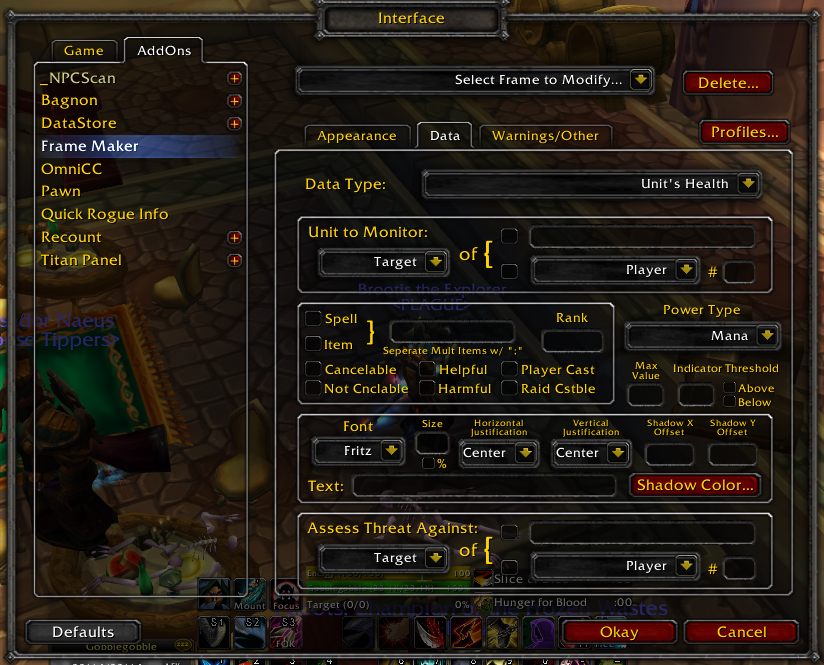
Once a frame is created, you can adjust its settings. Generally, the settings related to the "look and feel" of the frame are set in the first tab called "Appearance". the second tab generally deals with the data displayed by the frame, and the way that data is parsed and displayed. The third tab has some other miscellaneous options and settings related to warnings the frame may invoke. Each option has extensive tooltips that appear when you mouse-over the option, explaining what it does.
Frames can also be created using Templates. Click the dropdown menu at the top and choose "New from Template..." to use one of Frame Maker's built-in templates. Templates often include a parent frame and multiple child frames that will be created once you name the template and click the Create button. Once created, you can edit the created frames just like any other frame you make, so the look, feel, and monitored data can be manipulated once the template is created - templates just provide an easy starting point for common frame types. By the way, if you create a unique frame or set of frames that would benefit Frame Maker by being included as a template, please PM the author so it can be added to the default templates!
Data Types
Frame Maker currently allows the monitoring of the following types of data:
- Unit's Health - monitor the health of any unit - the player, target, a named unit, etc. (see below for information on setting the unit to monitor)
- Unit's Power - mana, rage, energy, runic power, etc. for the selected unit (see below for information on setting the unit to monitor)
- Time Remaining on a Spell, Buff, debuff, etc. - allows the tracking of time remaining on auras (see below for information on how to properly set the aura)
- Cooldown Time of Spell or Item - monitors the time until an aura can be cast again - the cooldown remaining (see below for information on how to properly set the aura)
- Combo Points - really only useful for rogues and feral druids, this monitors the number of combo points.
- Number of Stacks of Buff, etc. - display how many stacks of an aura have been applied (see below for information on how to properly set the aura)
- Speed (percent of normal run speed) - shows how fast the monitored unit is traveling as a percentage of run speed (normal run speed being 100%) (see below for information on setting the unit to monitor).
- Amount of Gold - shows how much money you have.
- Experience - monitor the current experience of the player at the current level.
- Reputation (for watched faction) - monitor the reputation of the monitored player for his or her monitored faction.
- Threat - monitor the raw threat of the monitored unit without regard to the threat of other units (see below for information on setting the unit to monitor and the unit to monitor threat against).
- Threat as percentage of tank - this is a percentage representing the monitored unit's threat against the target unit relative to the threat of that target unit's primary target. Usually, when this gets to 100%, the monitored mob will attack you (see below for information on setting the unit to monitor and the unit to monitor threat against).
- DPS - this data type can monitor DPS only if the addon "Recount" is installed since it farms the data from Recount. But it allows the displaying of this recount data in a customizable way within Frame Maker.
- Number of Items in Inventory - monitor the unit's inventory for certain items and show how many you have. Useful, for example, for Warlocks in monitoring the number of soul shards in your bags.
- Whether a Buff, Spell, etc Exists - simply show whether or not an aura exists on the set unit.
- Durability of Least Repaired Gear - monitors all the unit's gear and finds the gear that is most banged up (the item with the least percentage of durability) and shows the durability of that gear (the least-durable gear may change and Frame Maker will automatically change as well) as a percentage.
- Equipped Ammo - useful for hunters and other classes that need to watch their ammo.
- Main Hand poison/enchant - monitor the time remaining on the poison (or other temporary enchant) applied to the main hand weapon of the monitored unit.
- Off Hand poison/enchant - monitor the time remaining on the poison (or other temporary enchant) applied to the off hand weapon of the monitored unit.
- Set Value to Custom LUA Code - this setting is for ADVANCED USERS only because the user must have a working knowedge of LUA. But it allows more customization. The LUA code is entered in the misc/warnings tab. The code entered must be in the form of a function that returns a numerical value (do not include the function definition or ending) using the WoW LUA implementation.
Setting the "Max" value
For status bars, Frame Maker needs to know the maximum value of the bar. For most of the above data types, Frame Maker is able to automatically determine this maximum value. For those data types, there is no need to manually enter a max. But for certain types of data, it is impossible to know what the max should be. In those cases, enter a value in this setting on the second options tab. For example, if the data type being monitored is the amount of gold the player has, and you wanted to show your gold on a status bar, Frame Maker has no way of knowing what the maximum of the status bar should be because there is no theoretical maximum to the amount of gold you can have. So you would need to set a maximum here and the status bar would max out at your setting. Your gold may exceed this value, but the status bar will show as full if the value is exceeded.
Setting the Unit(s) to Monitor
Frame maker provides many ways to dynamically change the unit being monitor. The simplest way to set the monitored unit is just to put the name of the unit in the text box setting in the second options tab. But you can also set the monitored unit to be changed dynamically. For example, you can set the monitored unit to be the target of the player. Or the target of a named player. Or the target's target of raid member number 20 (which can change). All of these can be set in the settings box on the second options tab. Be sure to set the left-most dropdown to "Self" if you want to monitor the player himself or herself.
For data types that monitor threat, a second unit needs to be named. Threat is always assessed FROM the unit set in the "Unit to Monitor" box TO the unit set in the "Assess threat Against" box. That way you can monitor threat, for example, from your target's target to the targeted mob. An infinite number of combinations can be used to monitor the WoW threat tables.
Setting the Auras to Monitor
The Auras box (directly below the "Unit to Monitor" box on the second options tab) allows specific monitoring of spells, buffs, debuffs, item procs, items, etc. WoW can be finicky about these settings, however, so it may take a little trial and error to get the settings just right here. But the settings are powerful if used correctly. Different things are monitored in this setting, depending on the data monitoring type set, but I will refer to all of the different things that are monitored as an "aura" even though some things are not really auras).
The name of the aura to monitor must be entered exactly, including proper capitalization. In most cases, you should check whether the aura is or comes from a spell or an item. The rank is usually not required, but experiment with it if you are having problems or if you want to actually limit the monitored data to a specific aura rank. Rank must be entered exactly in this format (no including the quotes): "Rank #" where # is the rank. For example, to monitor only rank 3 you would enter (without quotes): "Rank 3"
For some auras, it may be helpful to enter a Spell or Item ID instead of its name, if you know it. This should rarely be necessary, but the option is there (this does not work for buff, debuff, or aura stack monitoring and should not be necessary). Also, by default the Global Cooldown will not be monitored for spell or item cooldowns unless you check the GCD checkbox.
The other 6 checkboxes are "filters" that you can apply to the aura being monitored. I've found that in SOME cases, certain filters may be REQUIRED, but typically they are not. you may have to experiment to get the monitoring just right. The function of each filter is explained in the tooltips in-game, so I won't repeat it here. These filters, though, can be pretty useful at times, even if not required. For example, if you want to monitor a debuff that you cast on the target as part of your normal rotation and you have another party member who applies the same debuff to the target, the "Player Cast" filter will be useful in monitoring only your version of the debuff.
Text Display and Value Rounding
Displaying Text is a core functionality of Frame Maker. The displayed text can be static or dynamic, which means it can always display the same thing, or it can change, monitoring one or more values. The font, justification, text size, etc. can be set in the right of the text input box in options tab 2, but the actual text data to display is set in the text input box to the left of those options. To display static text, simply enter the text you want to show in the box (be sure to press enter whenever you are finished editing any text option in the Frame Maker Options).
To show dynamic text, you need to enter a variable in the text entry box. Variables can be placed anywhere within the texbox text setting, so they can be combined with other static text or other variables. The variables available are:
- %V - show the value of the currently selected data type (for example, if "Unit Health" is selected, "%V" will be replaced with the health value of the selected unit wherever it appears in your text string). Can be rounded (see below).
- %X - show the maximum of the monitored value type. Can be rounded (see below).
- %N - show the minimum of the monitored value type. Can be rounded (see below).
- %P - show the player name
- %T - show the name of the player's target
- %U - the name of the Unit of the set UnitID
- %A - the Aura being tracked in the Aura monitoring settings
- %G - the name of the threat target set in the "assess threat against" options
- %$ - display a "money string" showing the player's current gold, silver, and copper with icons denoting each
- %% - show the value as a percentage of its maximum. Can be rounded (see below).
- %I - show the value as a time (in this format: "1:02:33"). Can be rounded (see below).
As mentioned above, the variables that result in numbers (%V, %X, %%, %I and %N) can be rounded. To specify how the values should be rounded, enter four options enclosed in braces ("{" and "}") immediately after the variable. The four options available are:
- First Option: specifies the digit to which the variable will be rounded. For example, to round a value to the "tenth's" decimal place, enter (without quotes): 0.1. To round to the nearest one-thousand, enter "1000".
- Second Option: specifies the range of values within which the current rounding will occur. separate the two values with a dash ("-"). When the value being monitor is outside the range of the values, no rounding will occur. To round all values, regardless of range, just leave this blank (see the full examples below showing how to leave out this value). Examples of the range option: "100-200" will only round when the values are between 100 and 200; "1000-1000000" will round only values between 1000 and less than 1 million.
- Third Option: this option gives the ability to divide the rounded value. This is useful for rounding and displaying "K" or "M" afterward, for example. See some examples of this below.
- Fourth Option: specifiy any text that should be added after the rounded value only when rounded. For example, if you enter " million" as the third option (without the quotes), the text " million" will only be added to the text string when a rounding condition was applied (see examples below).
The four options, enclosed in the braces, as discussed above, are separated by a comma (",") and nothing else (do not add spaces before or after the comma). For example, the full text setting (without quotes) "Player has %V{1000,1200-1300000,*1, K} health." would display the following text at the following values of %V:
%V |
Text |
| 10 |
Player has 10 health. |
| 986 |
Player has 986 health. |
| 1456 |
Player has 1000 K health. |
| 868532 |
Player has 869000 K health. |
| 1420365 |
Player has 1420365 health. |
That looks funny, though - the rounded values still say "1000 K health" for example, when we want it to say "1 K health". That is where that third option comes in. If we change the third option to "1000" instead of "1", it will divide the rounded value by 1000 before printing it, giving the intended results. The text string would be: "Player has %V{1000,1200-1300000,1000, K} health." resulting in:
%V |
Text |
| 986 |
Player has 986 health. |
| 1456 |
Player has 1 K health. |
| 1456 |
Player has 1000 K health. |
| 868532 |
Player has 869 K health. |
| 1420365 |
Player has 1420365 health. |
Notice the space before the "K" for the values that were rounded. This is due to the space after the comma in the third option. Only the first option (rounding digits) is required. The other options can be left blank, but the commas must still be used (with no space between). For example (no quotes): "%X{0.1,,,max}" would round all values to the 0.1 and print "max" after. "%X{0.1,,,}" would do the same thing without the "max" being printed. If the second option is omitted, all values will be rounded (unlimited range). If the third option is omitted, no division will occur. If the fourth option is omitted, no additional text will follow the rounded value (except text that exists in the rest of the text string, like " health." in the example above.
Multiple rounding conditions can be applied to the same variable, so the variable can be rounded differently as it changes. For example, the full text setting (without quotes) "Player has %V{1000,1200-1300000,1000, K}{1000000,1300001-5000000,1000000, M} health." would display the following text at the following values of %V:
%V |
Text |
| 986 |
Player has 986 health. |
| 1456 |
Player has 1 K health. |
| 868532 |
Player has 869 K health. |
| 1420365 |
Player has 1 M health. |
| 3689053 |
Player has 4 M health. |
| 68905003 |
Player has 68905003 health. |
Notice that last row does not round because it is out of the range (second option) of both rounding instructions.
Other Ways to Manipulate Text
Those variables that do not display numerical values can take options as well. If followed by braces (similar to the rounding format above), you can display alternate text and/or truncate the text that is displayed. Follow the variable (the percent sign and the following letter) with an opening brace and the two options below, separated by a comma, followed by a closing brace. No spaces should be added between any of these characters (unless you want the space added to the option). The first option is the alternate text that will be displayed when the monitored value is nothing. The second option is a number indicating how many characters of the variable will be displayed.
For example, the text entry (without quotes) "%T" will show the name of the target name, but when there is no target, it will show nothing. So the text entry "I'm targeting %T" will show "I'm targeting Bob" when Bob is the player's current target, but it will show "I'm targeting " when there is no target. If we use the text entry "I'm targeting %T"{nothing,}" we can fix this problem and "I'm targeting nothing" will now show when the player has no target. It will still say "I'm targeting Bob" when Bob is targeted. What if we target an NPC with a really long name? The second option can truncate the characters. So "I'm targeting %T{nothing,10}" will show only the first 10 characters of the target's name and also show "nothing" if there is no target. For example, targeting "Fjola Lightbane" will display only "Fjola Ligh" (note the space counts as a character).
New in version 1.06 is the ability to apply simple math calculations to numerical variables. For example, you can output text that is the result of the max value minus the current value. Only simple math calculations may be made, and only to numerical variables. Further, the math calculations follow no "order of operations" rules (calculations are simply made from left to right). To create a math calculation, start with a variable (such as "%V"), followed by an opening brace ("{"), an operator (such as "+"), a closing brace ("}"), and a second variable (such as "%X"). The final value can also be rounded using the formatting described above. So, for example, "%X{-}%V{*}%N{0.1,100-1000,,XXX}" would output the number of the Max value minus the current value, and then that value would be multiplied by the minimum value, and if the result was between 100 and 1000, it would be rounded to the 0.1 and "XXX" would be appended to the end of the whole thing.
Warnings
Frame Maker lets you set up independent warnings for each frame. Each frame can have a visual warning and/or an audible warning. Each warning that is enables will be triggered upon the value being monitored becoming greater than or less than (whichever is selected) a selected trigger point. For example, if the audible warning is enabled, and the Warning threshold "below" is checked, with the threshold set to 1000, a sound will be played (once or continuously, depending on the setting) when the health of the monitored unit goes below 1000.
You can change the sound, set whether it will play once or whether it will repeat, set the number of seconds between repeats, etc. You can set similar options for the visual flash warnings, such as the flash rate, etc. The threshold set can be a raw value (such as raw health as in the example above) or a percentage (for example entering "10" (without the quotes) in the threshold textbox and checking the "threshold is percent" option would invoke the selected warnings when the value crosses 10%).
You can also use your own MP3 files for the warnings. Just replace the mp3 files in the WoW\interface\addons\FrameMaker\sounds\ directory on your computer with the EXACT same file names.
Image/Texture Selection
Selecting an image for the background of a frame, or the texture for the bar of a status bar, etc. brings up a dialog box offering a number of ways to find the image you want. As with the warning sounds, you can use your own custom images by saving them in the WoW\interface\addons\FrameMaker\images\ directory on your computer with the EXACT same file names. Alternatively, you can use WoW's built-in images for backgrounds, item icons, and spell icons. For items and spells, you must enter the name EXACTLY, and this is CASE SENSITIVE. If entered correctly you will see the image next to the OK button (otherwise you'll see a no-smoking-looking sign). If you don't see your image, it will not be properly selected.
The color of a frame element, such as the status bar color or the text color can be changed by clicking the button in the first options tab. You can also make the element color change dynamically as the monitored data value changes. To do this, check the "scale color" option box in the first options tab. Choose the starting color by clicking the "color..." button to the left of the check box and choose the ending color by clicking the "to..." button next to that. As the value increases, the color of the selected frame element will gradually change from the first selected color to the second. For example, if you are monitoring a unit's health, set the starting color as red and the ending color as green. As the unit's health decreases, the bar color will go from green to yellow to red.
Button Actions
The action Frame Maker takes when the user clicks a created button frame can changed depending on what modifier keys and/or mouse buttons were clicked while the button was clicked. for example, the button can cast spell X when regular-left-clicked, but it can cast another spell when right clicked, and it can use an item when shift-left-clicked. Each action to take can be independently set in the options in the "Warnings/Other" tab. Select the modifier keys you want to set an action for in the left-most dropdown and then select the action to take in the dropdown beside that. If the action to be taken requires an item or spell, etc. to be specified, enter the exact name of the item, spell, etc. in the editbox to the right.
Note that the action will by default be taken on the unit set in the "Unit to Monitor" box in the "data" tab. You can change this behavior and set a different unit by entering the name of the unit in the edit box. You can also enter (with no quotes, all lowercase letters) "player", "target", "pet", "vehicle", "focus", "mouseover", "npc", "party#" (where # is the number of the party member you want to set), "raid#", "partypet#", "raidpet#", or "arena#" to name a dynamic target of the button action. Those dynamic names can be further altered by appending "target" to them to denote the target of the set unit - for example, "focustarget" would invoke the button action on the player's focus's target. Further, "targettargettarget" would invoke the button action on the player's target's target's target. You can also add this "target" suffix to a named character by putting a dash before the suffix, for example: "Gobblegobble-targettarget" would invoke the button action on Gobblegobble's target's target. Again, if NO UNIT is set in the textbox, Frame Maker will use the unit specified in the "Unit to Monitor" setting in Tab 2, which is easier to deal with. The textbox here is really only needed if you want to set different targets for each different type of button click (different modifiers while the button is clicked).
Profiles
Frame Maker has profile support. This means that you can create a frame setup and save it for loading later. Saved Profiles can also be accessed between your Wow Characters, so you can set your frames up for one character and load the same setup from another character. To save, load, or delete profiles, just click the "profiles" button at the top of the Frame Maker options window.