Morrowgear: Drone Command
- By
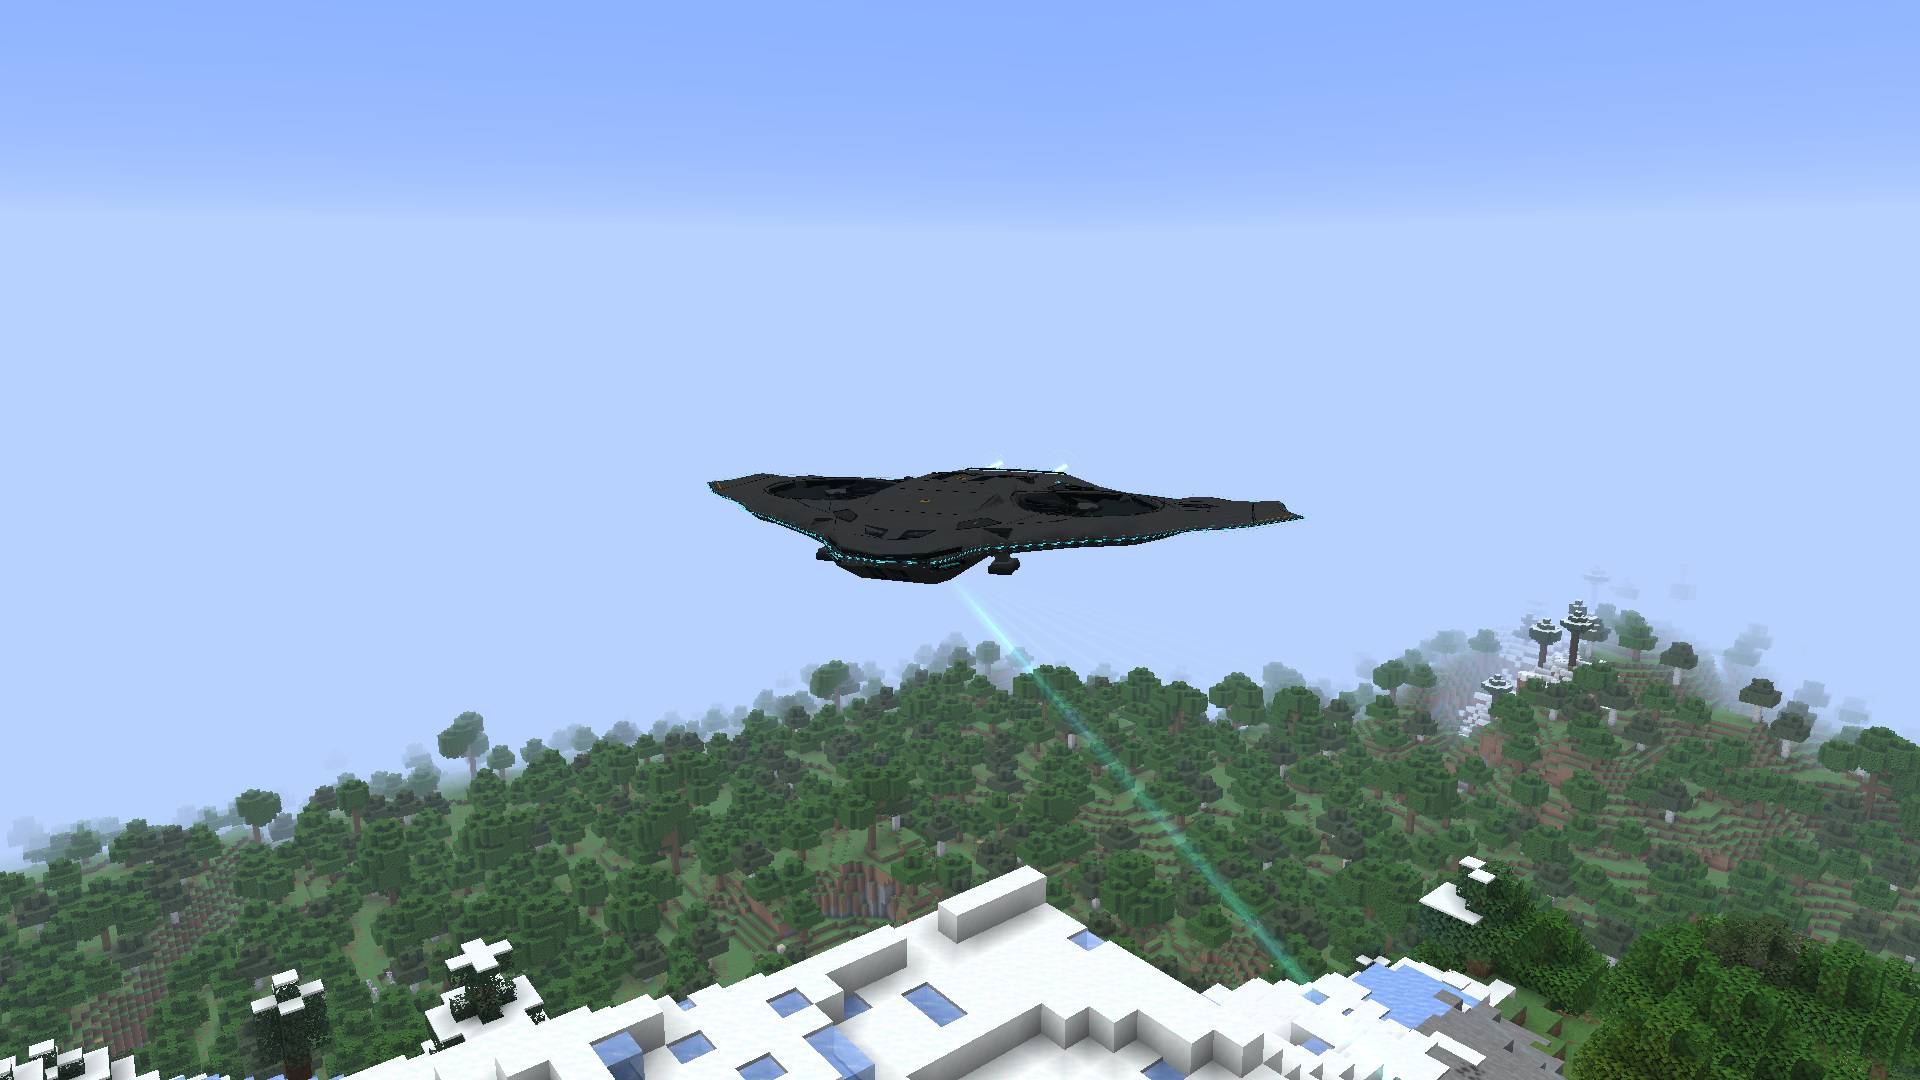
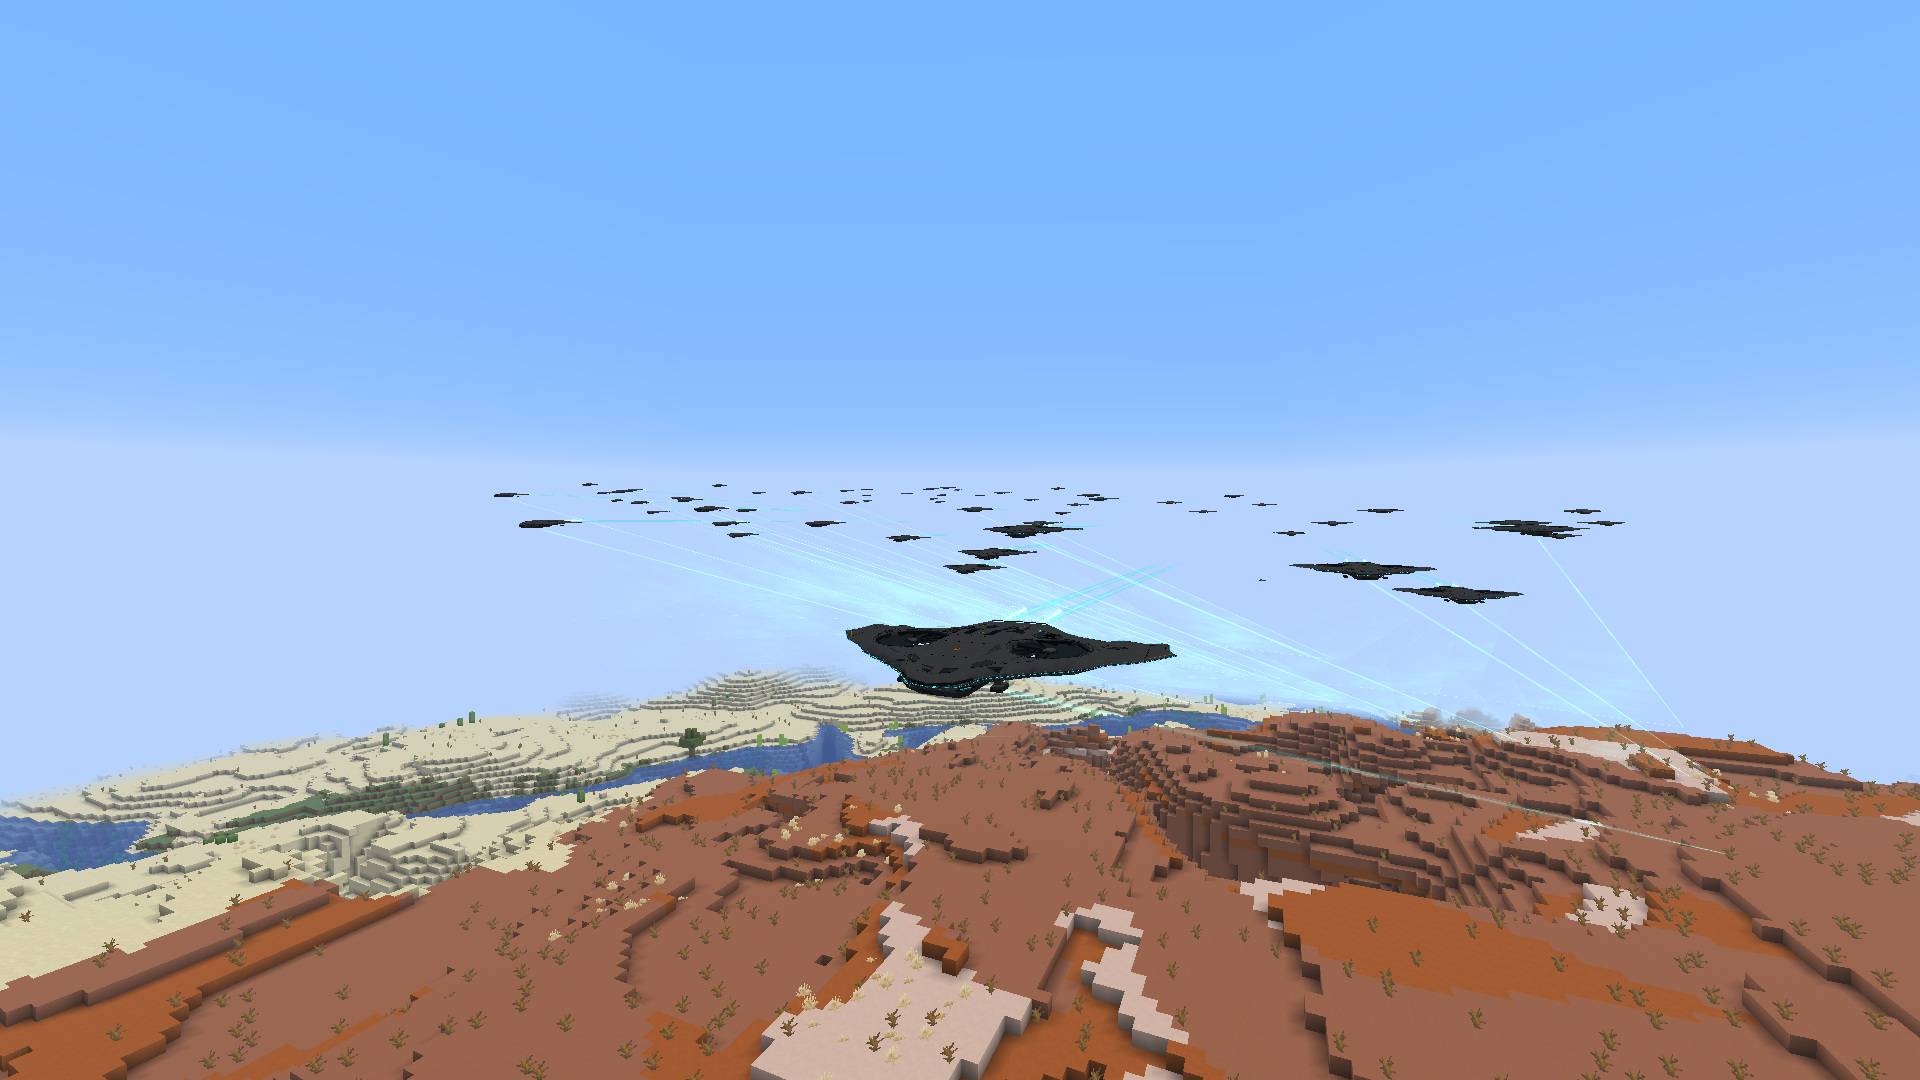
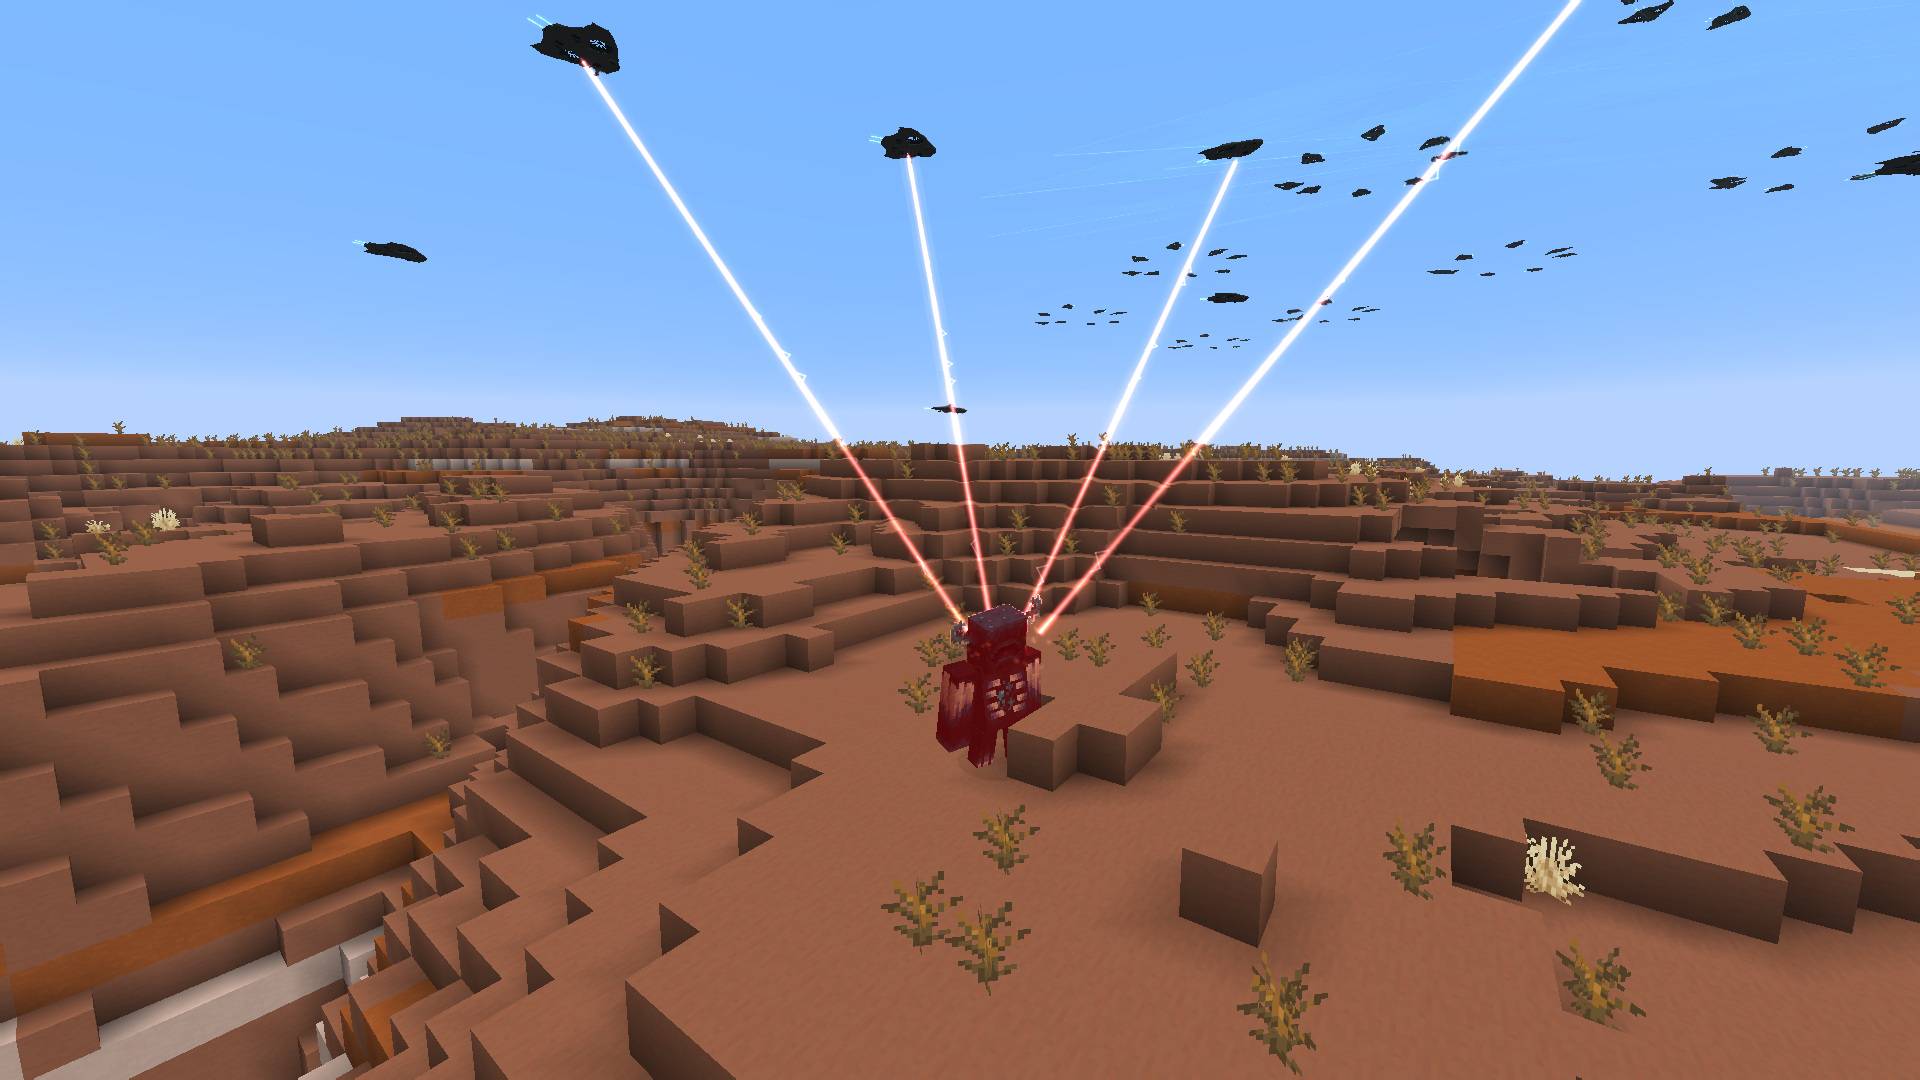
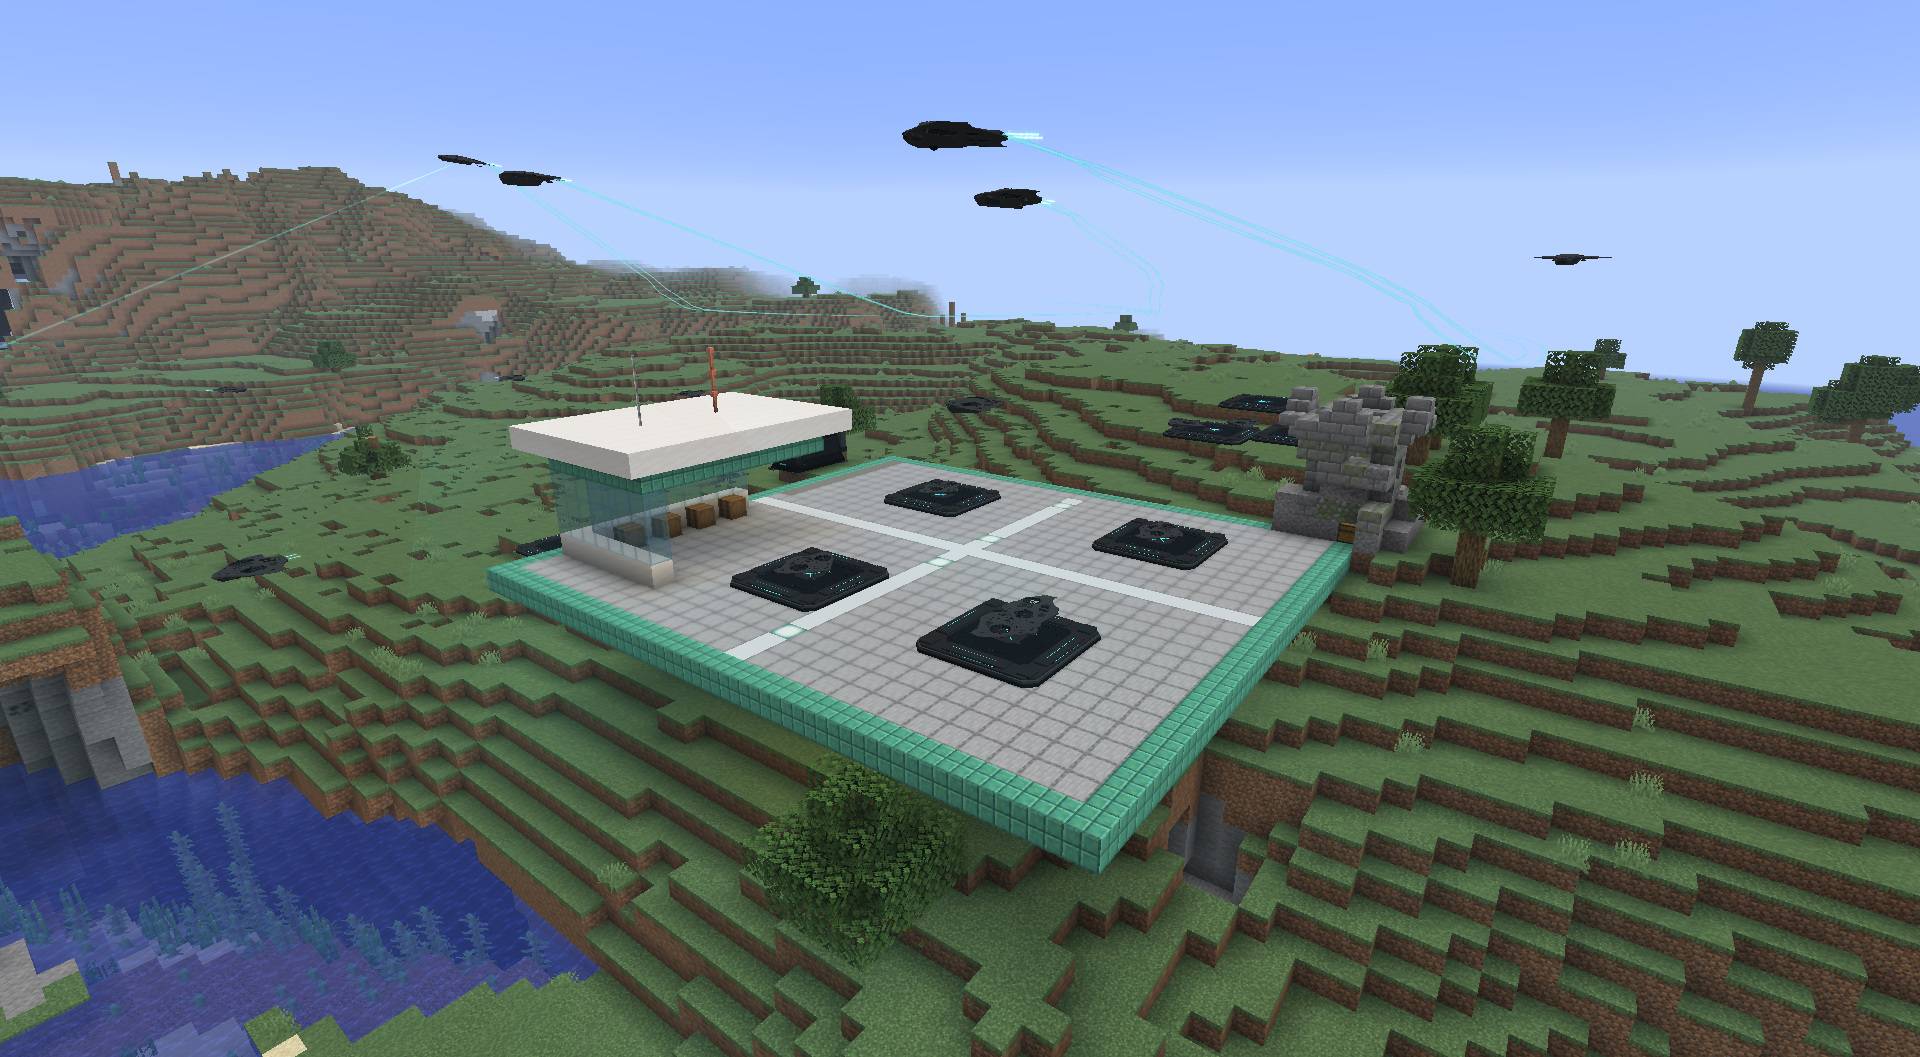
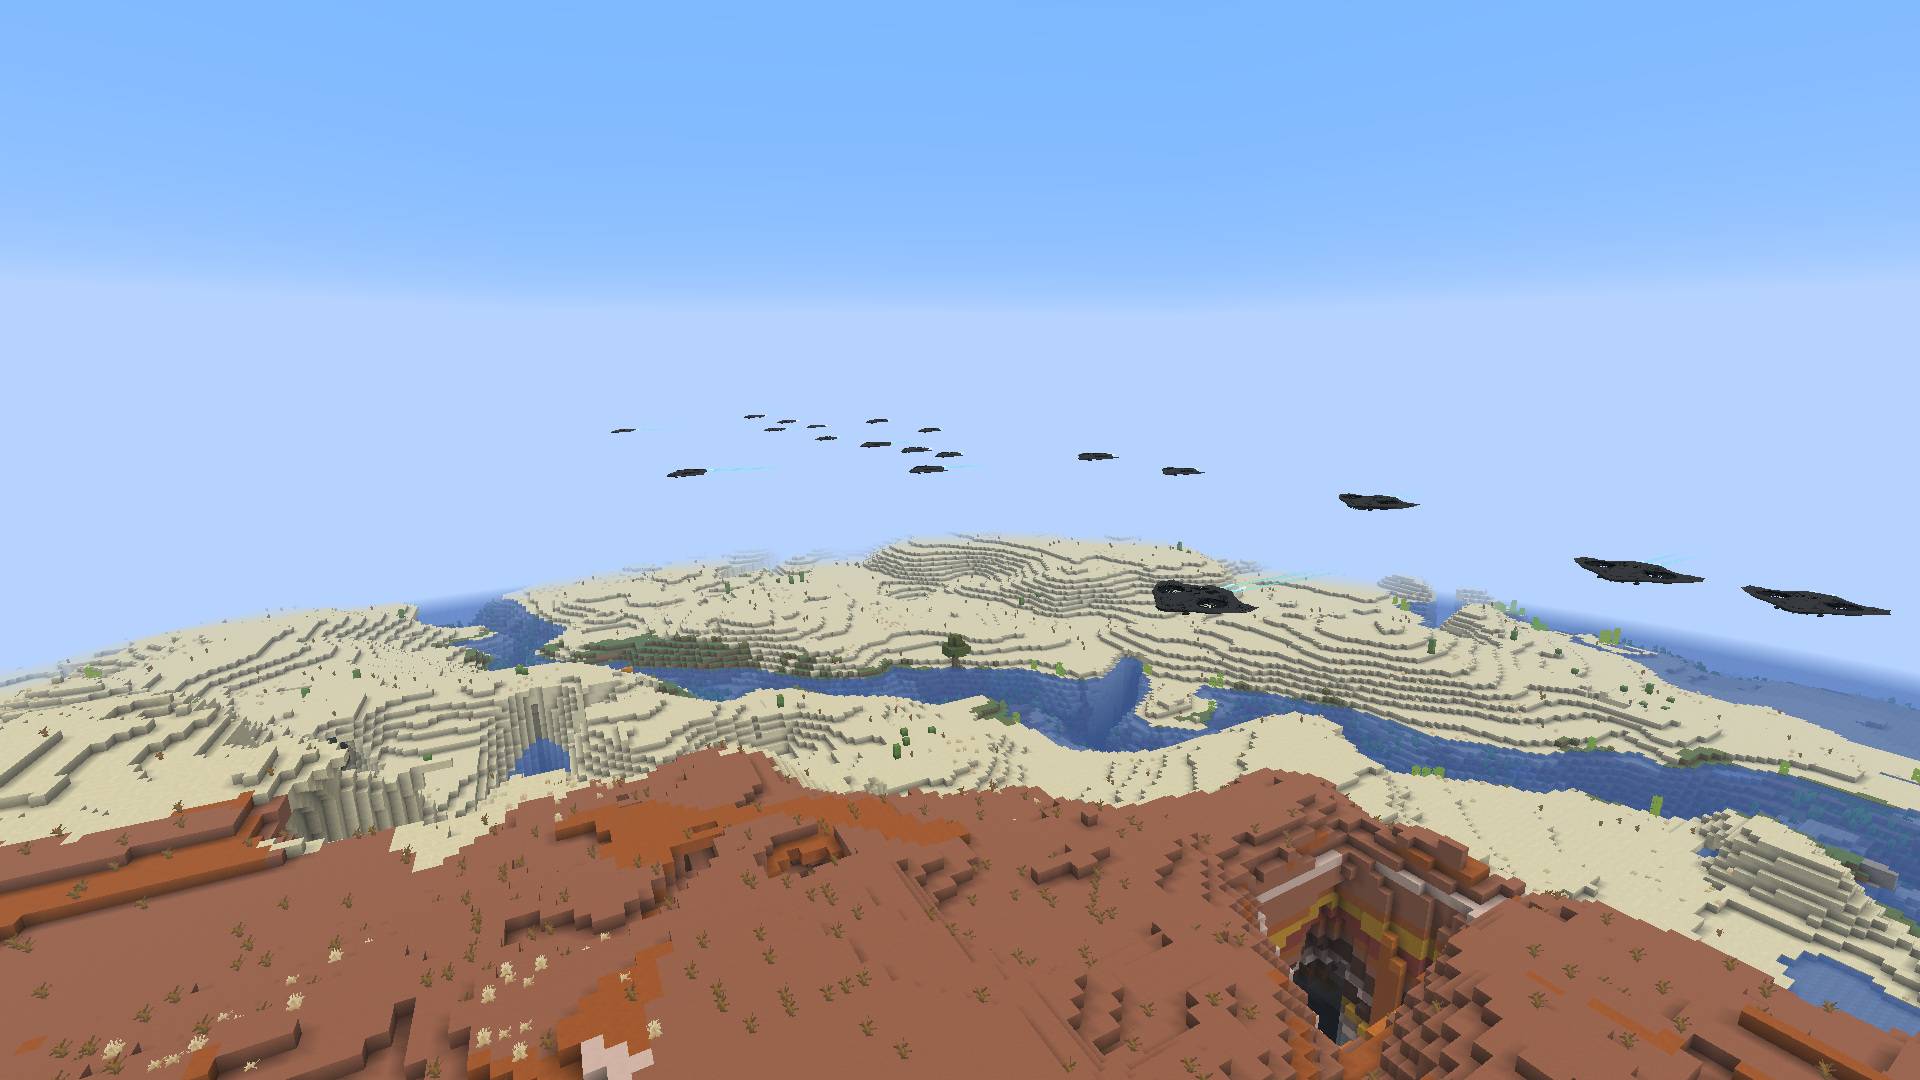
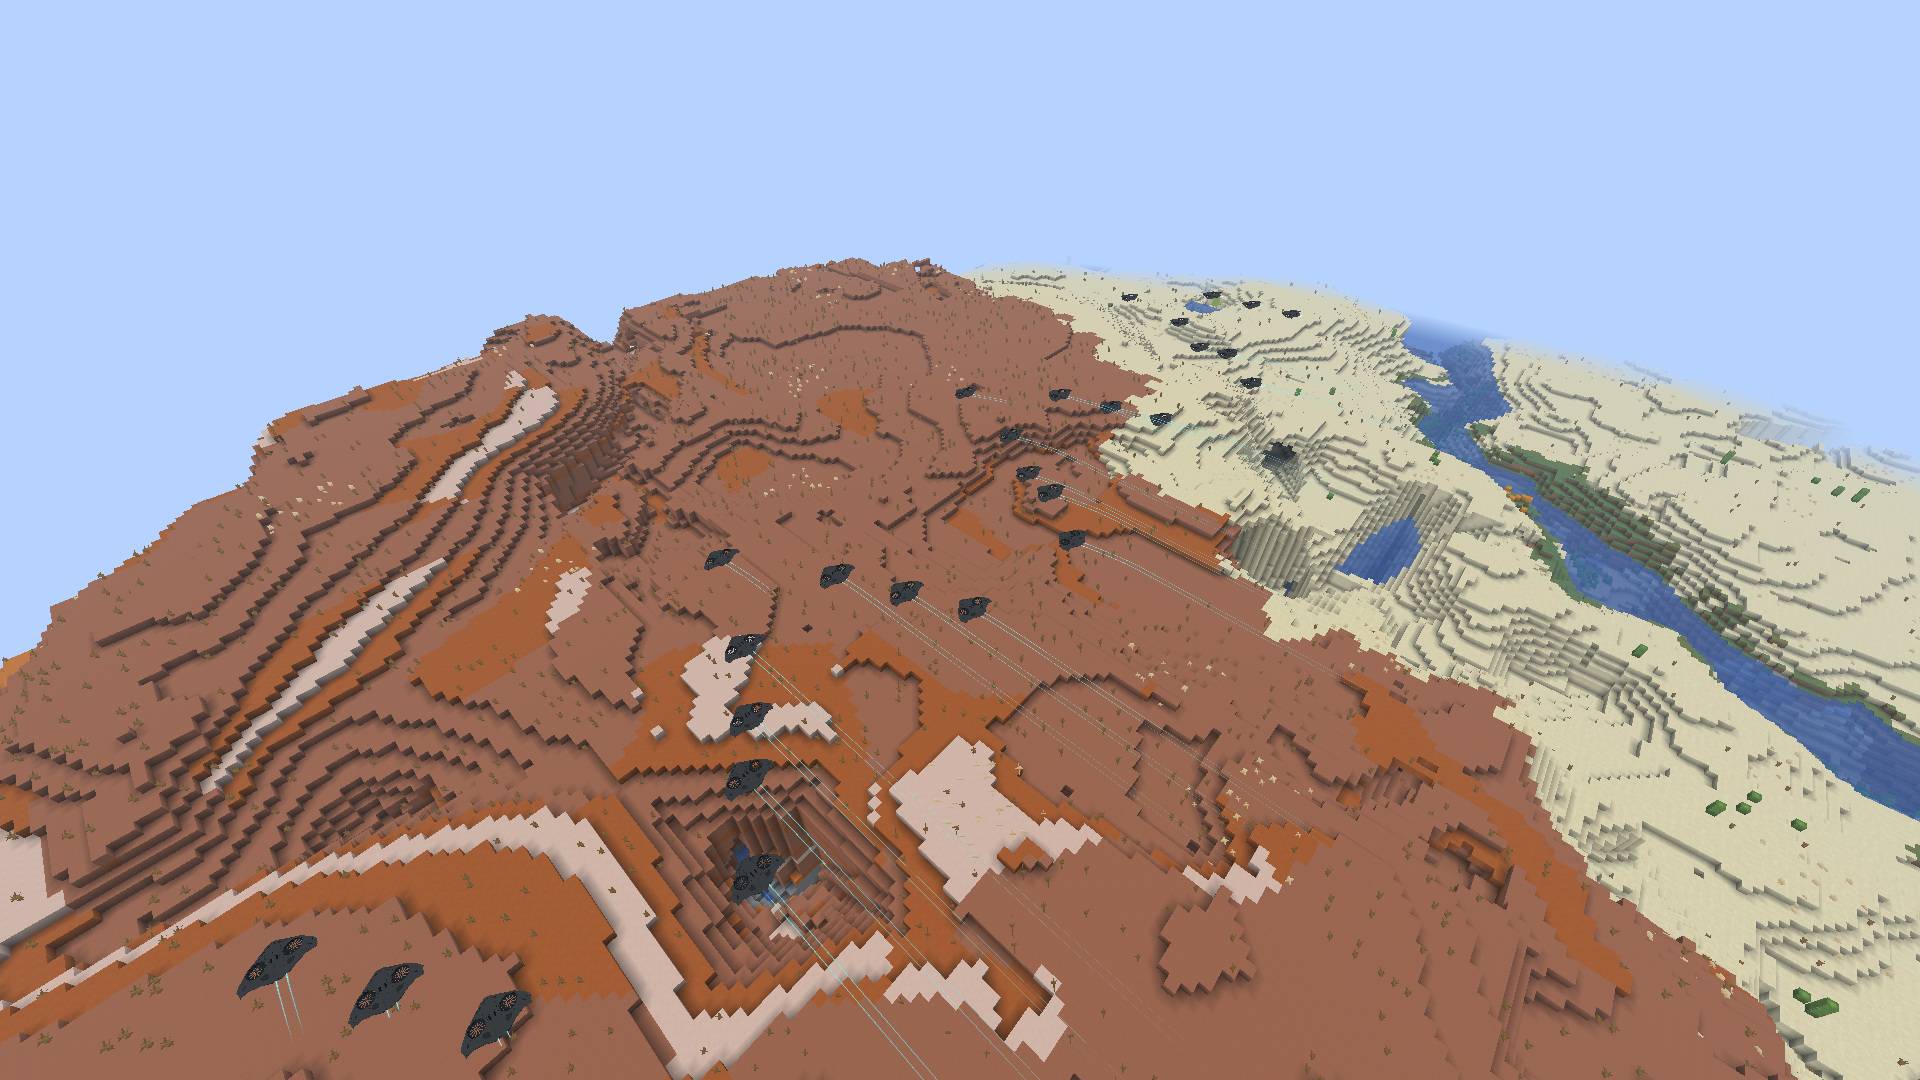
04-small-wing-flight.jpg
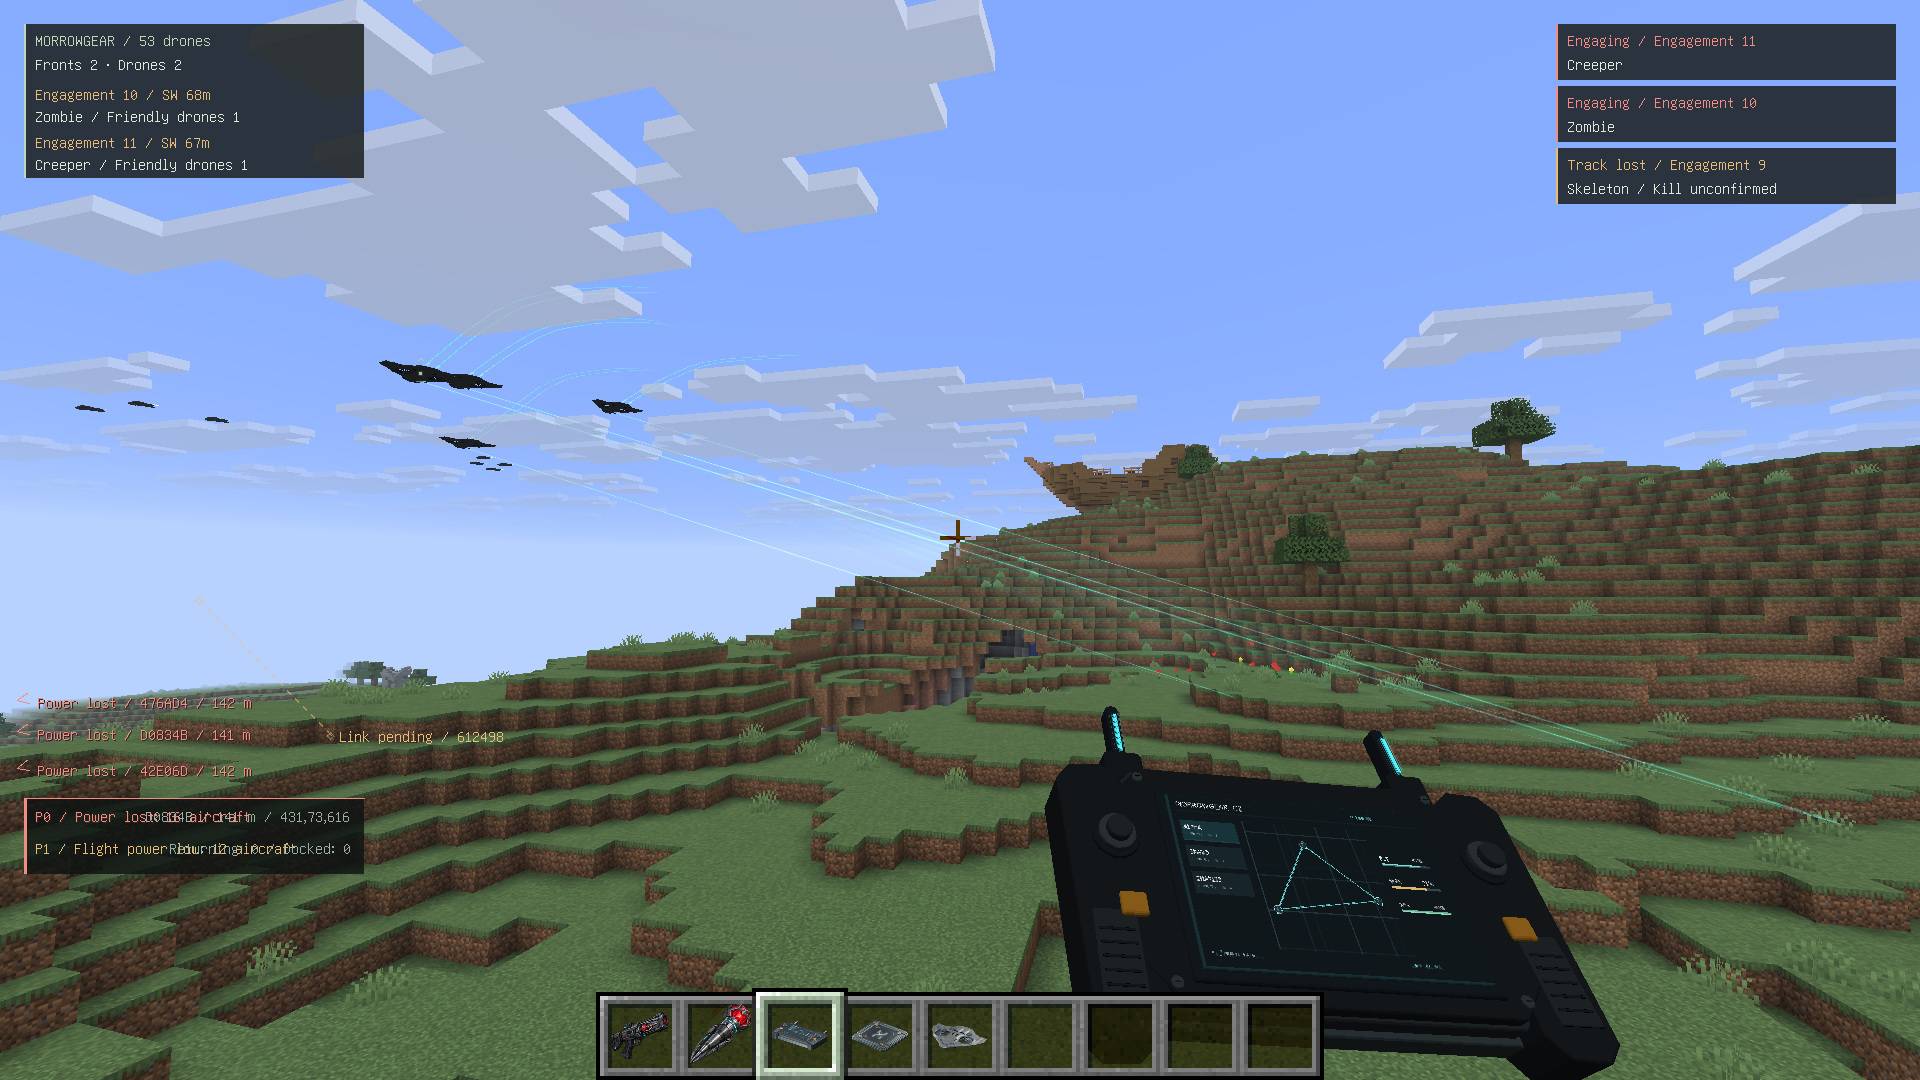
02-field-controller.jpg
Description
Announcement
Added support for version 1.20.1(Forge/NeoForge). (November 18, 2026)
Morrowgear: Drone Command
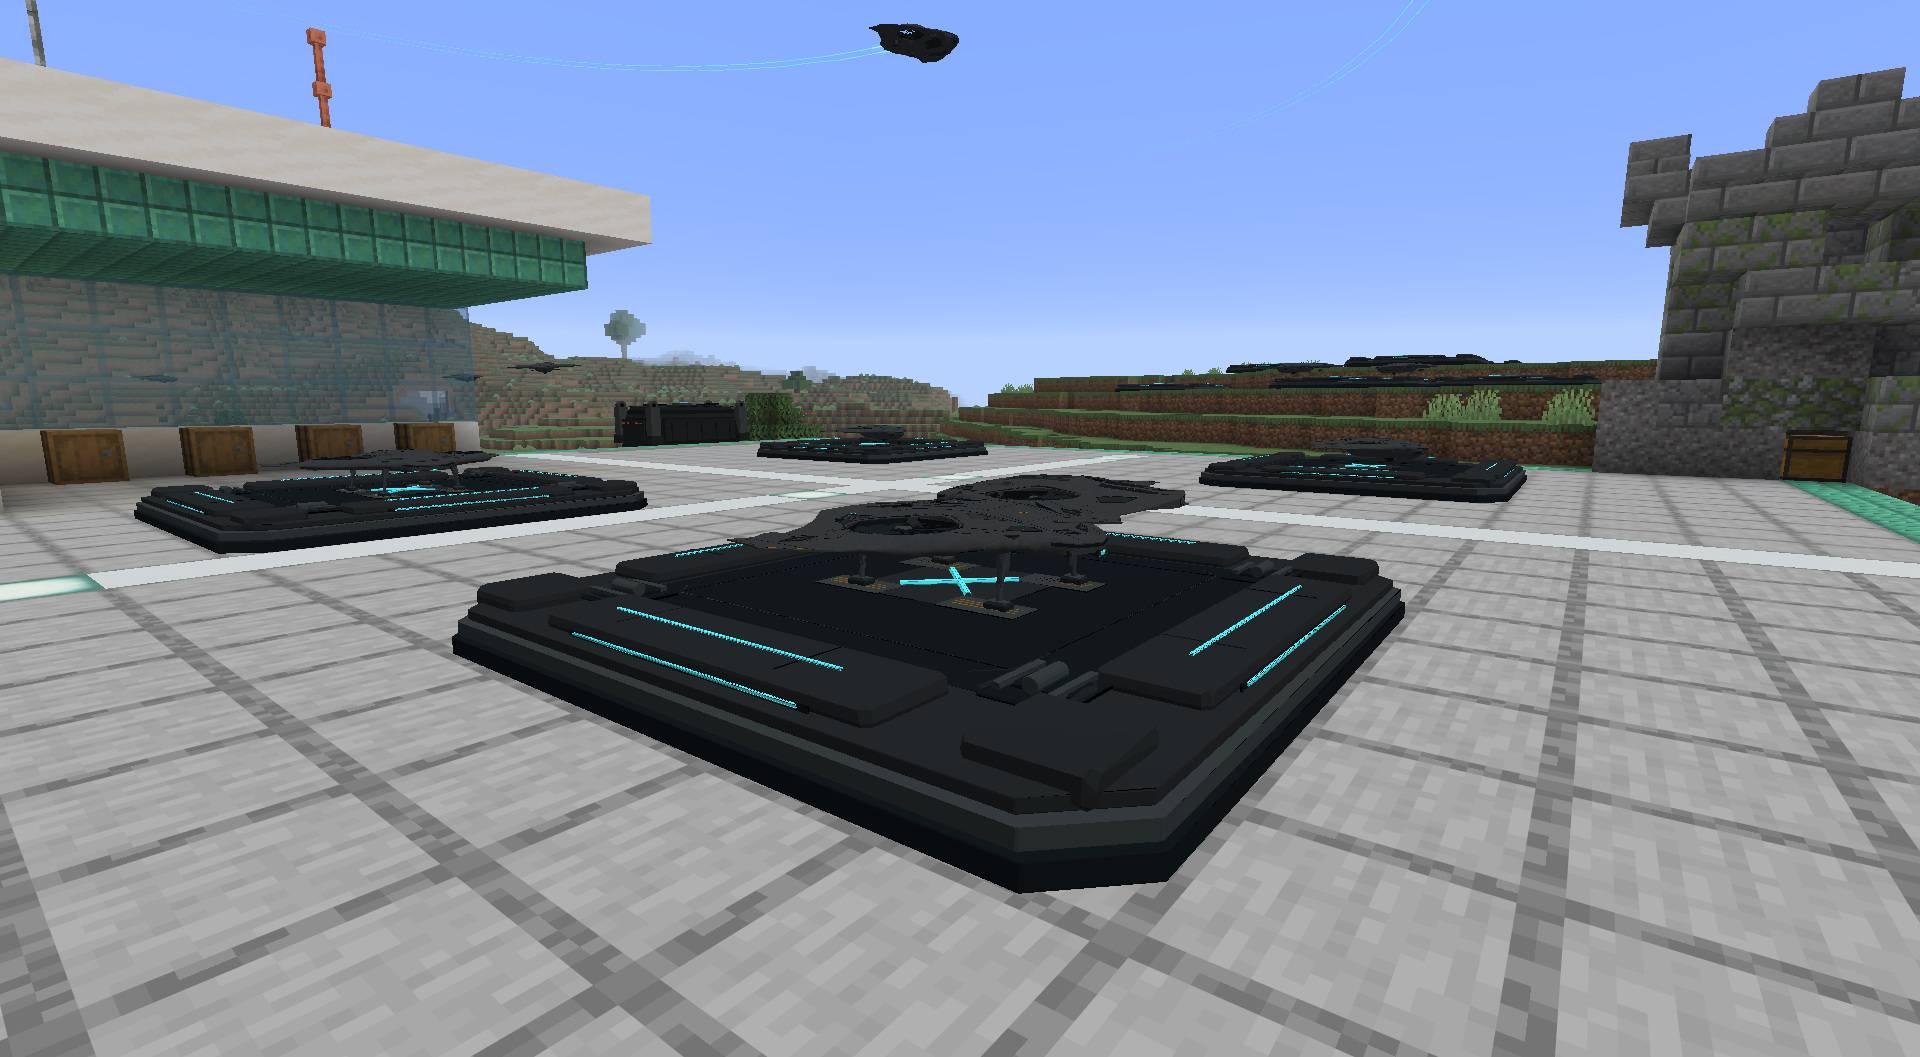
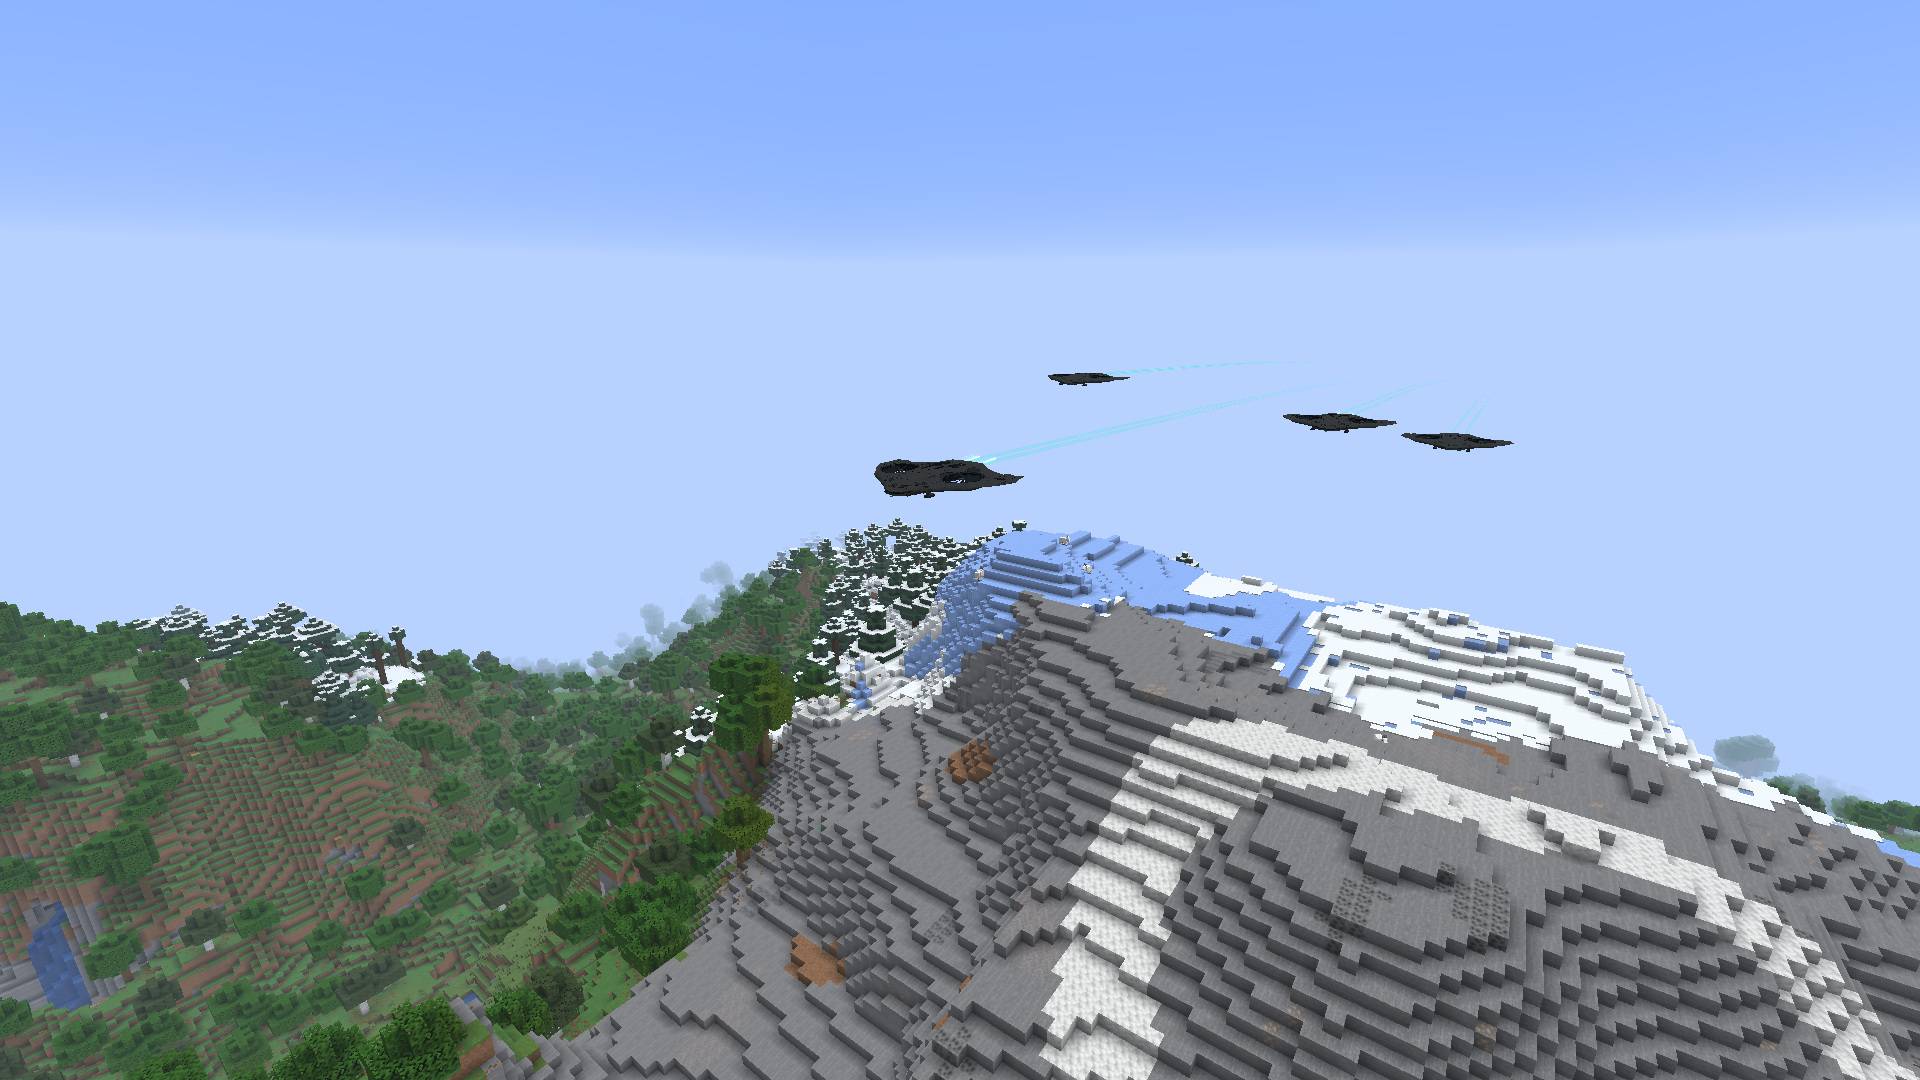
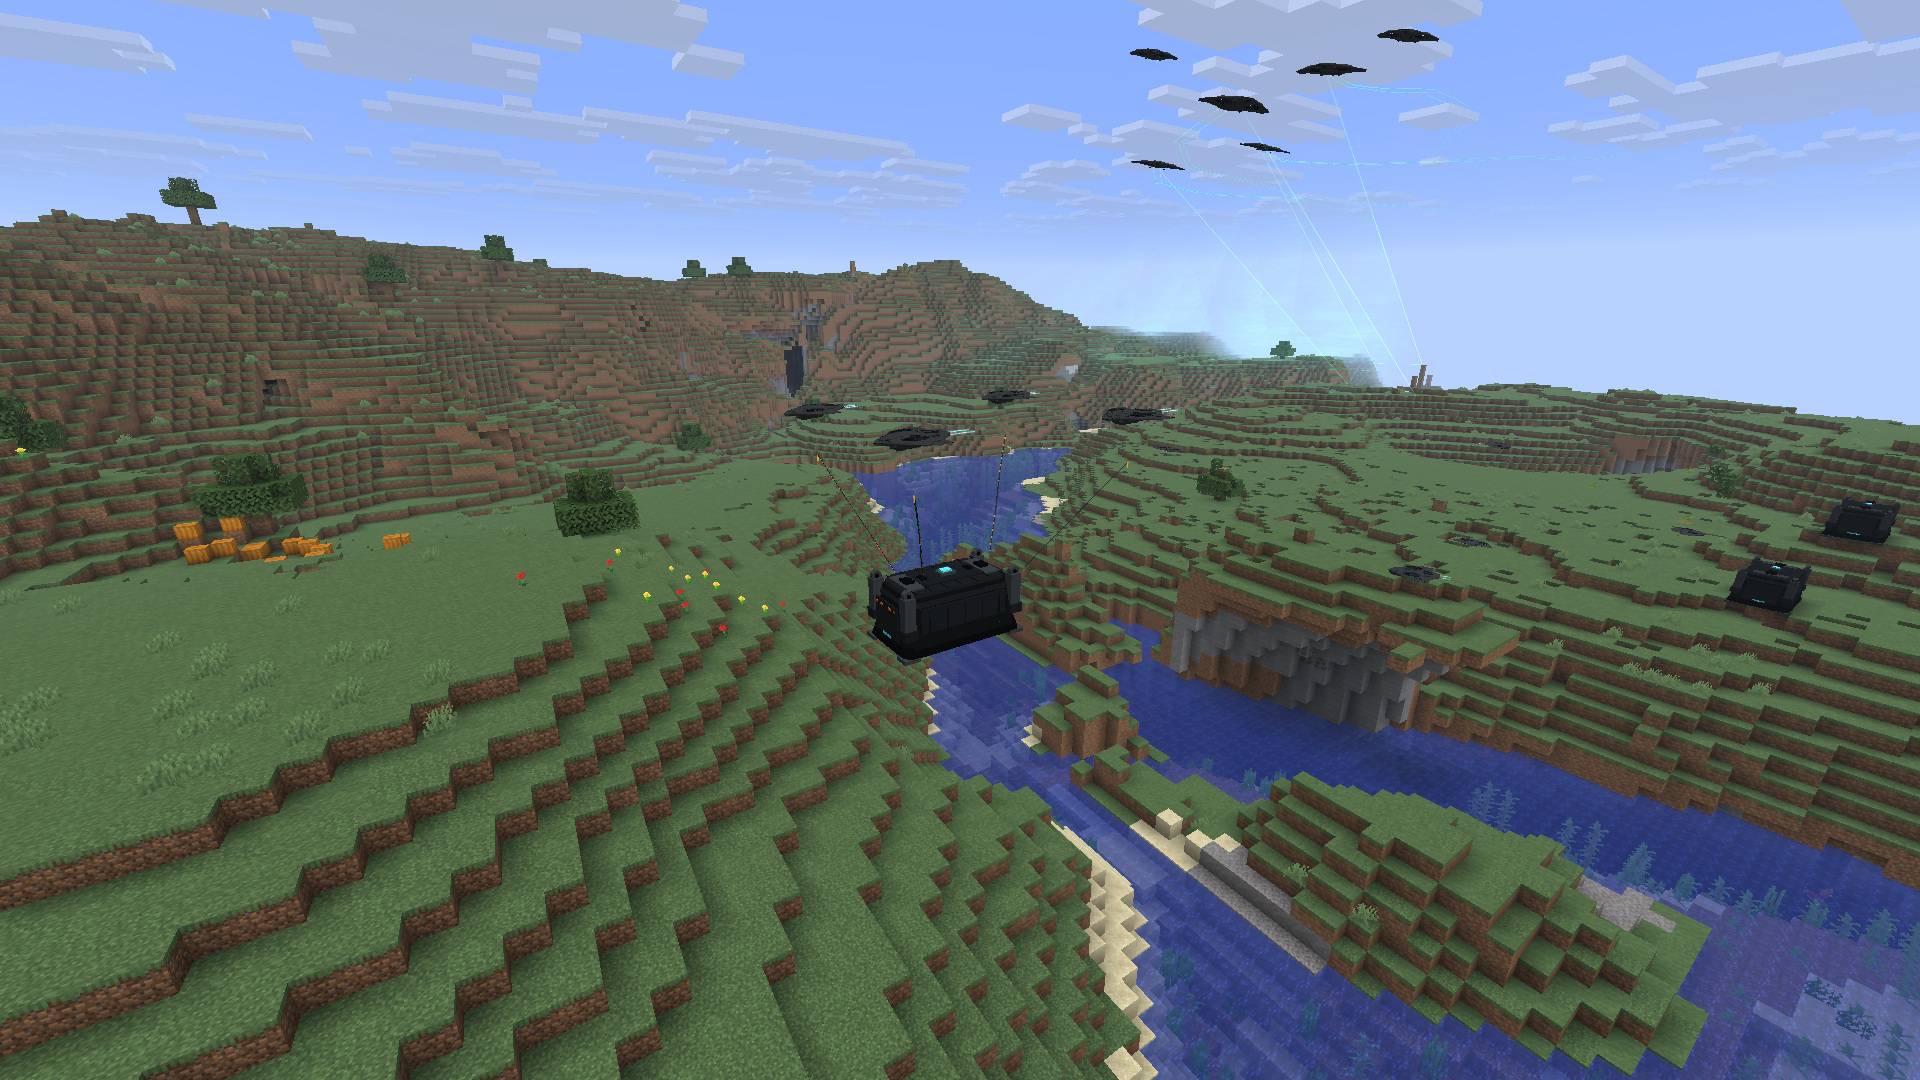
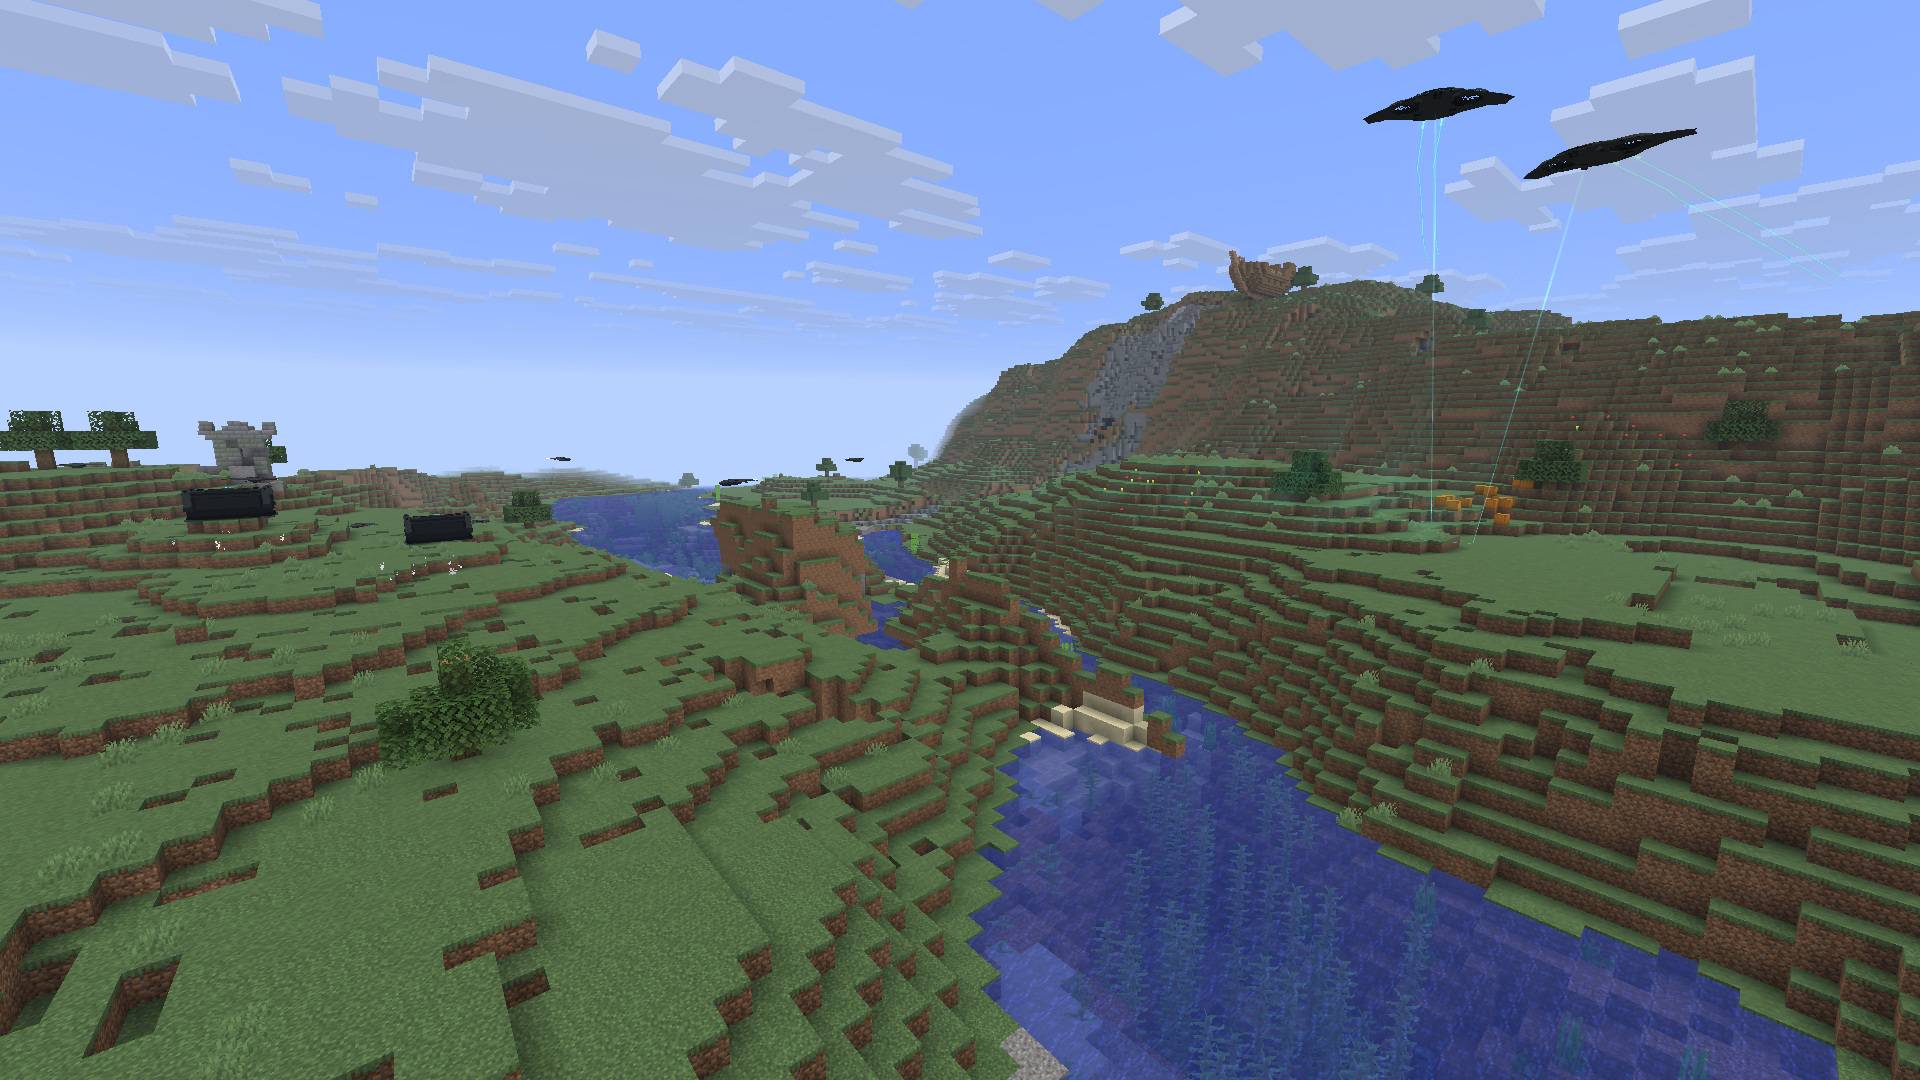
Hey, I'm nyma! I made Morrowgear because I wanted to build a drone in Survival, give it a destination, and watch it find its own way there. Start with one aircraft, then build your own fleet. Send a Wing over the mountains, keep a remote outpost supplied, or scramble your security drones when something gets too close.
The guide below takes you from crafting your first drone to sending a Wing on a mission and bringing it home for service. 日本語ガイドはページ後半にあります。
Your first flight in Survival
1. Craft a controller, a drone, and a Dock
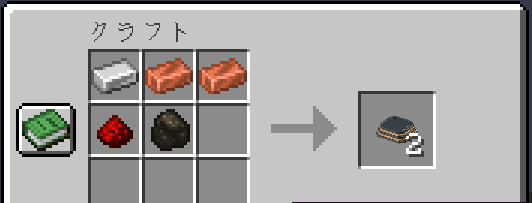
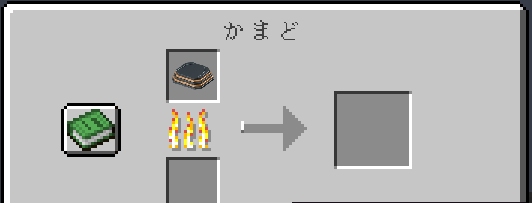
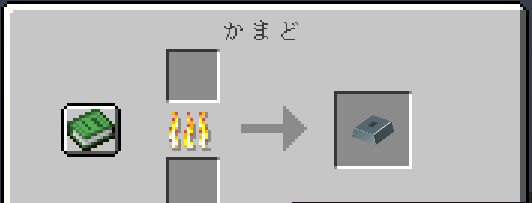
- At a crafting table, combine 1 iron ingot, 2 copper ingots, 1 redstone dust, and 1 charcoal in any arrangement to make 2 Unsintered Morrow Composite. Put the composite in the upper furnace slot and fuel in the lower slot. Collect the Morrow Alloy from the output slot. A blast furnace works too.
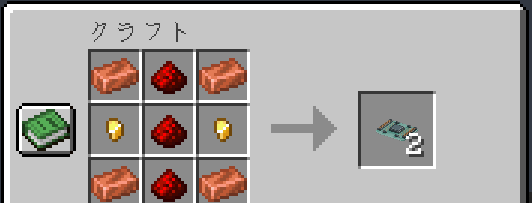
- Use the alloy to make Lightweight Frames. Make a Basic Control Board, then use it to craft a Field Controller. Once you have the controller, open Equipment guide, choose an item, and select Materials & recipes to see its crafting grid. Craft at the workstation shown there. The board recipe uses copper in the four corners, redstone down the center column, and gold nuggets on the middle left and right.
- Make Flight Actuators and a Standard Flight Battery. Use them with frames, copper ingots, and a control board to assemble your Field Drone Unit. Make a Drone Dock from frames, iron ingots, pistons, and a redstone block.
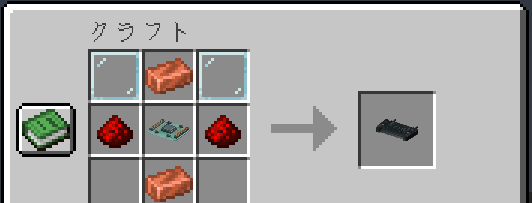
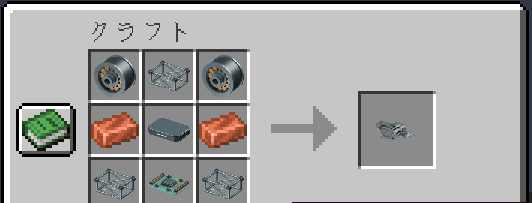
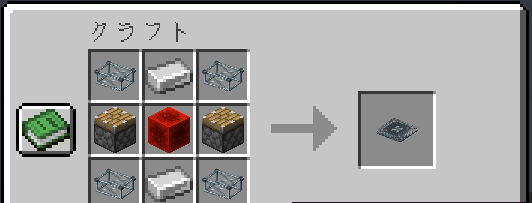
2. Deploy the drone and give your first order
- Place the Dock on level ground with a clear 5 × 5 area and room overhead. Right-click beside it with the Field Drone Unit to deploy the drone.
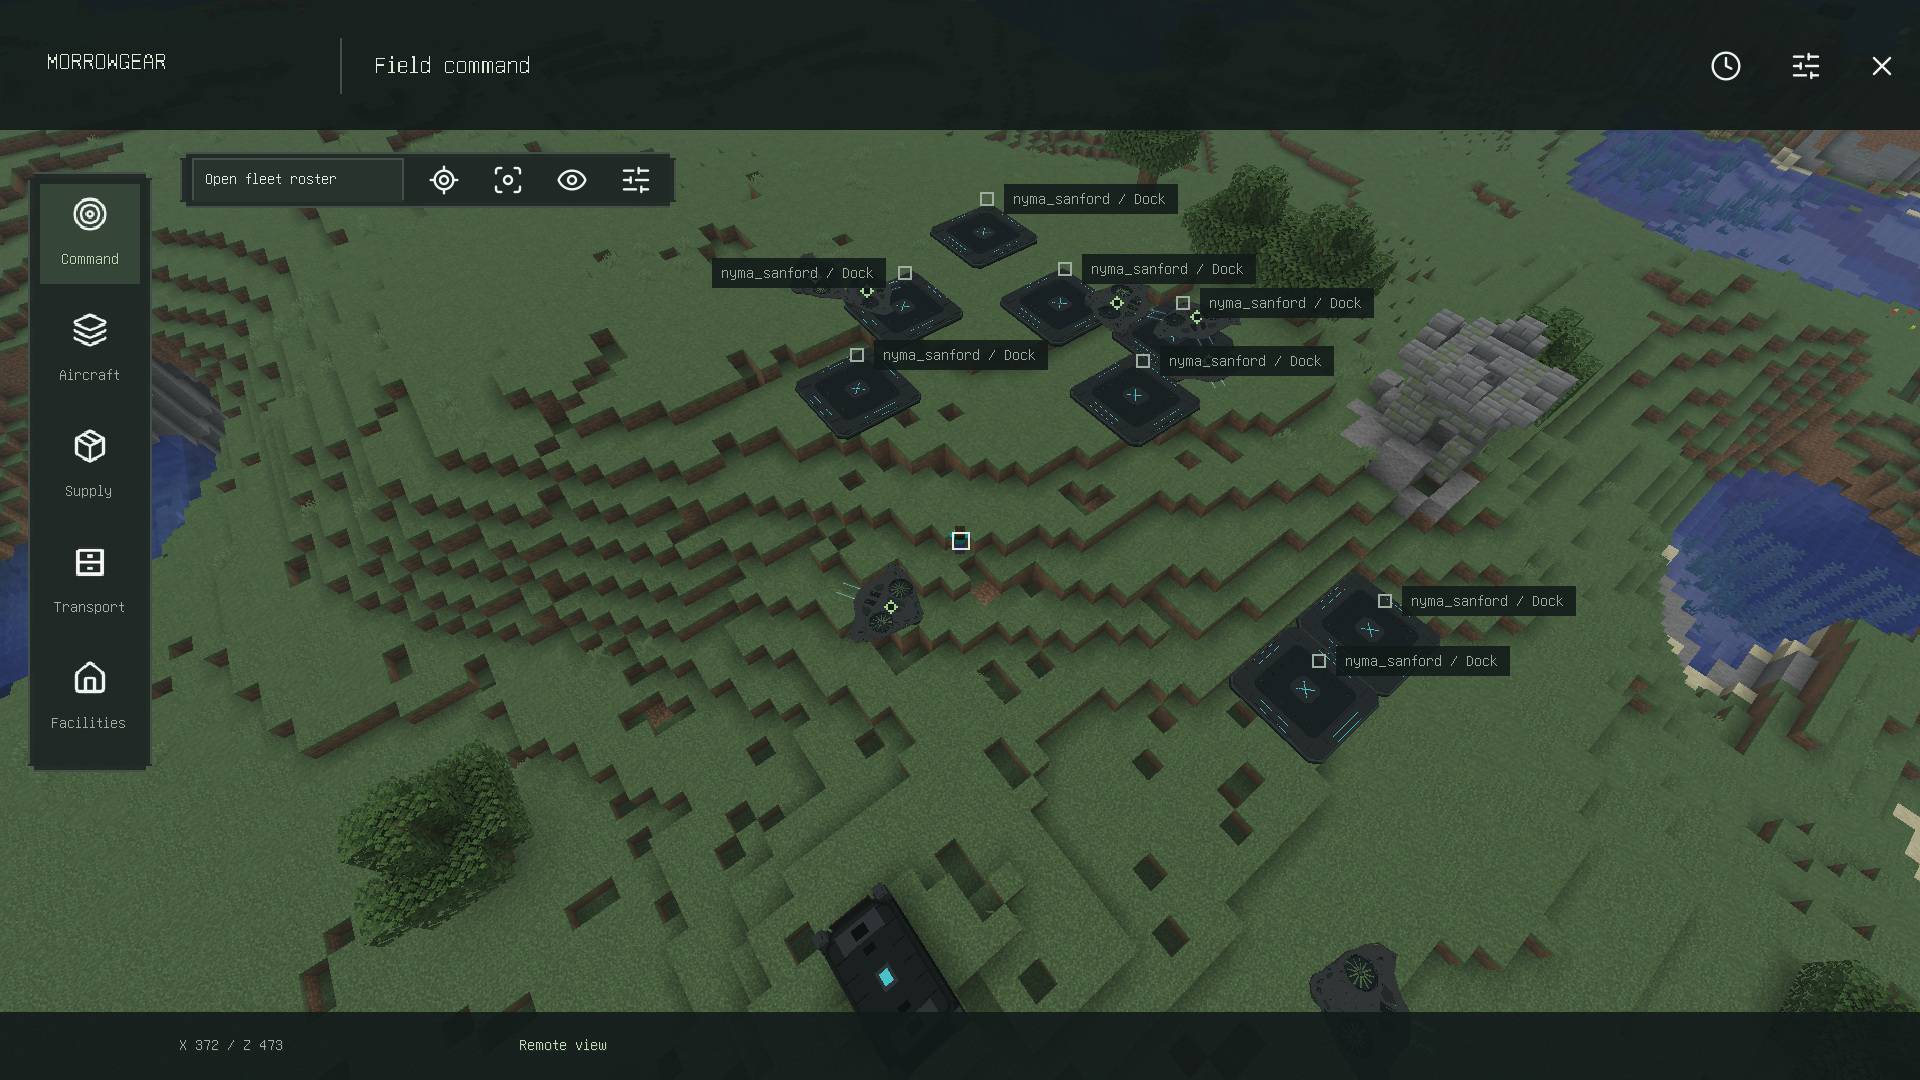
- Right-click with the Field Controller in hand, or press K with the default keybind. On the left, choose Field command. Select Open fleet roster → Aircraft, then click the drone's row.
- In the right-hand panel, choose Other actions → Follow. When the drone shows Following, press Esc and walk a few blocks. The drone will follow you.
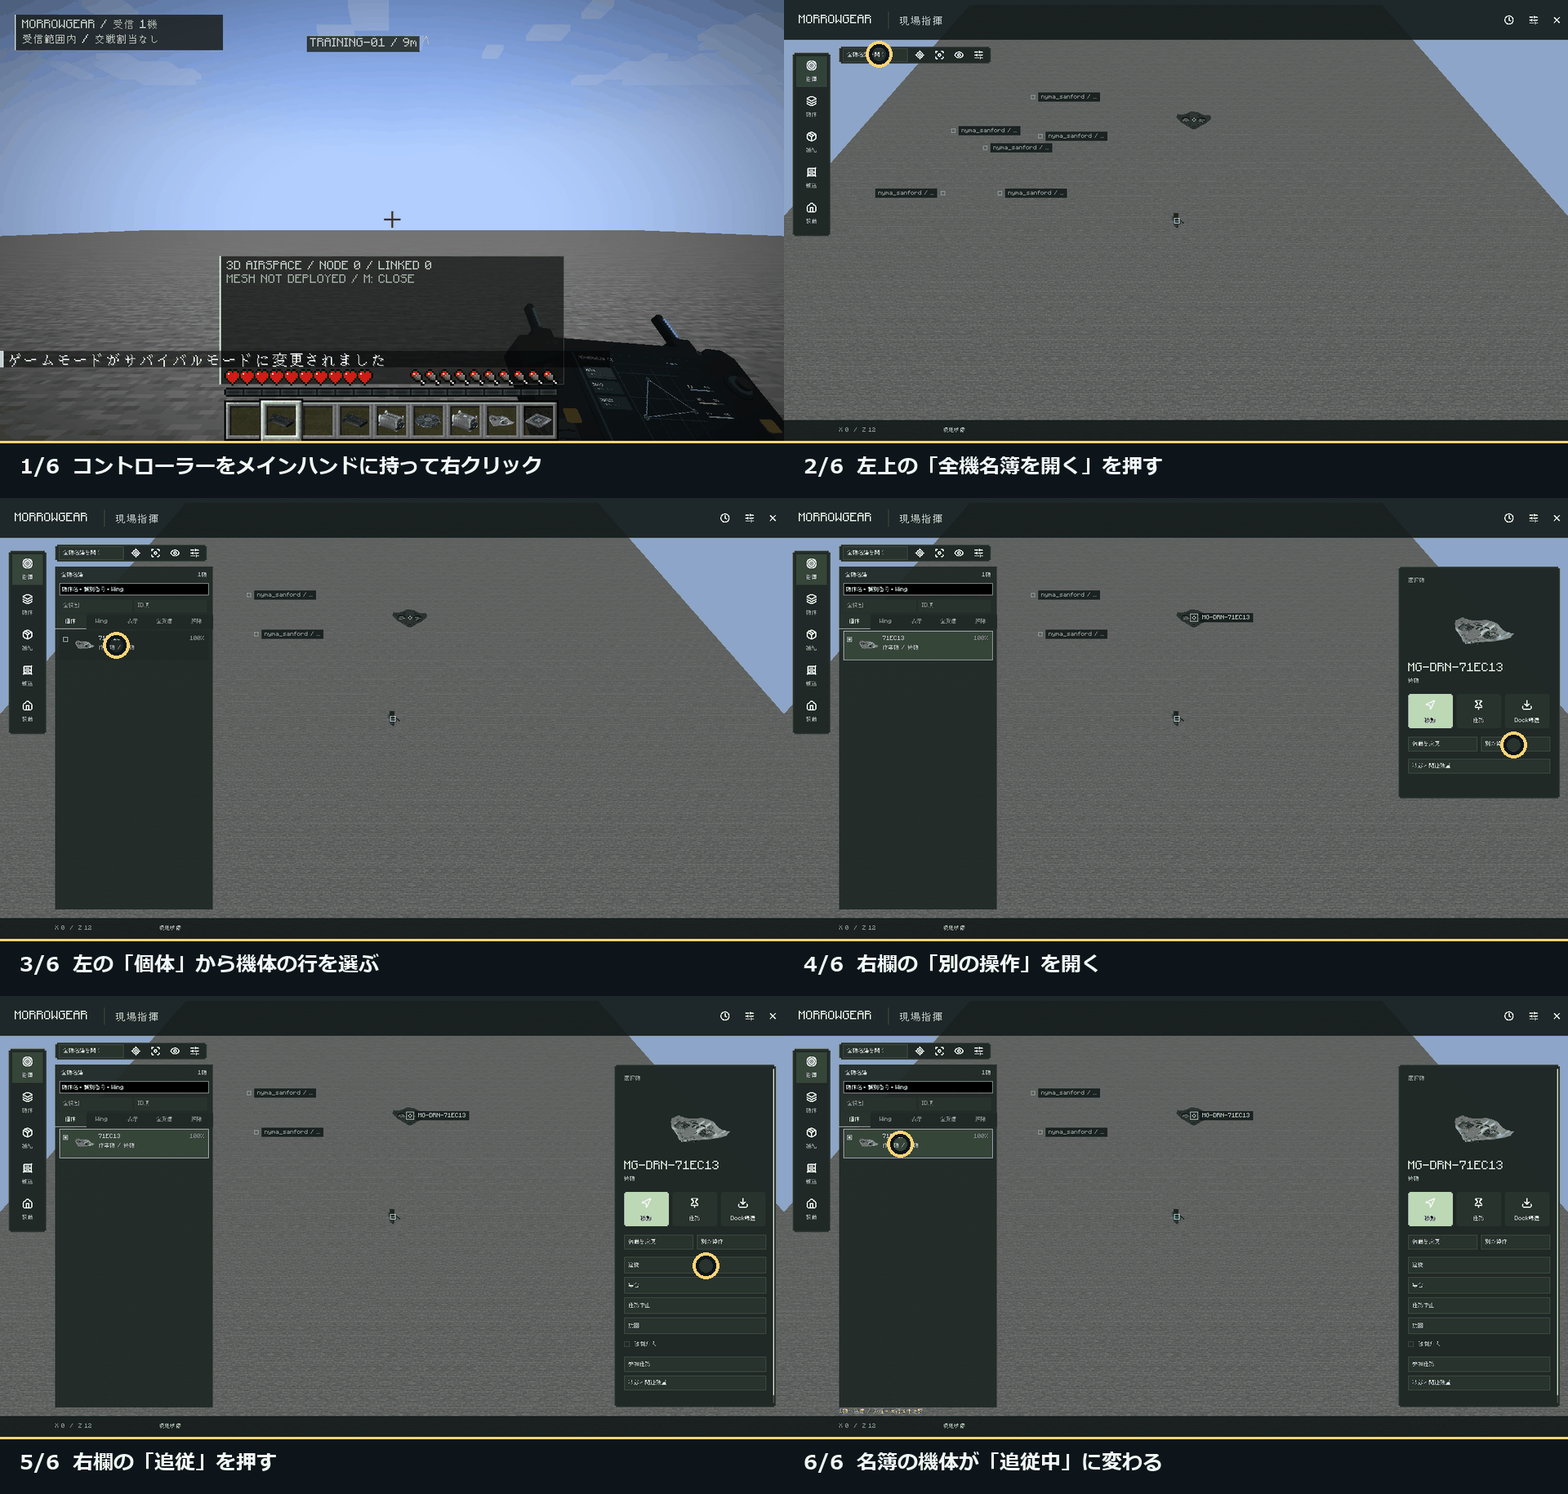
3. Return, refuel, and take off again
Select the same drone and choose Return to Dock. Once it has landed, empty your hand and right-click the middle of the Dock. Put coal or charcoal in the supply area. Open Status & resources for that drone in the controller and watch its flight power recover. Give it Follow once more to complete the cycle.
Control aircraft, form Wings, and use the visor
Give orders and read the aircraft's condition
- Move to a point. Select an aircraft, choose Set destination, click an open spot on the map, and select Send move order. Right-drag rotates the map, middle-drag pans it, the wheel zooms, and the crosshair button recenters the view.
- Change an order. Open Other actions to bring a drone back to you or cancel its current mission. Use Return to Dock when you want it to land and get serviced. Accepted orders continue after you close the controller.
- Check readiness. Open Status & resources to check flight power, airframe health, the weakest of the propulsion, sensor, and payload systems, and the relevant weapon's ammo, energy, or heat. Hovering consumes power. A low battery, damaged airframe, or failing subsystem can trigger an automatic return. If flight power runs out before landing, the aircraft needs recovery.
- Access nearby equipment. For Local controls to a Dock or container through the controller, hold the controller in your main hand and stand close with a clear view of the block.
Fly a Wing
- Deploy a few drones and provide enough Docks to service them. Under Aircraft, hold Ctrl and click the rows for the drones you want to group.
- Open Formation & equipment → Formation → Create Wing. A Wing can hold up to eight aircraft. Select the Wing to issue Follow or a move order to the group.
- To try a patrol, select a Field drone or its Wing, open Missions → Edit patrol route, and add the waypoints in order. Select Send patrol order. The aircraft fly autonomously, using the lead aircraft as their reference and adjusting spacing as they move.
Equip the Tactical Visor
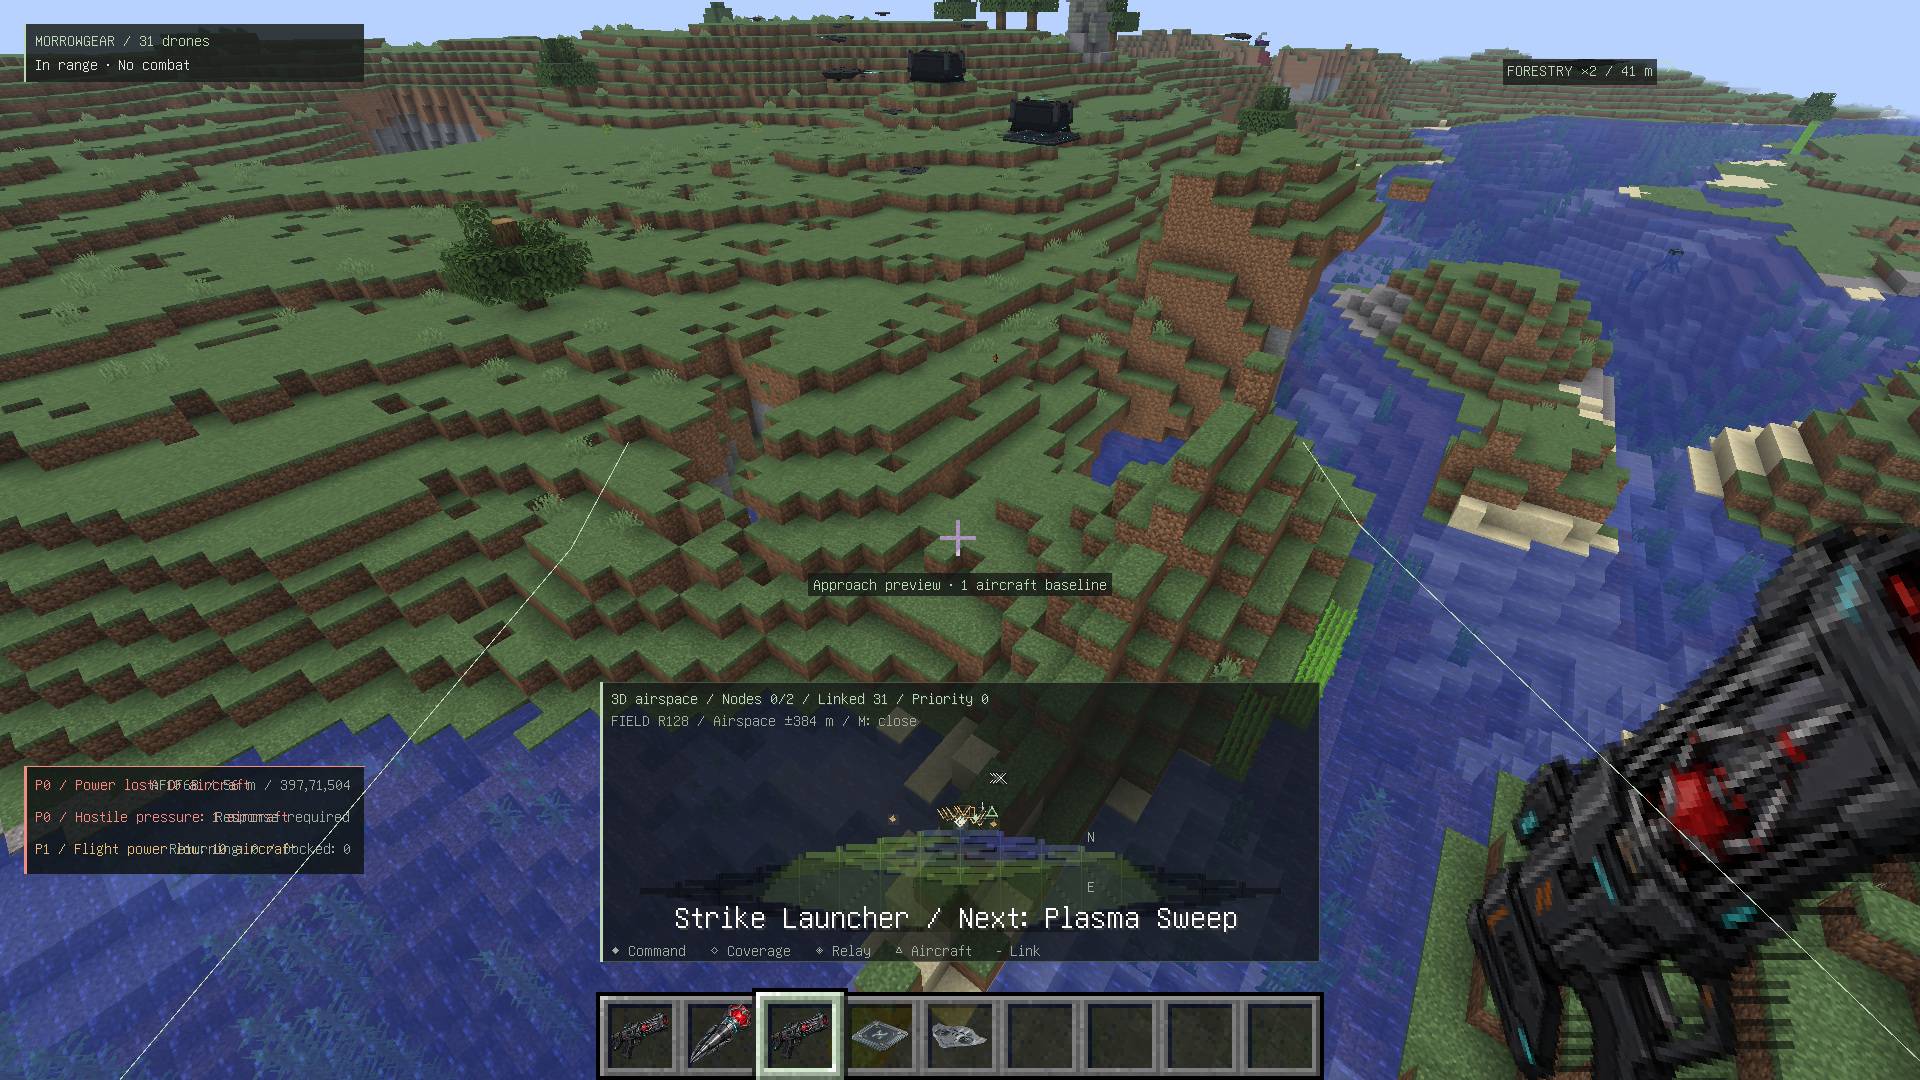
Put the Tactical Visor in your head slot. It shows linked aircraft and active operations while you play, with the top-center space reserved for boss health bars. It also draws the approach corridor on the ground before you fire a supported strike beacon.
Change roles and send drones on missions
To swap equipment, bring the drone to your Dock and keep the module in your inventory. Select the landed drone, choose Change equipment → Change role, select a role, and choose Equip selected module. For a Security drone, use Change weapon to install its weapon module the same way.
| Aircraft | What you can assign |
|---|---|
| Field | The default role. Use it for following, patrols, and extending radio coverage. |
| Scout | Survey an area and send a remote view and contact reports. |
| Engineer | Mine, excavate, or cut trees in a marked area. |
| Cargo | Move items between containers or keep Docks stocked. |
| Salvage | Recover grounded aircraft and lift whole containers as a team. |
| Security | Guard a position, engage a detected hostile, or join a strike. |
Scout an area and extend radio coverage
- Select a Scout, open Missions → Deploy for area recon, and mark the area on the map. For uncharted ground, use Set unscouted area by coordinates and enter X and Z. Select Deploy scout.
- Once the Scout is on station, select View this scout's area, or open Remote view from the eye icon. Check whether the feed is live or showing the last received view.
- If a remote aircraft is out of radio contact, select one or more charged Field drones and choose Missions → Mesh → Auto-deploy mesh. Wait for the relays to reach their positions, then send the original order again. If the relays are still short of the target, add a charged Field drone or move closer. To take down the relays, select those aircraft and choose Withdraw mesh.
Mine, excavate, or cut trees
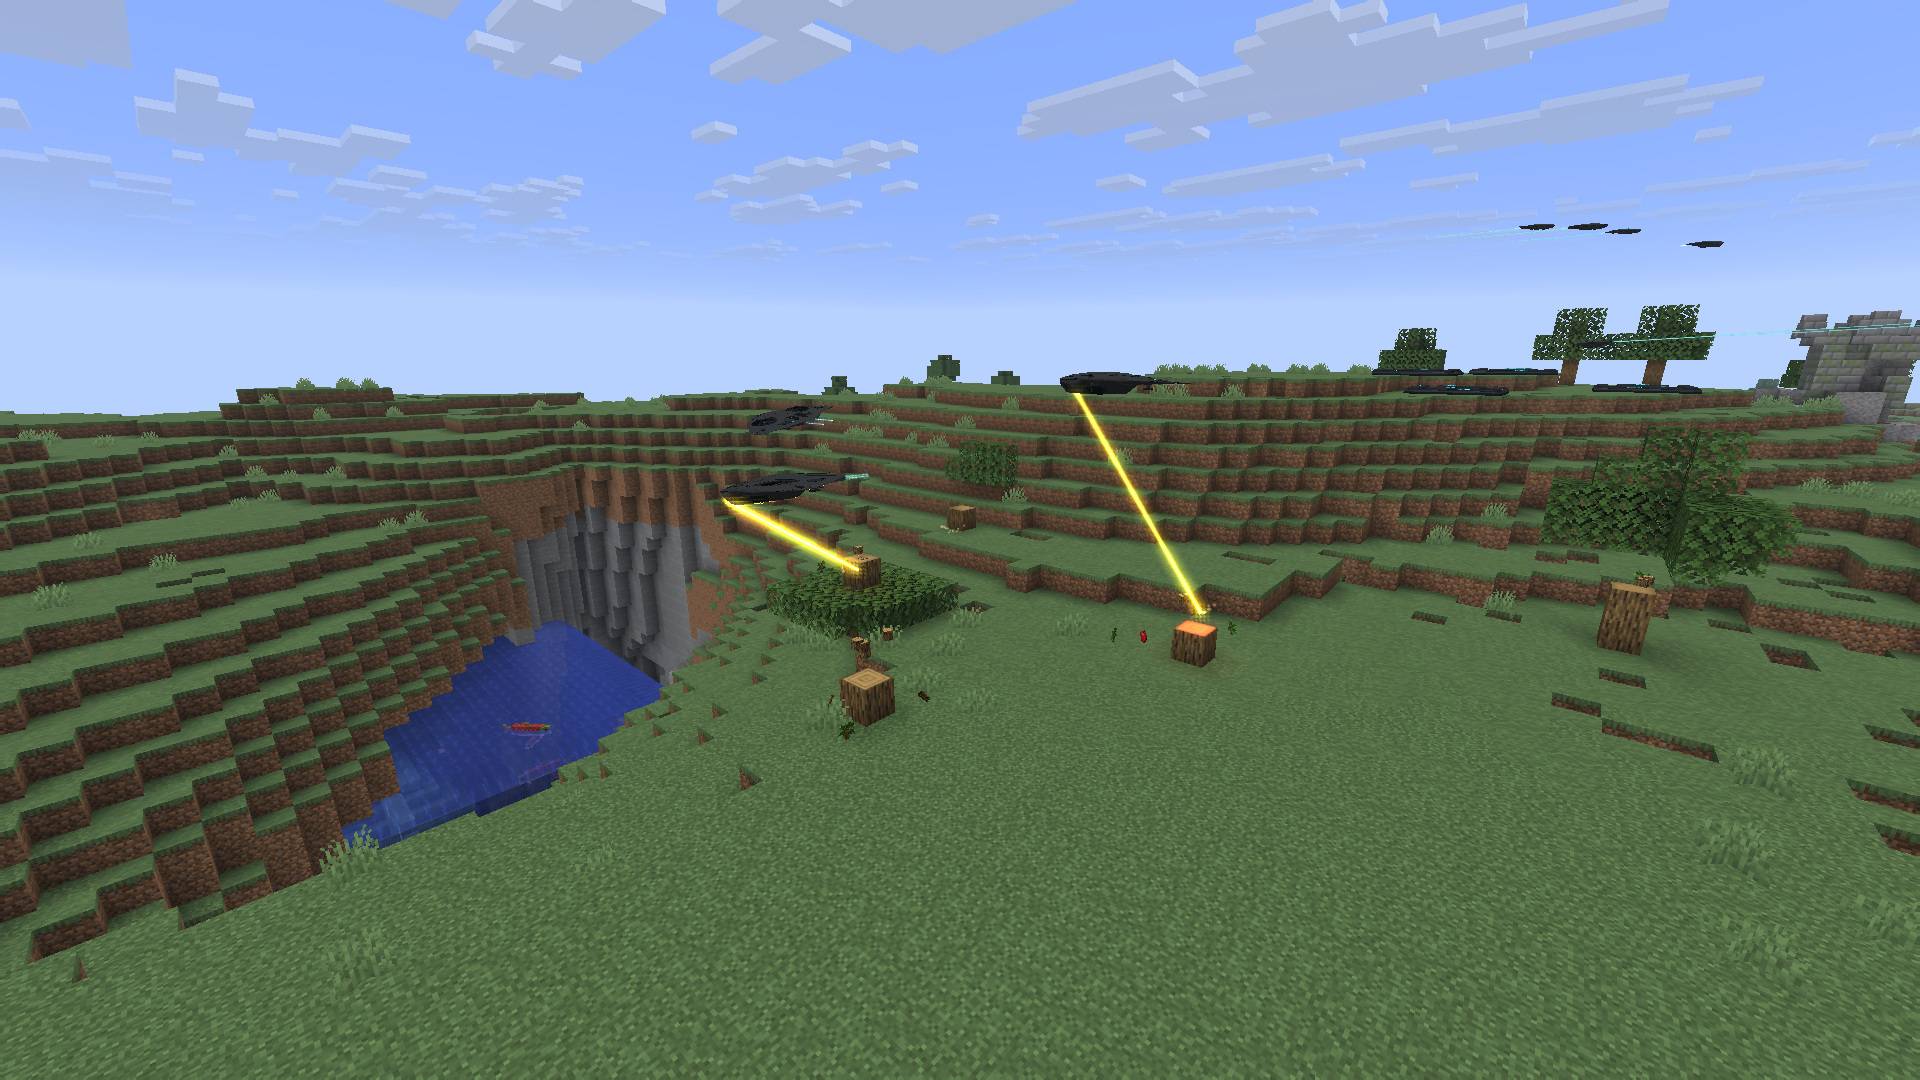
- Assign work from the Controller. Select an Engineer and open Missions, then choose Ore mining, Area excavation, or Logging. Mark the center on the map, use Change work radius to set the area, and send the order. For forestry, click the mode button to switch between Fell only and Fell & replant before sending the order. Engineers can cut trees in their line of sight while flying through the area.
- Excavation with the Spatial Operation Marker. With the marker in hand, right-click in the air until excavation is selected. Right-click a block at one corner of the area, then a block at the opposite corner. The two blocks set the width, length, and height. Place the second corner higher or lower to include blocks above or below the first. Check the dimensions, then right-click in the air to start. Sneak and right-click to clear the selection.
- Marking mining or forestry on foot. Select the task with the marker, then right-click the center block and an outer edge. For mining, right-click in the air to change the depth. Right-click the center again to start. Forestry orders placed with the marker include replanting.
Supply Docks, transport cargo, and recover aircraft
Keep your aircraft ready
Put the matching item in the landed aircraft's Dock supply area. A Flight Battery sets the aircraft's capacity. Standard, Reinforced, and High-density batteries hold 1,000, 1,800, and 3,000 flight power. To upgrade, use the battery on the aircraft while it is docked. The fuel below restores stored flight power.
| What needs replenishing | What to put in the Dock |
|---|---|
| Flight power | Coal, charcoal, or a Propulsion Power Cell |
| Airframe or subsystems | Copper ingot, iron ingot, or Morrow Alloy |
| Autocannon rounds | Autocannon Magazine |
| Missile stock | Micro-missile Supply Pack |
| Laser energy | Weapon Energy Cell. Allow the weapon to cool if heat is high. |
When a drone returns on its own for subsystem maintenance, it stays at the Dock until the work is done and then resumes its previous mission. If it stays docked, check the repair materials in the supply slots.
Use a warehouse to restock Docks automatically
Put coal or charcoal in a chest, set up a Dock that's short on fuel, and have an idle, charged Cargo drone available. Near the chest, open Supply → Manage supply sources, choose the chest, and select Register. When a Dock runs short, an available Cargo drone can deliver from the registered chest. Open the Dock to check the delivery. If nothing moves, check the chest inventory and registration, the drone's availability, and whether the Dock has room for supplies.
Set up a cargo route or lift a whole container
- Transfer items. Put items in a container and set up an empty one at the destination. Select a Cargo drone and open Transport → Transfer contents / Select source and destination. Set the pickup and delivery containers and choose Confirm route. Refill the pickup container or clear space at the destination if the drone is waiting.
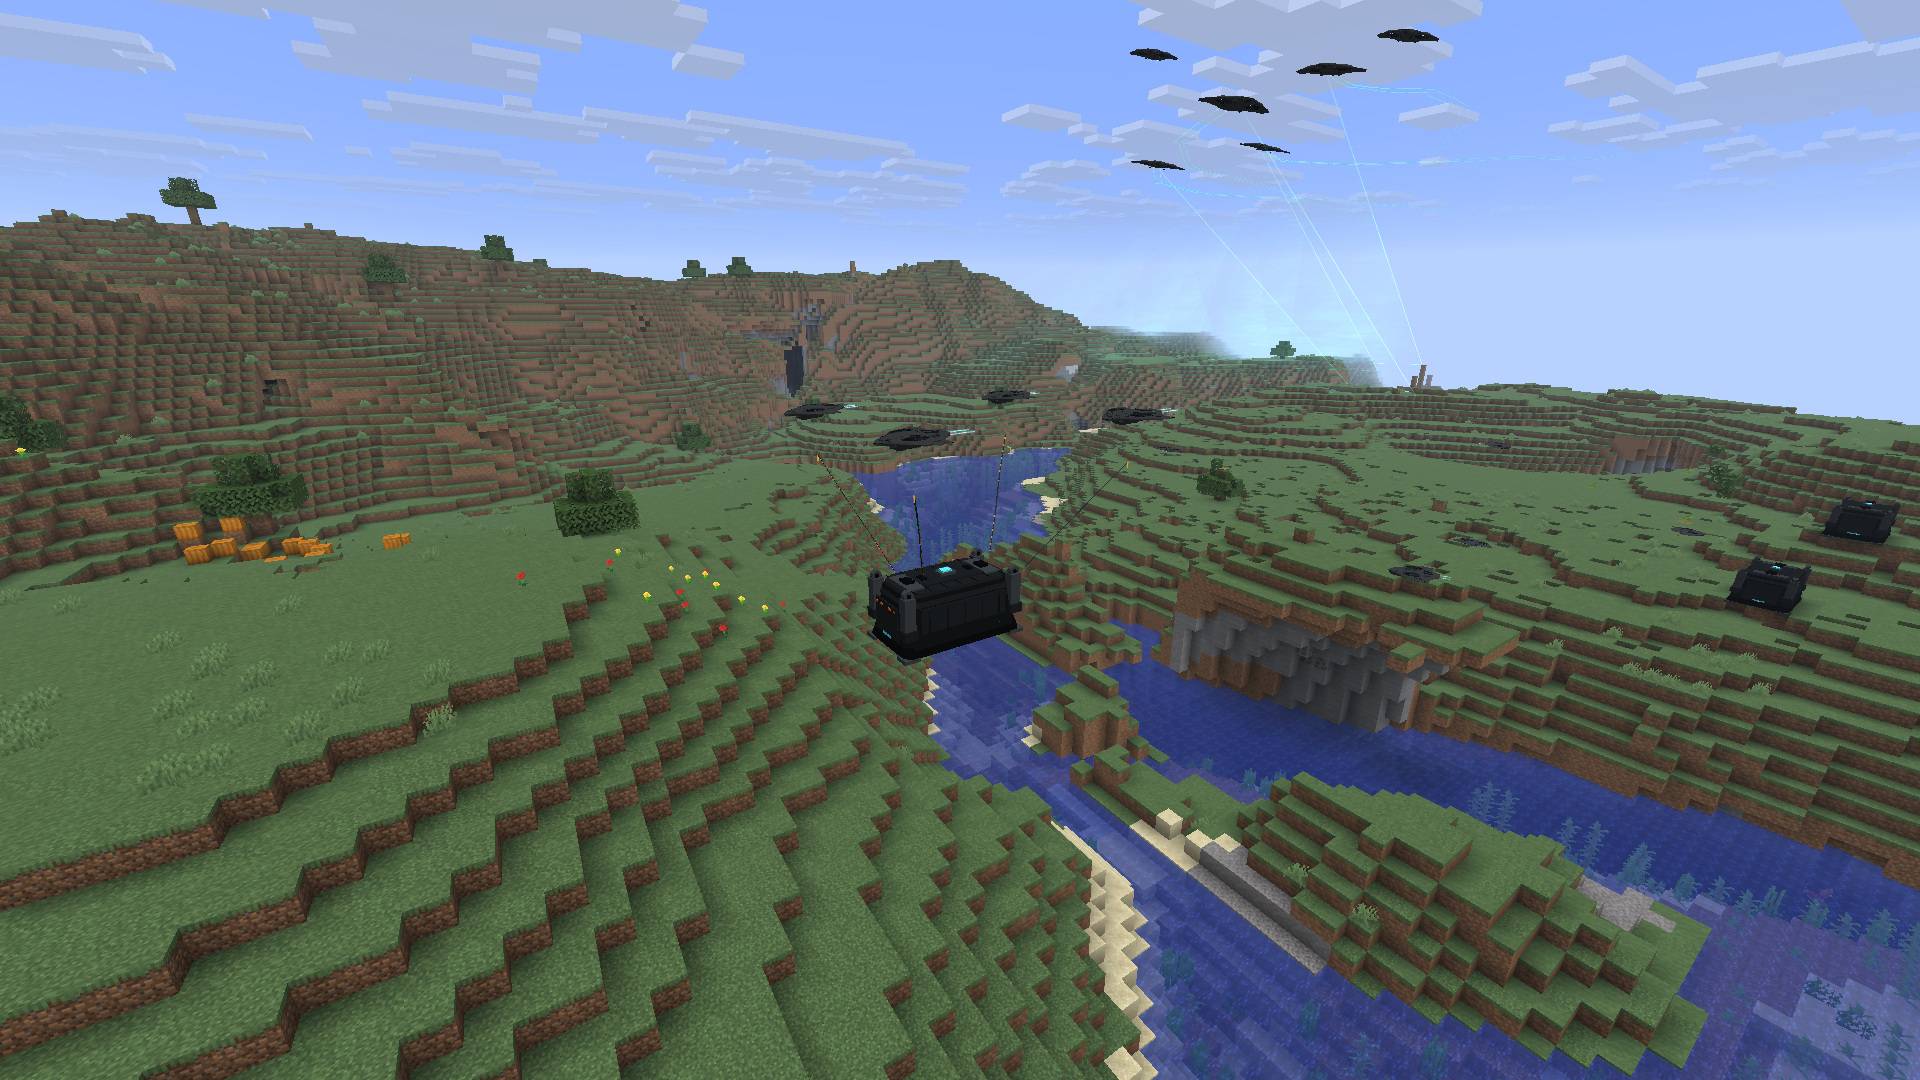
- Lift a container. Place a Carrier Cargo Container and prepare four available Salvage drones with at least 35% flight power each and a working payload system. Open Transport → Move container. Use the pickup map picker to select the container and the delivery map picker to choose an open spot. Confirm both points, then choose Start transport with 4 drones. Open the container at its destination to check its contents.
Recover a downed drone or pack one away
Keep a charged Salvage drone available and leave its Dock clear and stocked. If one of your drones runs out of power and comes down, an available Salvage drone can pick it up automatically and take it to a Dock for service.
For recoveries between trees or beside a wall, keep an Engineer available with at least 35% flight power. It can clear blocks to make room for the Salvage drone to approach, lift the aircraft, and fly out with the load hanging below it. If protected blocks are in the way, clear a route by hand so the Salvage drone can pass.
To pack a drone into an item, select it and open Formation & equipment → Storage. Choose Store selected aircraft twice to confirm. In Survival you get the drone unit back, with removable modules, upgraded batteries, and cargo returned separately. It deploys as a Field drone, so equip the role again before sending it out.
Defend a position and call in a strike
Start with one autocannon drone
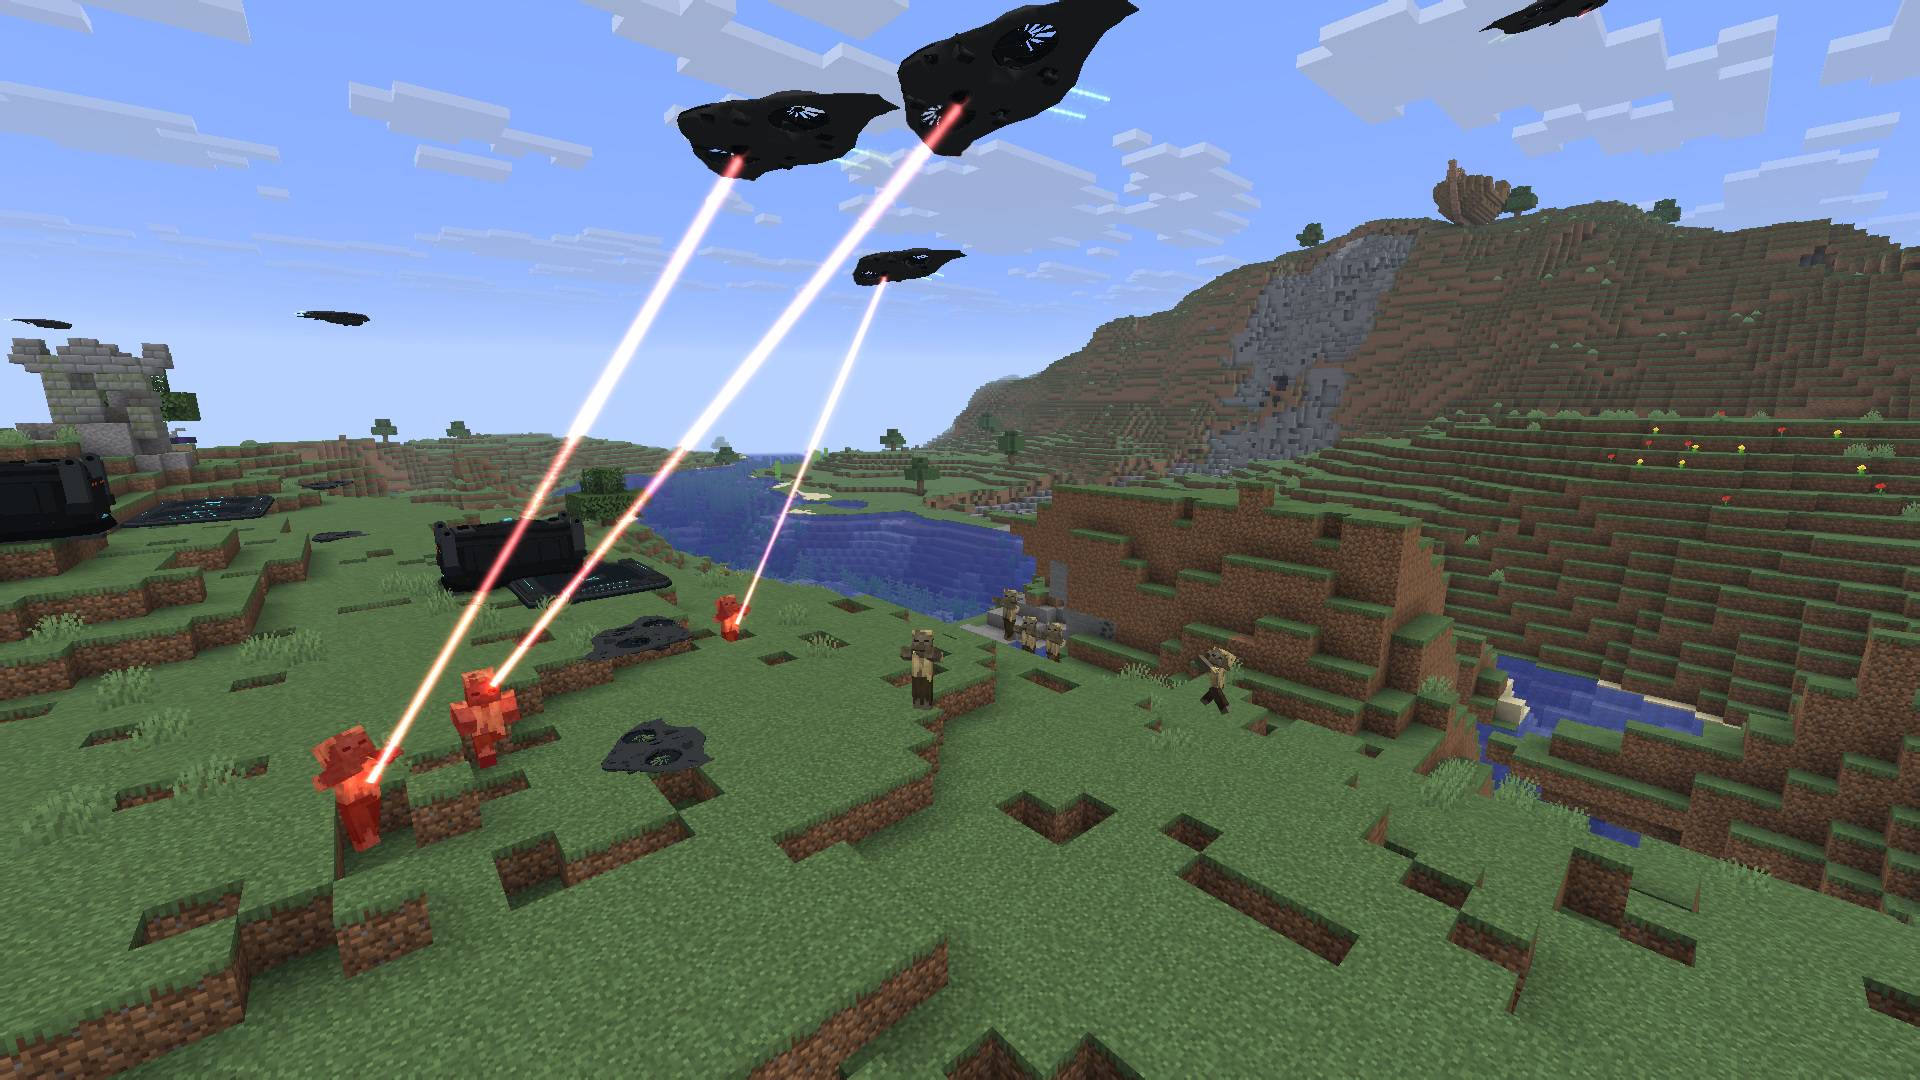
- Craft a Security Module, an Autocannon Module, and an Autocannon Magazine. Equip the role and weapon while the aircraft is docked. Stock the Dock with flight fuel and the magazine.
- Select the drone and choose Missions → Guard a position. Pick an open area on the map, check the radius, and send the order. For a specific hostile already marked on the map, choose Attack detected enemy and select its marker.
- Autocannons and lasers need a clear line of sight. A drone may break off the attack if it can't reach a firing position, even if a Scout has marked the enemy. After the engagement, send the drone back to the Dock for resupply.
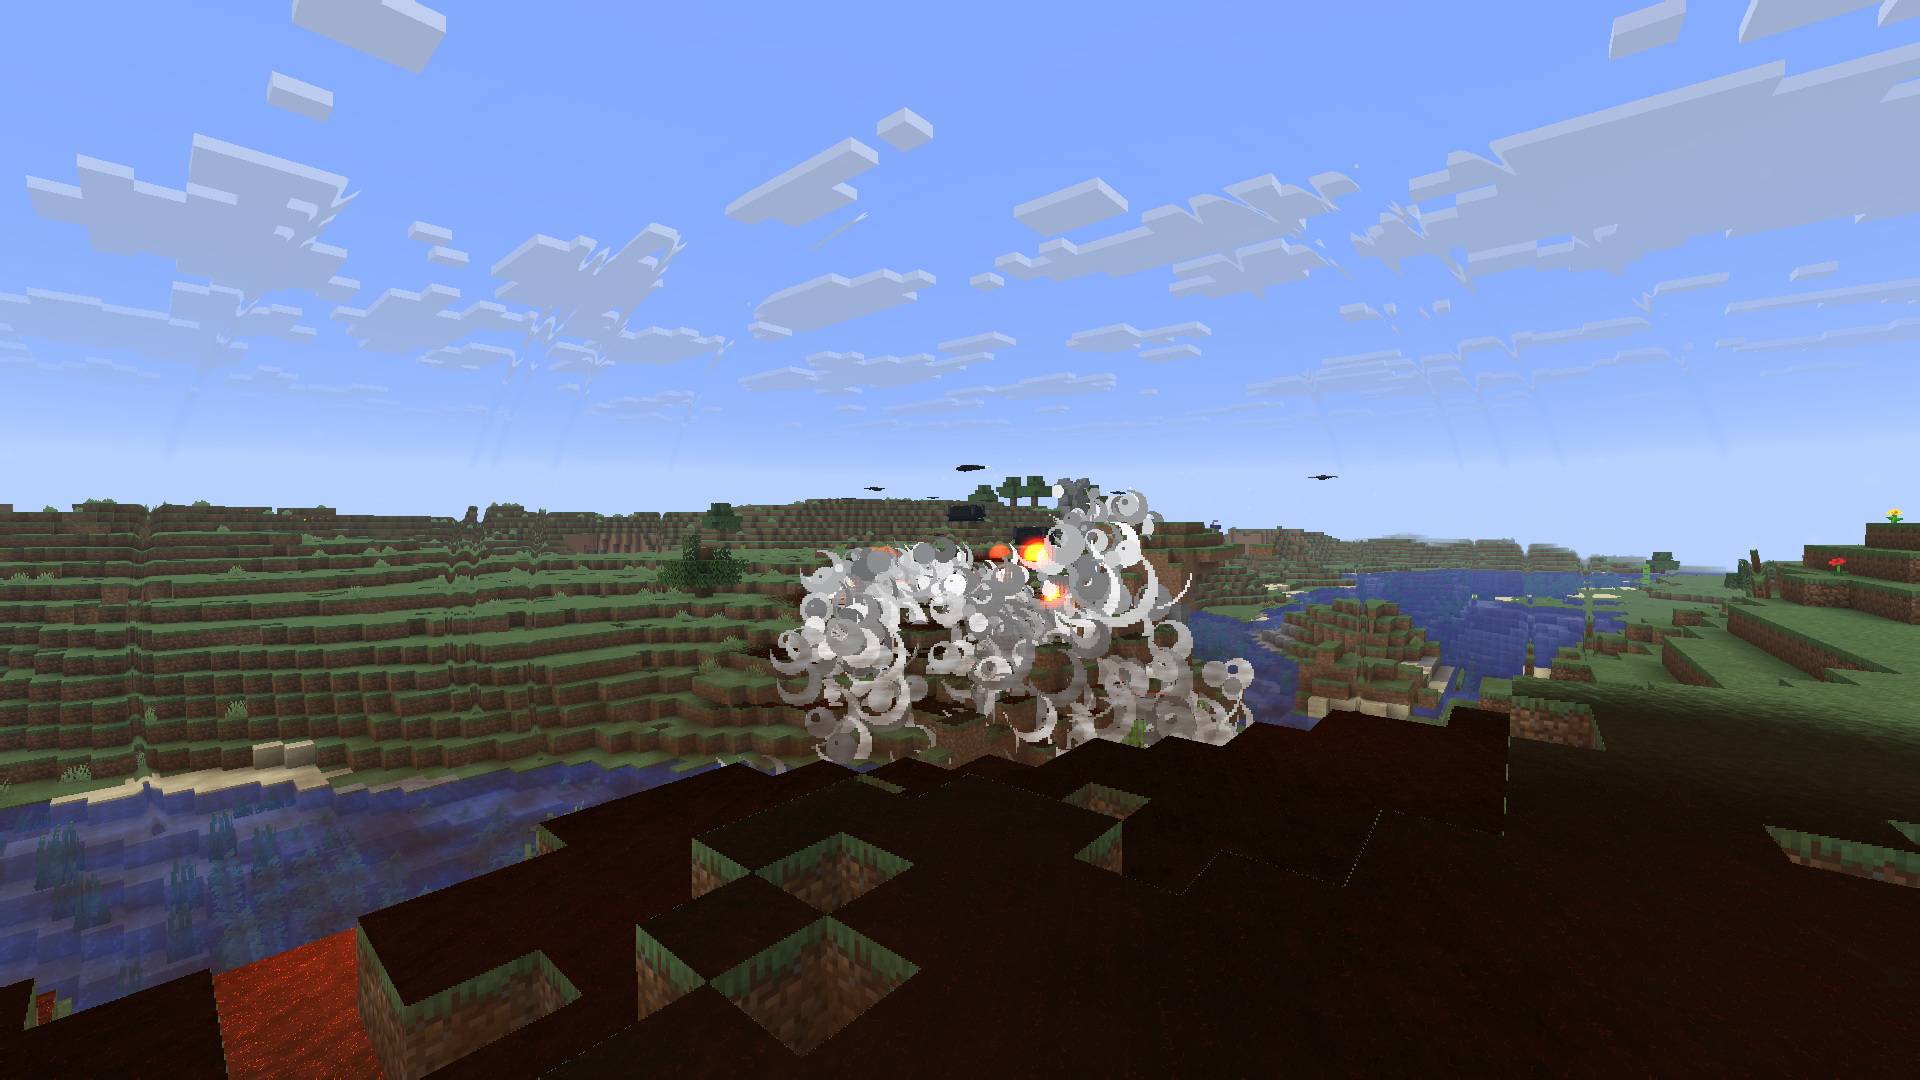
With a Missile Module equipped, micro-missiles can bore through up to five blocks of the first continuous layer of breakable cover. They explode as soon as they reach open space, including an air gap between two walls. The blast can damage nearby blocks, so keep missile engagements away from structures you want to preserve.
Launch a Strike Beacon
- Ready the Security drones and stock flight power, weapons, and ammo for the package. A newly crafted Strike Beacon Launcher comes with three Gun Run rounds.
- Hold the launcher in your main hand, aim at the target block, and left-click. With the Tactical Visor equipped, Gun Run, Close Air Support, and Plasma Sweep draw a rectangular approach corridor from the predicted landing point before you fire. After landing, the corridor updates for the participating aircraft.
- Once the beacon attaches, eligible Security drones assemble and enter the attack run. If no aircraft joins, check the launcher, the beacon's landing point, and the drones' flight power, airframe, weapon supplies, and heat.
- To switch rounds, sneak and right-click with the launcher to unload it. Put the desired round in your off hand, then right-click while standing with the launcher in your main hand. Check Next on the launcher. It holds three rounds and fires them in loading order.
| Package | What the aircraft do | What to load on the aircraft | Top-center recipe ingredient |
|---|---|---|---|
| Gun Run | Strafe with autocannons | Fill the autocannon ammo | Redstone dust |
| Close Air Support | Attack with autocannons and missiles | At least 80% autocannon ammo and 33 missiles | Iron ingot |
| Plasma Sweep | Attack with missiles and plasma beams | At least 36 missiles and 1,000 weapon energy. Fill the energy reserve if its capacity is lower. | Nether quartz |
| Convergence | Combine beams from several aircraft into a sphere | Full missile and weapon energy reserves | Small: glowstone dust · Medium: amethyst shard · Large: blaze powder · Extreme: echo shard · Unlimited: nether star |
All eight round recipes use four iron nuggets in the corners, a Basic Control Board in the center, and redstone dust at middle-left, middle-right, and bottom-center. Change the top-center ingredient to select the package. Each recipe yields three rounds. Strike readiness also calls for at least 90% airframe health, subsystem condition, and flight power, and at most 20% heat. Longer routes can require more flight power. For your first strike, test a Gun Run well away from your buildings.
Install and find every recipe
| Minecraft Java Edition | Loader | Mod version | Java | Tested loader and dependencies |
|---|---|---|---|---|
| 26.2 | Fabric | 0.20.7 | 25 | Fabric Loader 0.19.3 / Fabric API 0.156.0+26.2 |
| 1.21.1 | Forge | 0.20.7 | 21 | Forge 52.1.20 |
| 1.21.1 | NeoForge | 0.20.7 | 21 | NeoForge 21.1.259 |
| 1.20.1 | Forge | 0.20.7 | 21 | Forge 47.4.28 |
| 1.20.1 | NeoForge | 0.20.7 | 21 | NeoForge 47.1.106 |
Download the matching JAR from Files and place it in your instance's mods folder. The Fabric build also requires Fabric API for Minecraft 26.2. For multiplayer, use the same Minecraft version, loader family, and Morrowgear release on the server and every client. The game UI is available in English and Japanese. Back up your world before installing or updating. Mining, forestry, and some attacks can change blocks.
For the full in-game recipe reference, open Equipment guide in the Field Controller. Select a device or item and open Materials & recipes. Use the displayed workstation, ingredient positions, and output count.
Questions and feedback
If you get stuck, feel free to ask in the comments! For a bug report, include your Minecraft, loader, and mod versions, and what you did just before it happened. Keep personal details and full logs out of public comments. Gameplay videos, streams, and screenshots are welcome. See License for the terms.
An unofficial Minecraft Java Edition mod by nyma sanford. This project has no affiliation with Mojang or Microsoft.
日本語
こんにちは、にーまです! サバイバルでドローンを作って行き先を指示し、自分で飛んでいく様子を見たくて、このModを作りました。まずは1機。慣れてきたら自分だけのWingを組んで、山を越えさせたり、離れた拠点に物資を届けたり、敵が来たら警備機を出撃させたりしてみてね。
ここでは、最初の1機の作り方から、編隊を組んで任務に出し、Dockに戻して整備するところまで順に紹介します。
最初の1機を作る
- 作業台に鉄インゴット1個、銅インゴット2個、レッドストーンダスト1個、木炭1個を置くと、未焼結モロウ材が2個できます。置く場所は自由です。かまどの上段に未焼結モロウ材、下段に燃料を入れ、右の枠からモロウ合金を取り出します。溶鉱炉でも焼けます。
- 合金で軽量フレームを作ります。基礎制御基板を作ったら、それを使ってフィールドコントローラーを組み立てます。コントローラーを開いて「機器資料」で作りたいものを選び、「材料・レシピを開く」を押すと、材料の置き方を確認できます。基礎制御基板は、四隅に銅インゴット、中央の縦一列にレッドストーンダスト、中段の左右に金塊を置いて作ります。
- 飛行アクチュエーターと標準飛行バッテリーを作り、軽量フレーム、銅インゴット、基礎制御基板と合わせてフィールドドローンユニットを組み立てます。続けて、軽量フレーム、鉄インゴット、ピストン、レッドストーンブロックでドローンDockを作ります。
配備して追従を指示する
- 5 × 5ブロック分の平らな場所を確保し、上に障害物がないところにDockを置きます。Dockのそばでフィールドドローンユニットを手に持ち、右クリックで機体を配備します。
- フィールドコントローラーを持って右クリックします。初期設定では K キーでも開けます。画面左の「現場指揮」→「全機名簿を開く」→「個体」と進み、配備した機体の行を押します。
- 右欄の「別の操作」→「追従」を押します。「追従中」と出たら、Esc で画面を閉じて歩きます。機体が離陸し、ついてきます。
Dockへ戻して補給する
同じ機体を選んで「Dock帰還」を押します。着艦したら、手に何も持たずにDockの中央を右クリックし、補給枠に石炭か木炭を入れます。コントローラーの「状態と関連残量」を開くと、飛行電力の回復を確認できます。もう一度「追従」を指示すれば、配備から帰還、補給、再出発まで一通り完了です。
コントローラーで指示を出す
- 機体だけを先に進ませる。 機体を選び、「移動先を指定」を押します。地図で開けた場所を選び、「移動を指示」を押します。地図は右ドラッグで回転、中ボタンのドラッグで平行移動、ホイールで拡大・縮小できます。照準のアイコンを押すと表示位置が戻ります。
- 指示を変える。 「別の操作」から、プレイヤーのもとへ集めたり、任務を中止したりできます。着艦させるときは「Dock帰還」を使います。受理された指示は画面を閉じても続きます。
- 出発できるか確かめる。 「状態と関連残量」には、飛行電力、機体の耐久、推進・センサー・搭載系統のうち状態が最も悪いもの、装備に応じた残弾・兵装電力・発熱が表示されます。空中で止まっている間も電力を使います。電力の低下や損傷で自動帰還することがあり、帰還前に電力が尽きると回収が必要になります。
- 近くの設備を開く。 コントローラーの「現地操作」でDockやコンテナを開くときは、コントローラーをメインハンドに持ち、対象が見える近い位置から操作します。
複数のドローンでWingを組む
- 機体を増やし、整備に使うDockも用意します。名簿の「個体」で Ctrl を押しながら、まとめたい機体の行をクリックします。
- 「編成・装備」→「編隊」→「新しいWingを編成」と進みます。1つのWingは最大8機です。編成後はWingを選んで「追従」や移動をまとめて指示できます。
- 巡回させるときは、作業機またはそのWingを選び、「任務」→「巡回経路を編集」を開きます。地図で地点を通る順に追加し、「巡回を指示」を押します。機体は先頭機を基準に、互いの間隔を調整しながら自律飛行します。
タクティカルバイザーで状況を見る
タクティカルバイザーを頭に装備すると、移動中も通信がつながっている機体や進行中の作戦をHUDで確認できます。上部中央はボスのHPバー用に空けてあります。対応する強襲ビーコンを構えると、発射前から地上に進入経路の枠が出ます。
装備を交換して任務を選ぶ
モジュールを持ち物に入れ、機体を自分のDockに着艦させます。機体を選び、「装備を変更」→「役割を変更」から使いたい役割を選んで、「選択した装備へ交換」を押します。警備機の兵装を替える場合は「兵装を変更」から同じように交換します。
| 役割 | 任せられること |
|---|---|
| 作業機 | 初期状態の機体です。追従、巡回、通信の中継に使えます。 |
| 偵察機 | 指定地域を調べ、遠方映像や検知した対象の情報を届けます。 |
| 整備機 | 指定範囲の採掘、掘削、伐採を行います。 |
| 輸送機 | 容器間の荷物の運搬や、Dockへの補給を行います。 |
| 回収機 | 電力切れで落ちた機体を救助し、複数機でコンテナ本体を運びます。 |
| 警備機 | 地点を警戒し、敵への攻撃やビーコン作戦に参加します。 |
偵察と通信メッシュ
- 偵察機を選び、「任務」→「偵察地域へ展開」で地図上の行き先を指定します。地図にまだ出ていない場所は「未偵察地域を座標で指定」からX・Zを入力します。最後に「偵察機を展開」を押します。
- 機体が現地に着いたら、「この偵察機の地域映像」を開きます。目のアイコンから「遠方映像」を開くこともできます。現在の映像か、最後に受信した映像かを画面で確認します。
- 遠方の機体に指示が届かないときは、補給済みの作業機を選び、「任務」→「メッシュ」→「メッシュを自動展開」を押します。中継機が所定の位置に着いたら、遠方の機体を選び直して元の指示を送ります。まだ届かない場合は、補給済みの作業機を追加するか、プレイヤーが対象に近づきます。使い終わったら中継機を選んで「メッシュを撤収」を押します。
採掘、掘削、伐採を任せる
- コントローラーから作業を指示。整備機を選び、「任務」から「鉱脈採掘」、「範囲掘削」、「伐採」のいずれかを開きます。地図で中心を決め、「作業範囲を変更」で広さを調整してから指示を送ります。伐採では、指示を送る前に切り替えボタンで「伐採のみ」か「伐採+植え直し」を選びます。整備機は飛行中でも、ほかのブロックに遮られていない木を切れます。
- 立体作業マーカーで掘削。マーカーを持ち、空中を右クリックして掘削に切り替えます。掘りたい範囲の角にあるブロックを右クリックし、次に反対側の角を右クリックします。2点の位置で横幅・奥行き・高さが決まります。反対側の角を高くすると始点より上を、低くすると始点より下を含められます。表示された寸法を確認し、空中を右クリックして開始します。指定をやり直すには、しゃがみながら右クリックします。
- 現地で鉱脈採掘・伐採を指定。マーカーで作業を選び、中心と外周のブロックを順に右クリックします。鉱脈採掘では、空中を右クリックすると深さを変えられます。最後に中心をもう一度右クリックして開始します。マーカーで伐採を指定すると、植え直しまで行います。
Dockに入れる補給品
着艦した機体に補給するときは、目的に合う品をDockの補給枠に入れます。飛行バッテリーは機体の蓄電容量を決める装備です。容量は標準1,000、強化1,800、高密度3,000です。交換するときはバッテリーを持って、着艦中の機体を右クリックします。減った飛行電力は、表の燃料で回復します。
| 回復させたいもの | Dockに入れる品 |
|---|---|
| 飛行電力 | 石炭、木炭、推進パワーセル |
| 機体の耐久・各系統 | 銅インゴット、鉄インゴット、モロウ合金 |
| 機関砲の残弾 | 機関砲弾倉 |
| ミサイルの残弾 | マイクロミサイル補給パック |
| レーザーの兵装電力 | 兵装電力セル。発熱が高いときは冷却を待ちます。 |
系統整備のために自動帰投した機体は、整備が済むまでDockで待機し、その後に元の任務へ戻ります。待機が続くときは、Dockの補給枠に整備素材が入っているか確認します。
倉庫からDockへ自動で届ける
チェストに石炭か木炭を入れ、燃料が足りないDockと、飛行電力に余裕のある空き輸送機を用意します。チェストの近くでコントローラーを開き、「補給」→「補給元を管理」からチェストを選んで「登録」を押します。Dockに不足が出ると、空いている輸送機が登録済みのチェストから運びます。Dockを開いて到着を確認します。届かないときは、チェストの登録と在庫、輸送機が空いているか、Dockの補給枠に空きがあるかを確認します。
中身を運ぶ、コンテナごと運ぶ
- 中身を運ぶ。 積込元の容器に荷物を入れ、届け先にも容器を置きます。輸送機を選び、「輸送」→「中身を輸送 / 元と先を選択」を開きます。「積込元」と「搬送先」を指定し、「輸送経路を確定」を押します。機体が待機している場合は、元の荷物を補充するか、届け先に空きを作ります。
- コンテナごと運ぶ。 母艦カーゴコンテナを置き、飛行電力が各35%以上の空き回収機を4機用意します。各機の搭載系統も整備しておきます。「輸送」→「コンテナ本体を運ぶ」を開き、元の地図でコンテナ、先の地図で障害物のない地面を選びます。2地点を確認して「4機で搬送開始」を押します。着いたらコンテナを開いて中身を確認します。
電力切れの機体を救助する・機体を格納する
救助に備えて、充電済みの回収機を空けておき、Dockの周囲を片付けて燃料と整備素材を入れておきます。自分の機体が電力切れで落ちると、出動できる回収機が自動で吊り上げ、整備を受けられるDockまで運びます。
木の間や壁際からの回収に備えて、飛行電力が35%以上の整備機も1機空けておきます。進路がふさがっているときは、整備機が回収機の進入から吊り上げ、離脱までに必要な通路を開けます。吊った機体が揺れる分の空間も確保します。保護されたブロックが進路をふさいでいる場合は、回収機が通れるように手作業で通路を確保します。
機体を持ち運ぶときは、対象を選び、「編成・装備」→「格納」→「選択機を格納」と進みます。確認が出たら同じボタンをもう一度押します。サバイバルでは機体がフィールドドローンユニットに戻り、モジュール、標準以外の飛行バッテリー、積荷も別々に返ります。再配備時は作業機として出るので、使いたい役割のモジュールを取り付け直します。
警備機1機で敵を迎え撃つ
- Securityモジュール、機関砲モジュール、機関砲弾倉を作ります。着艦中の機体を警備機に変更し、機関砲を装備します。Dockに飛行用の燃料と機関砲弾倉を入れます。
- 警備機を選び、「任務」→「地点警戒」を開きます。地図で開けた場所を選び、警戒範囲を確認して指示を送ります。地図に出ている敵を1体指定するときは、「検出済みの敵を攻撃」からマーカーを選びます。
- 機関砲とレーザーは、敵までの射線が通ったときに撃ちます。偵察機が敵を検知していても、撃てる位置にたどり着けない場合は攻撃を打ち切ることがあります。戦闘後はDockへ戻して補給します。
ミサイルモジュールを装備すると、破壊できる遮蔽物の最初の連続した層を、着弾した側から最大5ブロックまで掘り進めます。壁の間に空洞がある場合は、そこへ出た時点で爆発します。爆風で周囲のブロックも壊れるため、残したい建物の近くではミサイルの使用を避けます。
強襲ビーコンで支援を要請する
- 作戦に合わせて、警備機に飛行電力、兵装、弾薬を用意します。新品の強襲ビーコンランチャーには機銃掃射が3発入っています。
- ランチャーをメインハンドに持ち、攻撃地点のブロックを狙って左クリックします。バイザーを装備している場合、機銃掃射・近接航空支援・プラズマ掃討では、発射前から予測着弾点を基準とした四角い進入経路の枠が出ます。着弾後は参加機に合わせて枠が更新されます。
- ビーコンが付くと、出撃できる警備機が集まり、進入を始めます。参加機が来ないときは、ビーコンが狙った場所に付いたかを見てから、機体の電力、耐久、装備、残弾、発熱を確認します。
- 弾を入れ替えるときは、ランチャーを持ってしゃがみ右クリックし、残弾を抜きます。使いたい弾をオフハンドに持ち、メインハンドのランチャーを立ったまま右クリックして装填します。アイテム名の「次」で作戦を確認できます。最大3発で、入れた順に発射します。
| 作戦 | 攻撃内容 | 参加機に用意する補給 | レシピの上段中央に置く材料 |
|---|---|---|---|
| 機銃掃射 | 機関砲で地上を掃射 | 機関砲弾を満載 | レッドストーンダスト |
| 近接航空支援 | 機関砲とミサイルで攻撃 | 機関砲弾80%以上、ミサイル33発以上 | 鉄インゴット |
| プラズマ掃討 | ミサイルとプラズマ照射で攻撃 | ミサイル36発以上、兵装電力1,000以上。容量が1,000未満なら満充電。 | ネザークォーツ |
| 収束殲滅 | 複数機で照射を集めて球を作る | ミサイルを満載し、兵装電力を満充電 | 小はグロウストーンダスト、中はアメジストの欠片、大はブレイズパウダー、極大は残響の欠片、無制限はネザースター |
ビーコン弾の作業台レシピは、四隅に鉄塊、中央に基礎制御基板、中段の左右と下段の中央にレッドストーンダストを置きます。上段中央の材料で8種類の作戦を作り分けられます。どのレシピでも一度に3発できます。参加する機体は耐久、各系統、飛行電力が90%以上、発熱が20%以下である必要があります。遠い地点への作戦では、往復や攻撃に使う飛行電力も見込んで判定されます。初回は建物から離れた場所で機銃掃射を試すと流れをつかみやすいです。
対応環境とレシピの確認
| Minecraft Java Edition | ローダー | Modバージョン | Java | 検証済みのローダーと依存Mod |
|---|---|---|---|---|
| 26.2 | Fabric | 0.20.7 | 25 | Fabric Loader 0.19.3 / Fabric API 0.156.0+26.2 |
| 1.21.1 | Forge | 0.20.7 | 21 | Forge 52.1.20 |
| 1.21.1 | NeoForge | 0.20.7 | 21 | NeoForge 21.1.259 |
| 1.20.1 | Forge | 0.20.7 | 21 | Forge 47.4.28 |
| 1.20.1 | NeoForge | 0.20.7 | 21 | NeoForge 47.1.106 |
Filesから環境に合うJARをダウンロードし、起動構成の mods フォルダーに入れます。Fabric版には、Minecraft 26.2対応のFabric APIも必要です。マルチプレイでは、サーバーと参加者全員でMinecraftのバージョン、ローダーの種類、Modの版をそろえてください。ゲーム内の表示は日本語と英語に対応しています。採掘・伐採や一部の攻撃で地形が変わるので、導入・更新前にワールドをバックアップしてください。
作り方を詳しく確認するときは、フィールドコントローラーの「機器資料」で機器を選び、「材料・レシピを開く」を押してください。必要な設備、材料の配置、完成数をゲーム内で確認できます。
質問・感想
使い方がわからなかったら、気軽にコメントで聞いてね! 不具合の場合は、Minecraft・ローダー・Modのバージョンと、直前にした操作を教えてもらえると助かります。公開コメントへの個人情報やログ全文の掲載はお控えください。プレイ動画、配信、スクリーンショットの公開も歓迎です。利用条件はLicenseをご確認ください。
nyma sanfordが制作したMinecraft Java Edition用の非公式Modです。MojangおよびMicrosoftとの提携はありません。
Morrowgear: Drone Command Team