LittleVecX
- By
An addon that gives LittleTiles the precision, animations, and elevators 1.12.2 always lacked. Built by a builder, for builders.
LittleVecX 1.12.2 
LittleVecX 1.12.2 is an addon for LittleTiles 1.12.2, built through its API, that extends LittleTiles' functionality for the old game version and adds several original ideas along with some reimplementations of features from newer versions of LittleTiles. At the same time, this version serves as a showcase for part of the ideas behind LittleVecX 1.21.1 — a larger, more polished mod for newer LittleTiles versions that, on top of its core features, adds support for building at any angle and brings together many ideas for building, along with various other new features and improvements.
LittleVecX is developed with support from the KharkivTiles project — an effort to recreate a real city in Minecraft at a 1:1 scale using LittleTiles. In the future, the recreated real-world locations will be explorable on KharkivTiles' themed RP server.
The addon requires Forge 14.23.5.2855, along with CreativeCore v1.10.71 and LittleTiles v1.5.87.
What does LittleVecX 1.12.2 offer?
Building and configuration quality-of-life
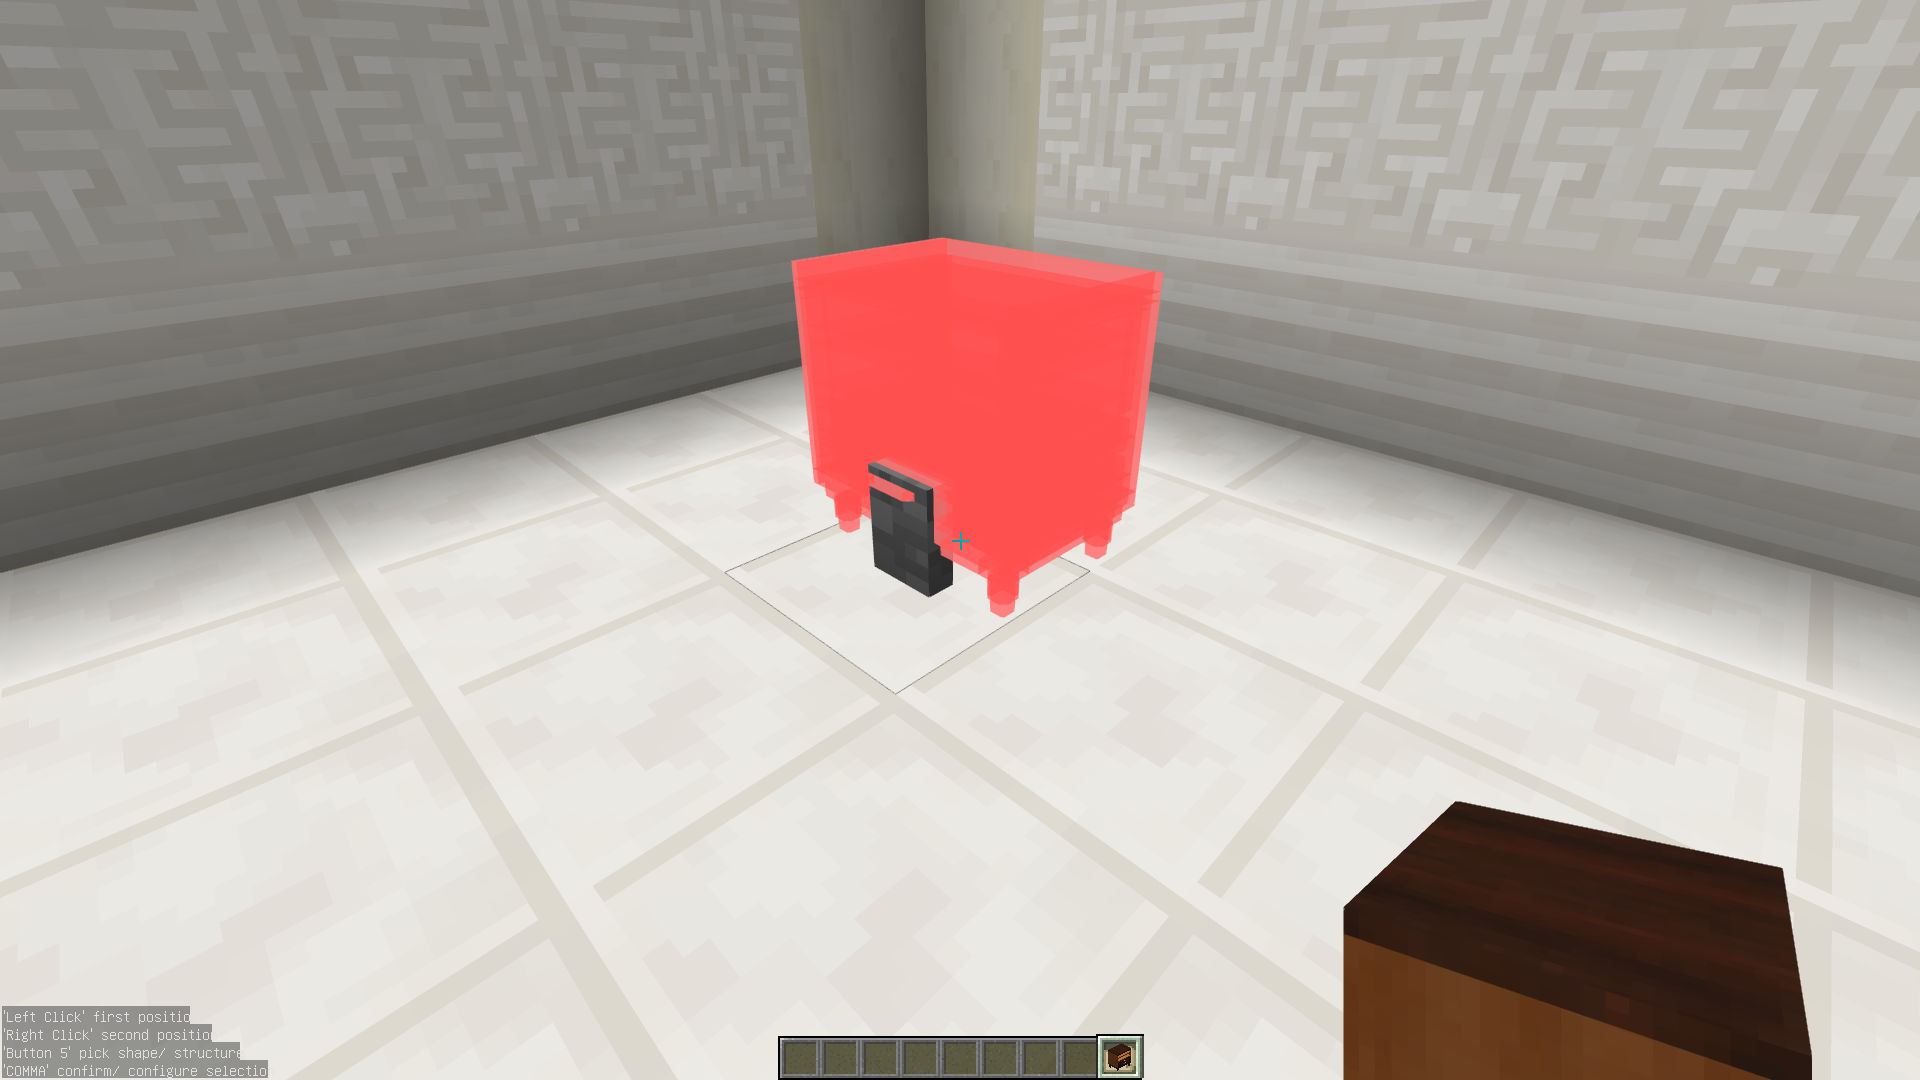
- Red placement preview. When a structure can't be placed, its preview turns red. This makes it immediately obvious, before you even attempt placement, that a structure can't go there.
- Search in the signal configuration screen. A magnifying-glass button opens a search over the available inputs: type part of a name and add the signal you need straight into the expression. Handy in large builds with a long list of signals.

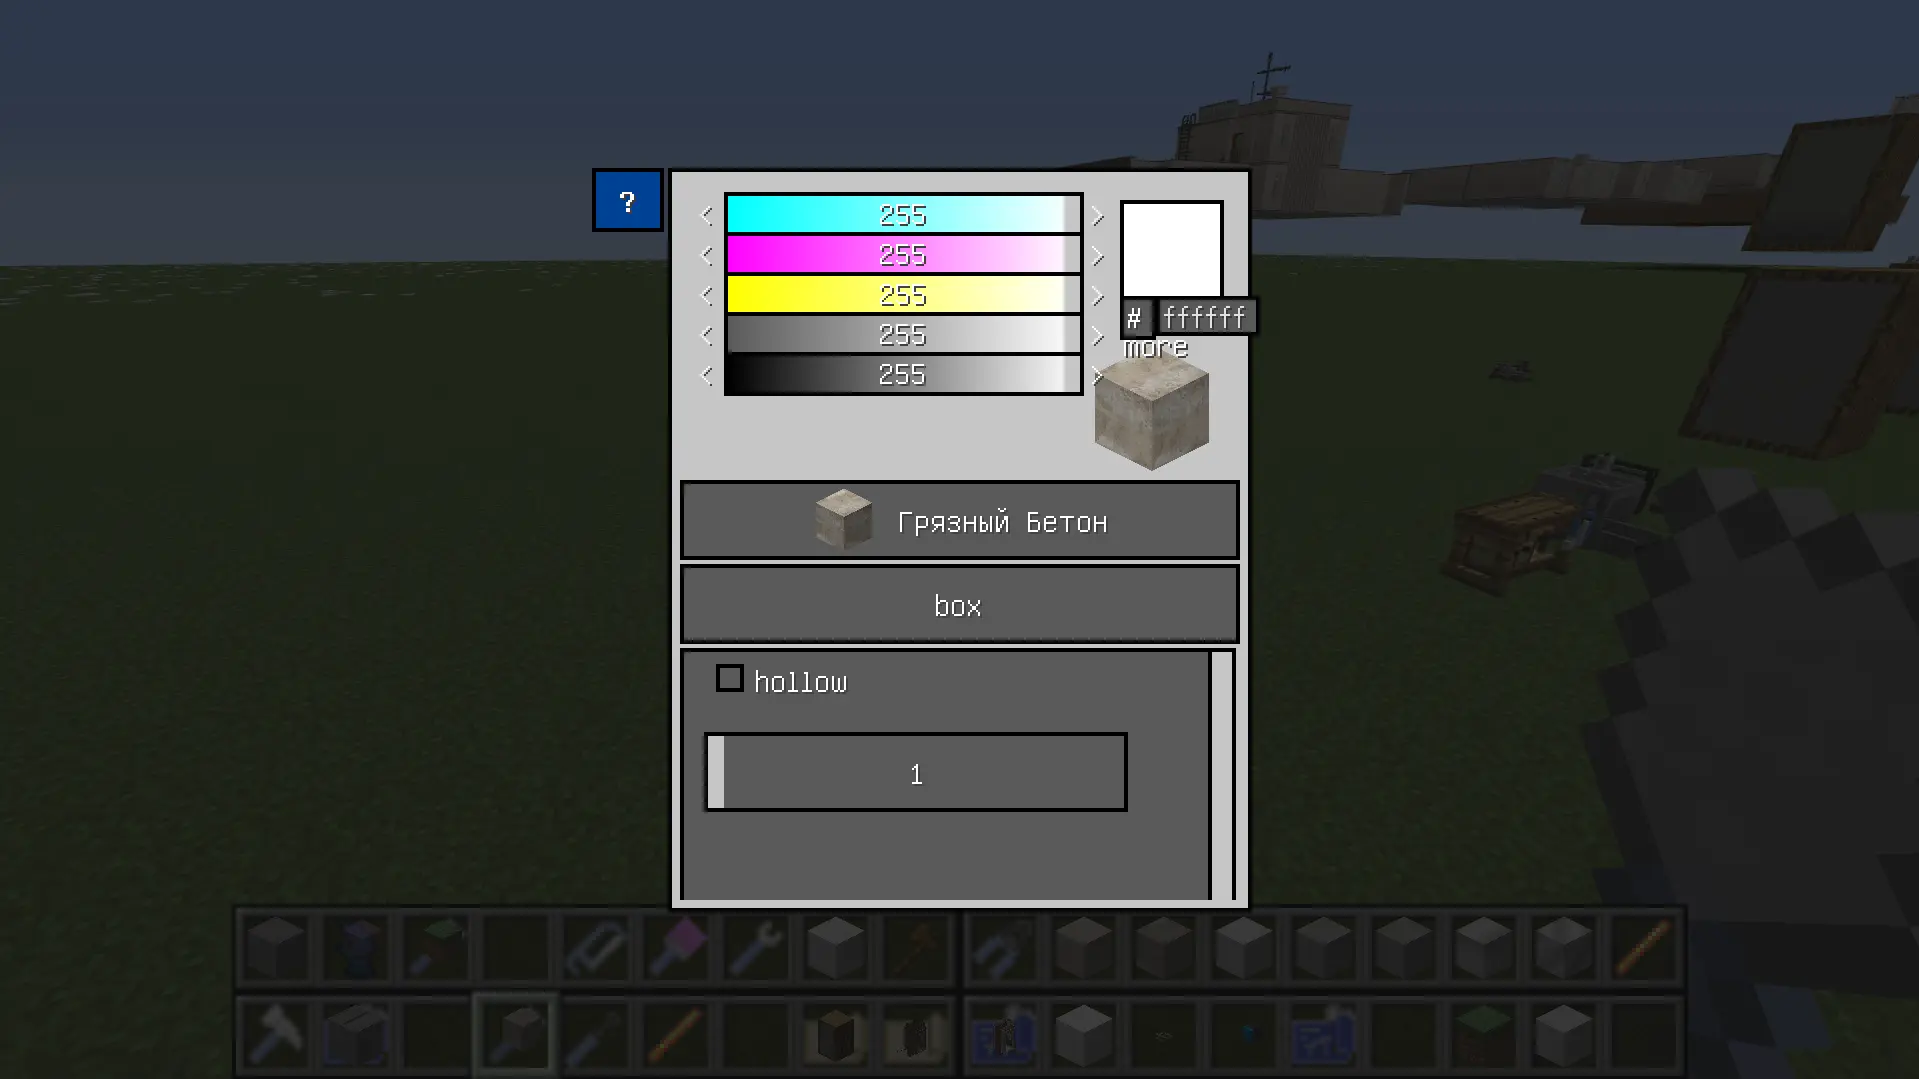
- HEX color input. HEX was backported and works the same way as in newer versions of LittleTiles. The # button opens a HEX field in almost every color picker. Enter or paste a six-digit RGB code to change the color instantly, or copy the code to use the same color in another tool.
 !
! - Custom zoom on ALT + mouse wheel. Zooms in without the "floating" typical of OptiFine's zoom, and scrolling the wheel lets you adjust the zoom distance — letting you build and work with very small tiles more precisely.
Industrial Recipe 
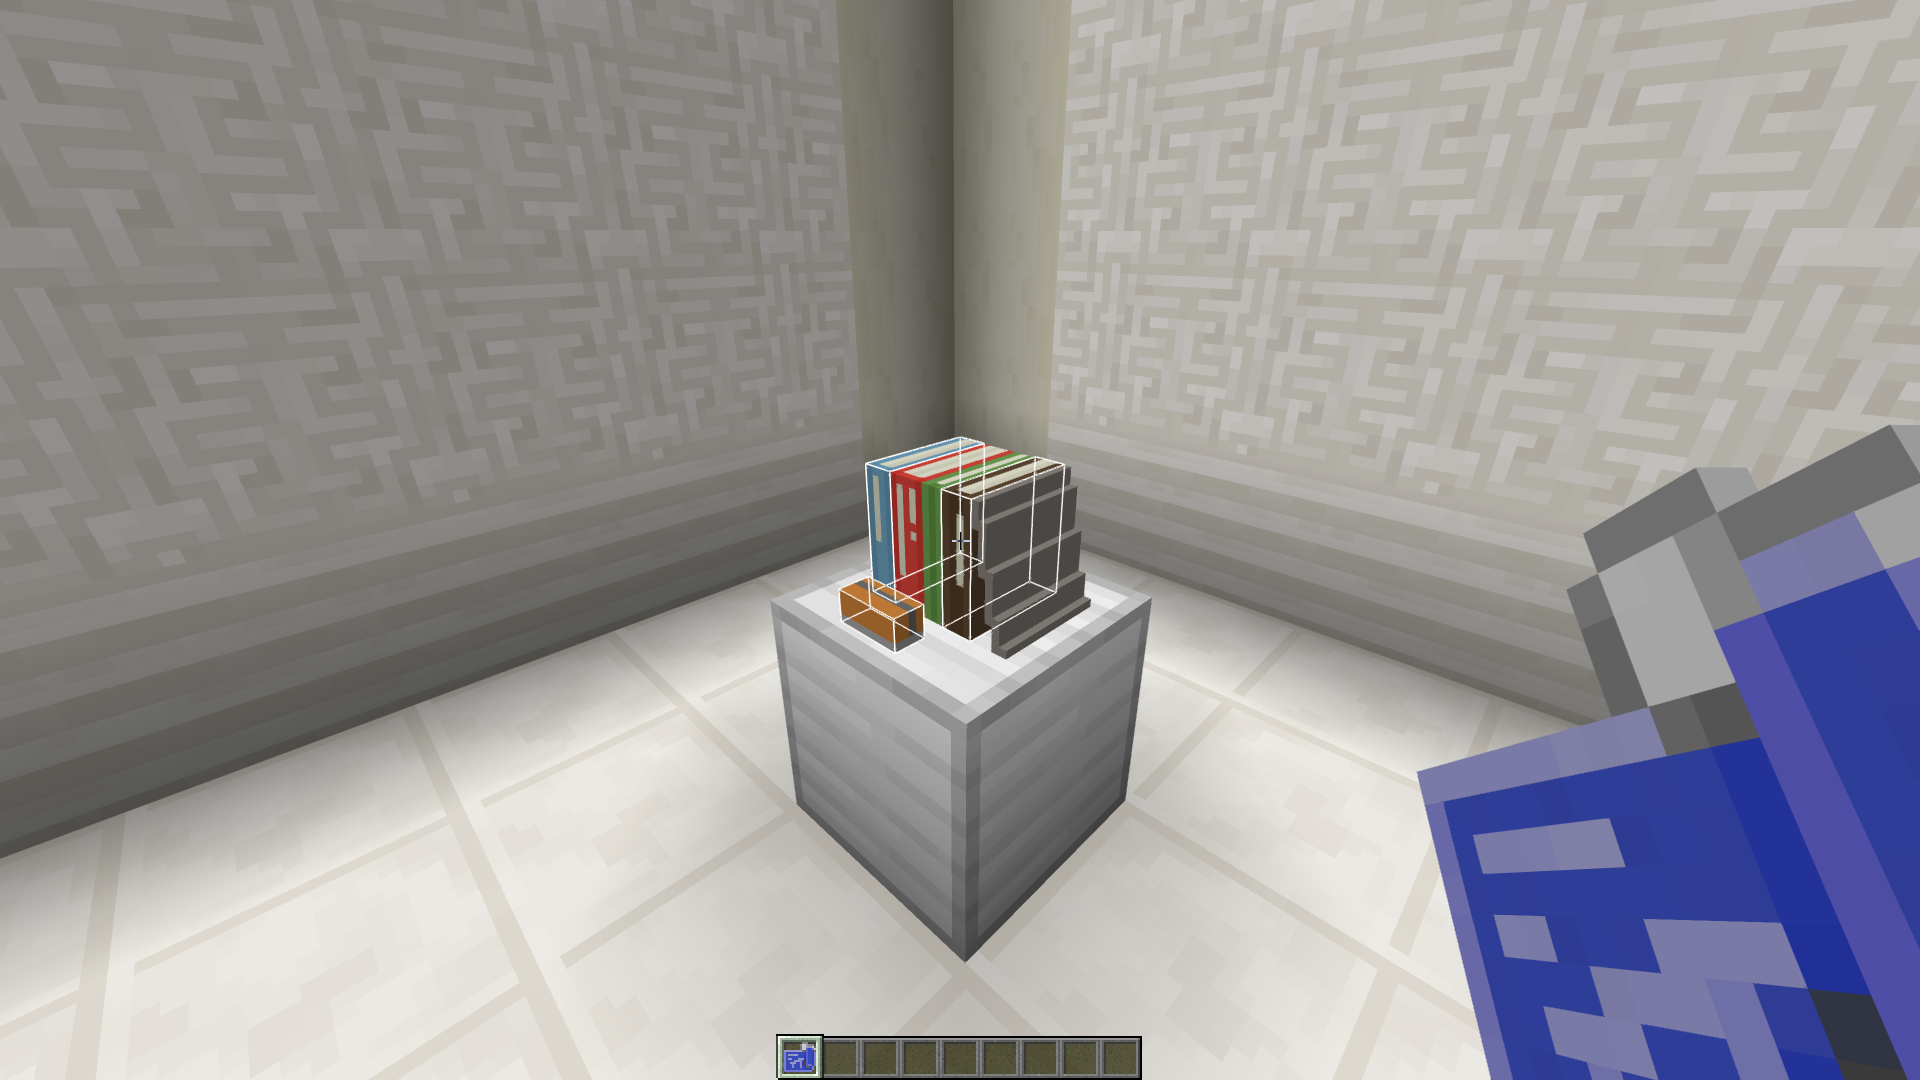
A separate item in LittleTiles' creative tab that adds multi-selection and combines it with the Extract selection feature from newer LittleTiles versions. The recipe lets you select several areas at once on a small grid and store everything selected inside the recipe for editing. For example, when decorating an interior, you can select three identical shelves in different corners of a room in one motion and copy them all in a single pass, instead of handling each one separately.
- [ — copy the current selection into the recipe and immediately place the preview for placement exactly where the selection was.
- ] — places the preview the same way as [, but moves the content instead of copying it, removing the original.
- X — delete the contents (tiles) inside the current selections.
- Shift + Left Click — clears all areas by default.
- Z / Y — undo the last selected area / redo it.
- M — with an existing area, use the arrow keys to fine-tune the position of the last selection point in the world. This is especially useful for fast building: previously in 1.12.2 you had to copy small details into a recipe, place them, clean up anything extra, copy again, and only then place the result. Now you can select several small objects at once and copy or move what you need with a single key.
Z and Y work here without Ctrl — Z undoes the last selected area, Y can redo it, and these keys only apply to the Industrial Recipe's own selection areas while it's in hand.
The Industrial Recipe also comes with a built-in "Industrial Screwdriver" with extended filters — by default it opens with the V key while the recipe is in hand, and it uses the same selection areas as the recipe.
Industrial Screwdriver
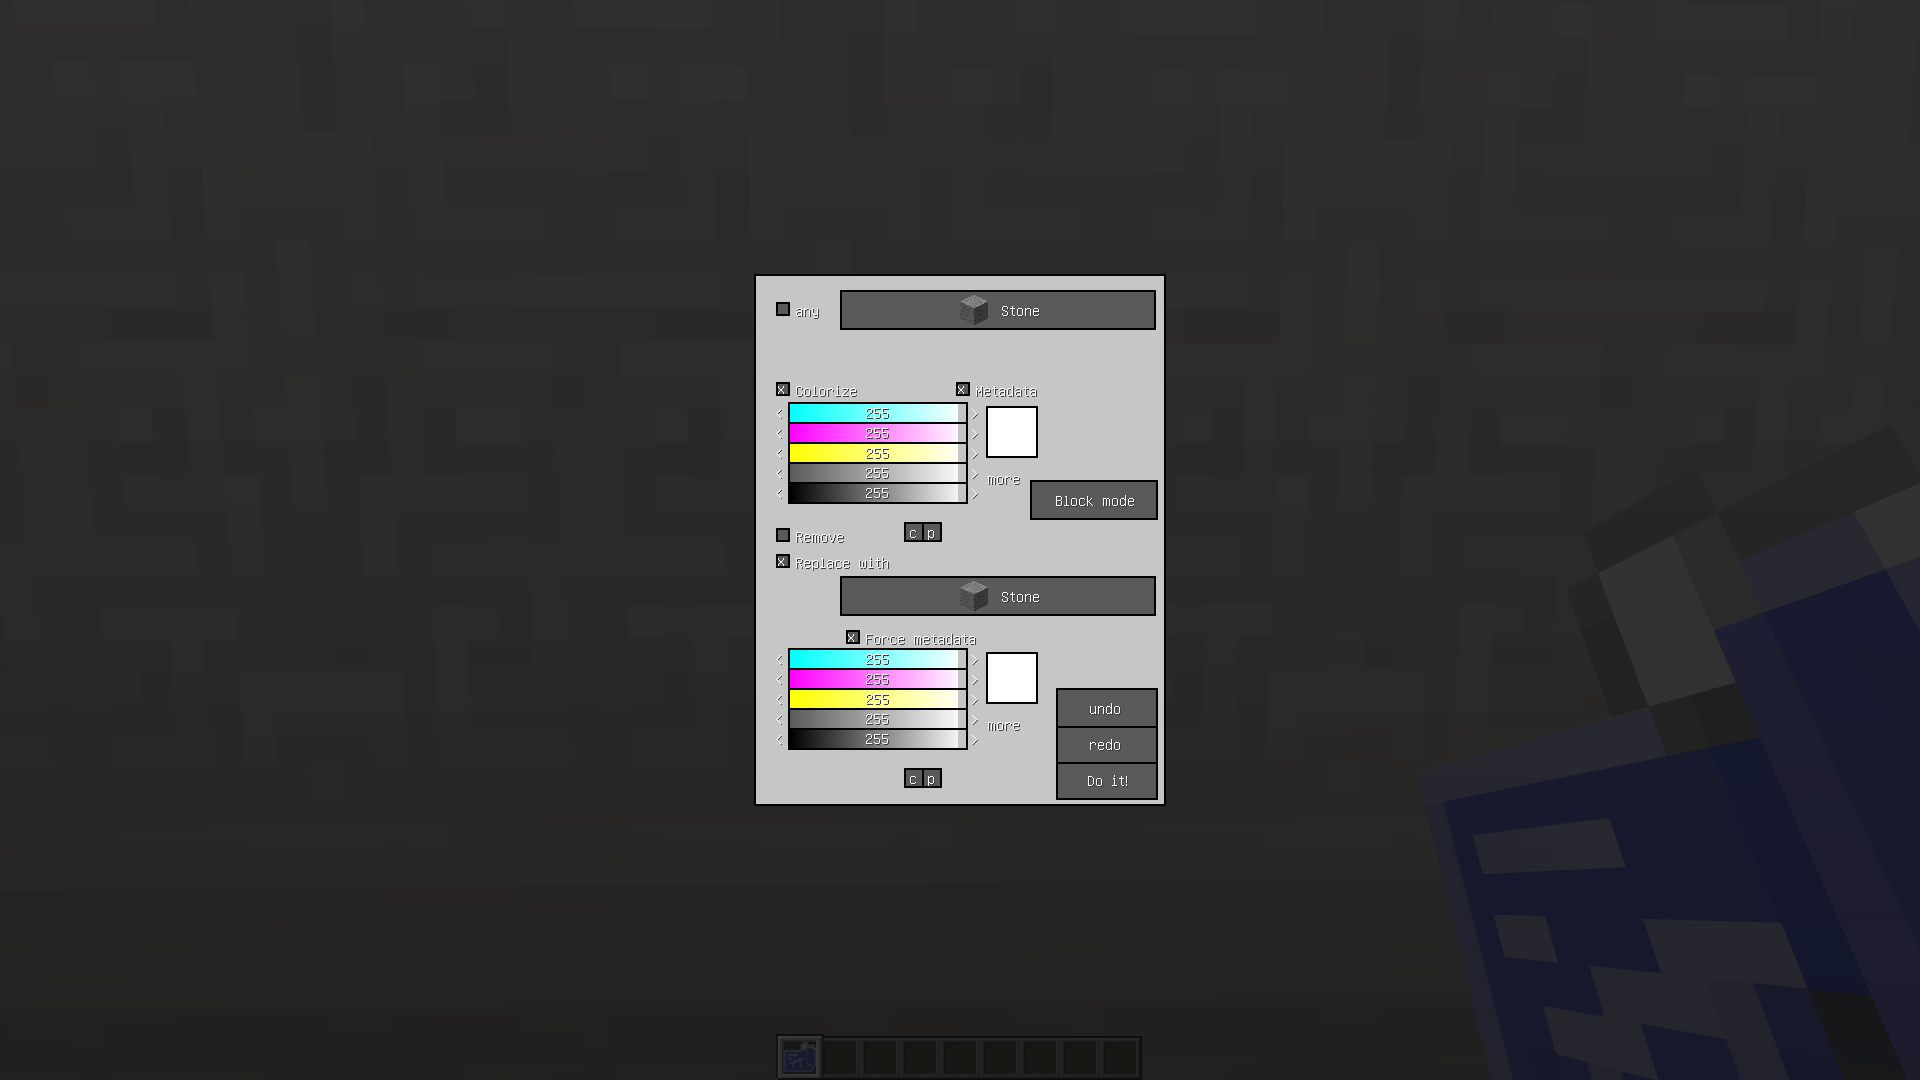
This tool doesn't change the regular LittleTiles 1.12.2 screwdriver. Instead, a separate "Industrial Screwdriver" is added — essentially the same screwdriver, but with additional color filters. Paired with micro-grid multi-selection, it lets you change colors or replace tiles far more precisely. The tool also spreads processing of heavy selections across several ticks, so the game doesn't stutter when handling a heavy operation in a single tick. The screwdriver's processing speed can be tuned in the config: screwdriverBlocksPerTick, screwdriverBoxesPerTick, etc.
Pliers 
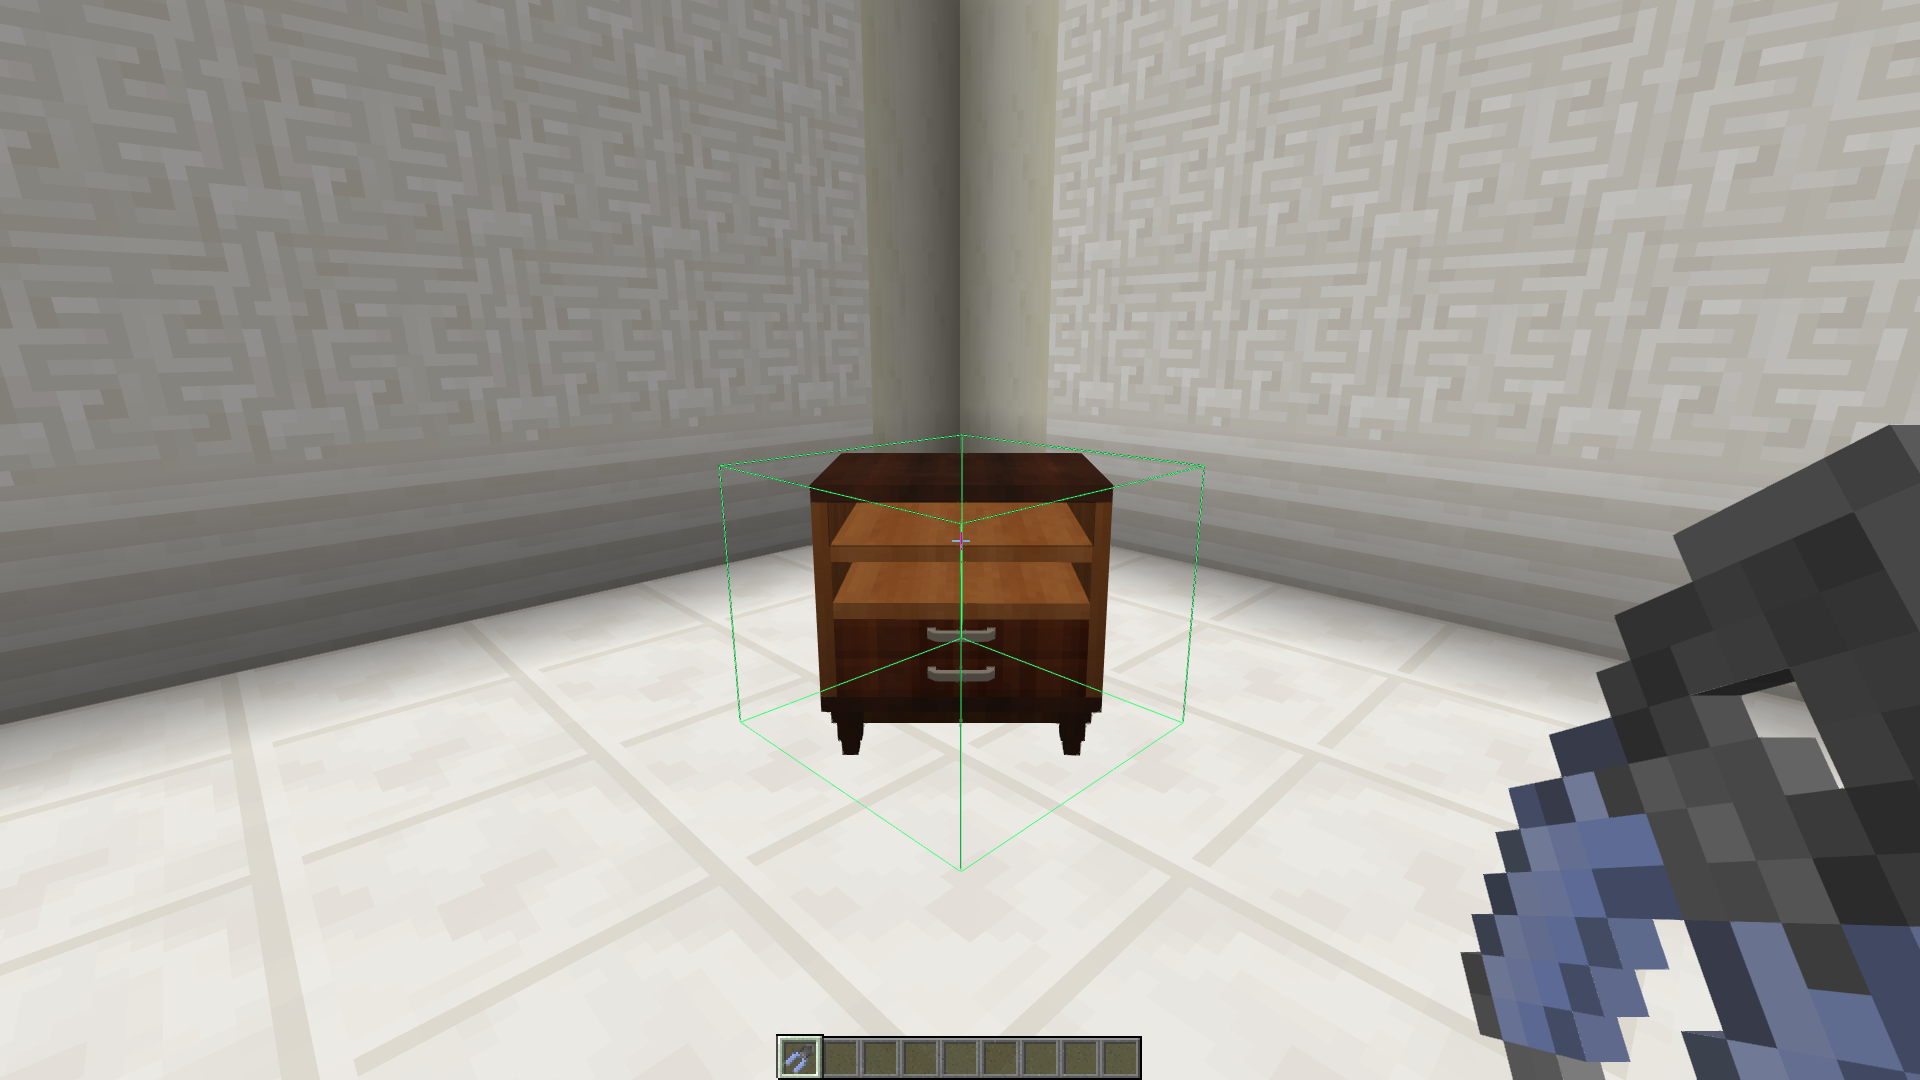
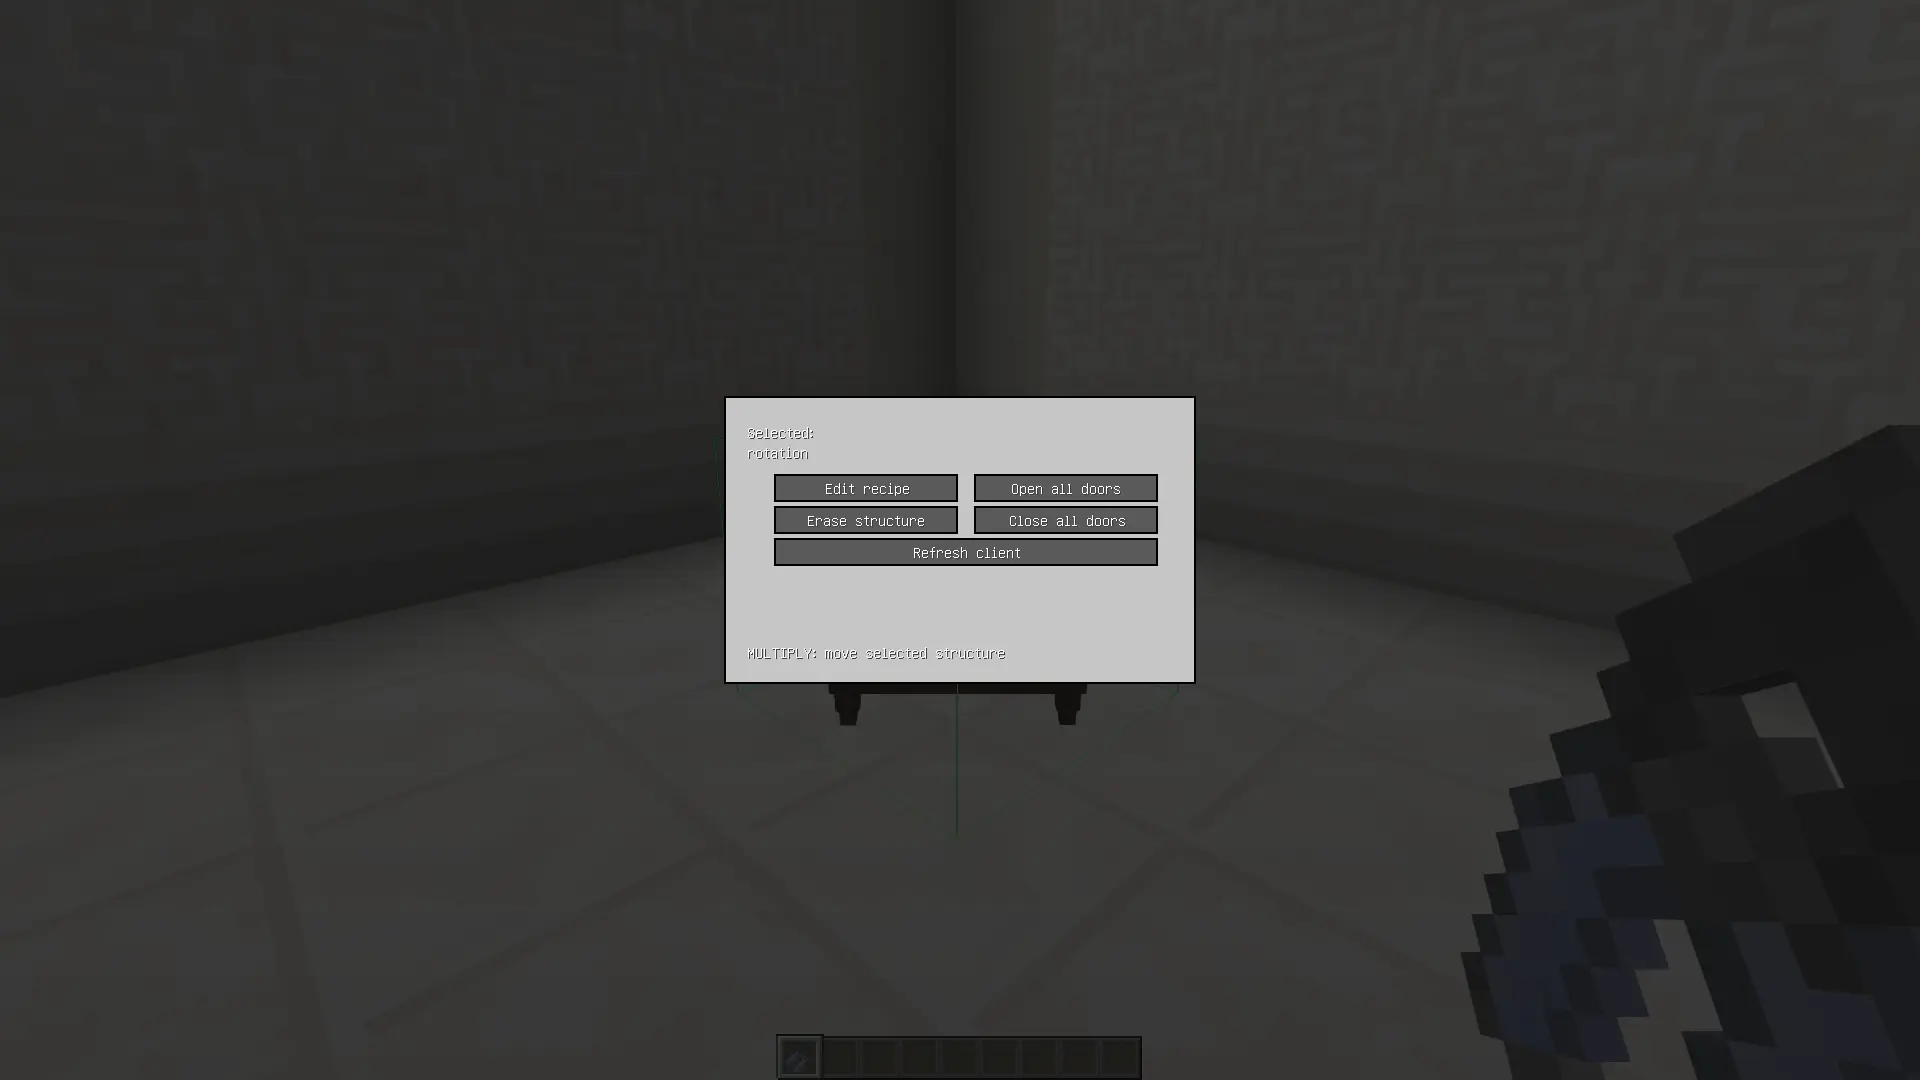
Mainly used for configuring and positioning rotated structures. Right-click a rotated structure to select it for editing, then press C to open its settings menu, or M to move it with the arrow keys. For any other structure with its own settings (animations, fixed structures), right-clicking it with the Pliers opens its recipe and lets you configure the structure directly in the world, even after it's been placed.
Activator 
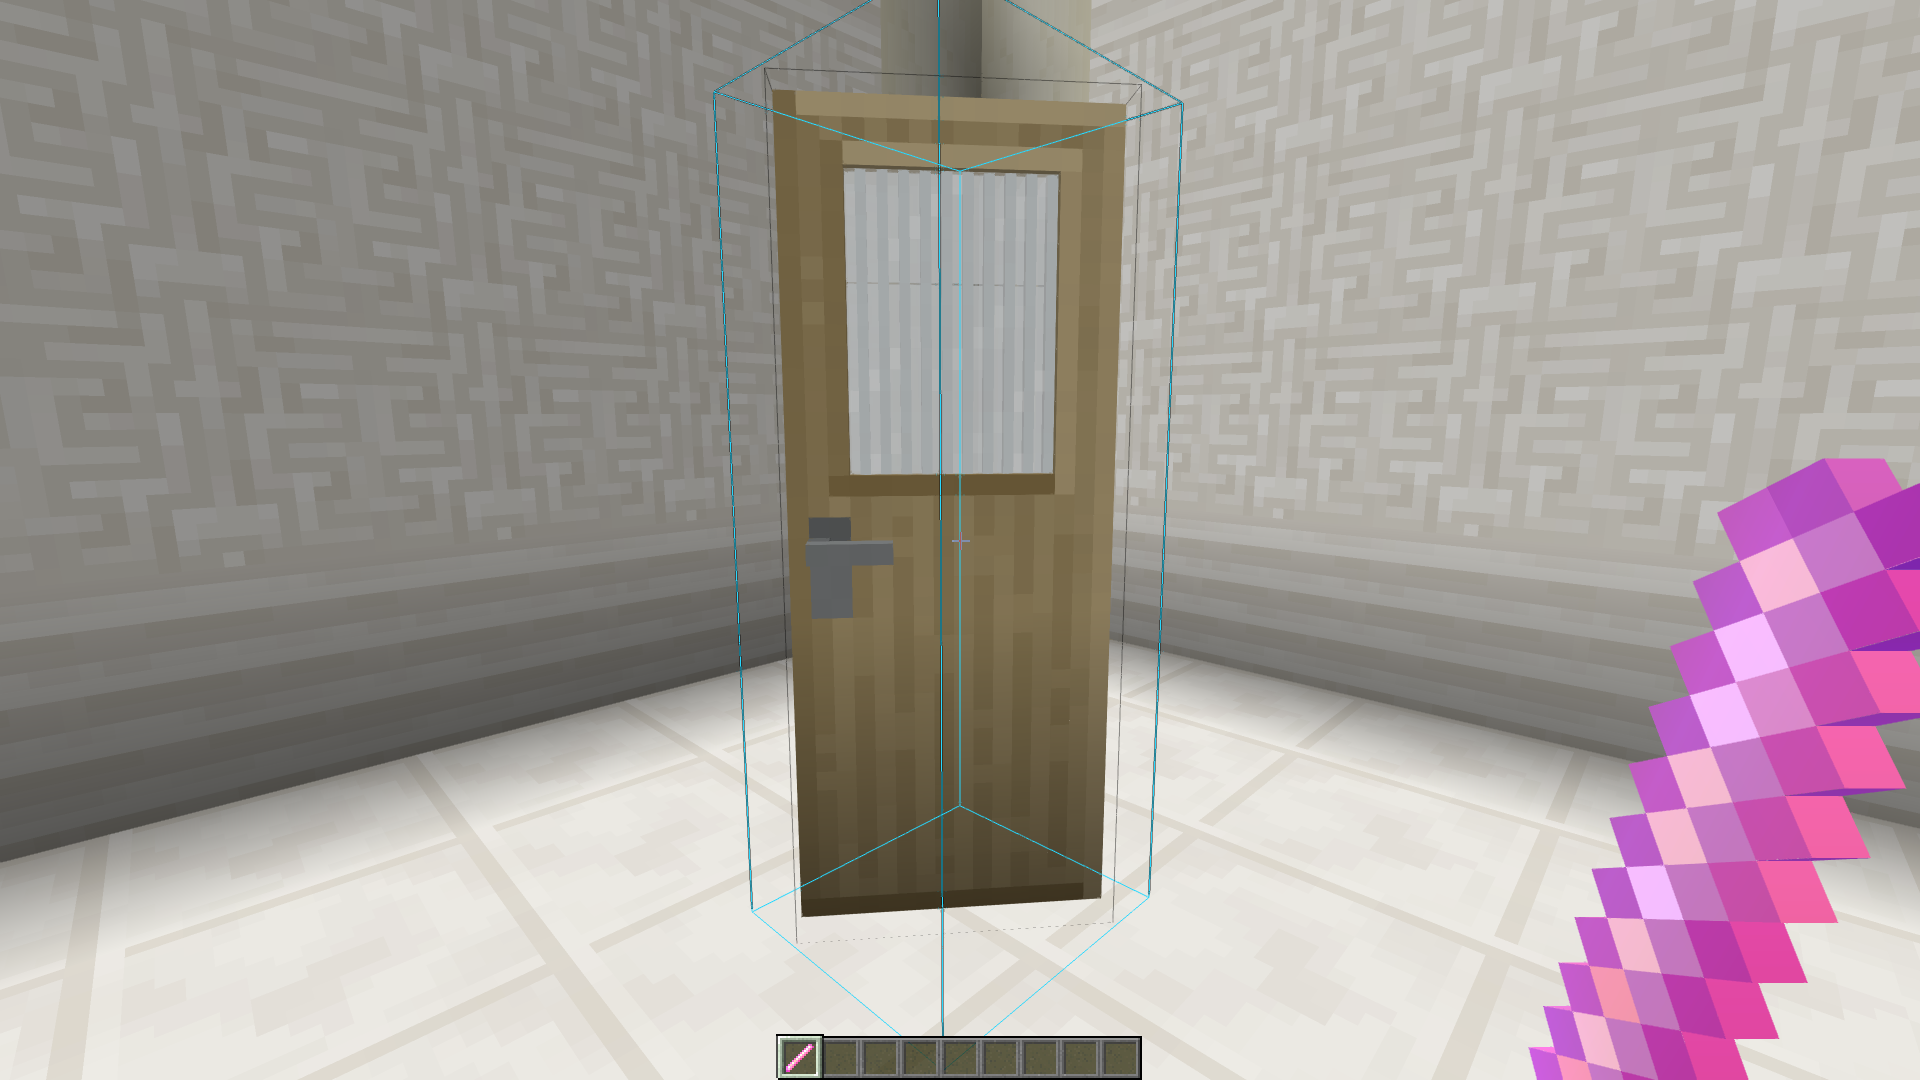
Used to activate and deactivate animations that have right-click activation disabled in their settings. The Activator is mainly meant for debugging and testing animations in complex setups — with it, you don't need to place a lever or button alongside the animation just to test it quickly.
Structures built on LittleTiles' animation system (Animator)
Rotation
A separate recipe for turning a prepared build into a rotating structure with a chosen axis. Configured the same way as an advanced door.
When placing a structure with the Industrial Recipe, you can rotate the placement preview to see exactly how the structure will be positioned.
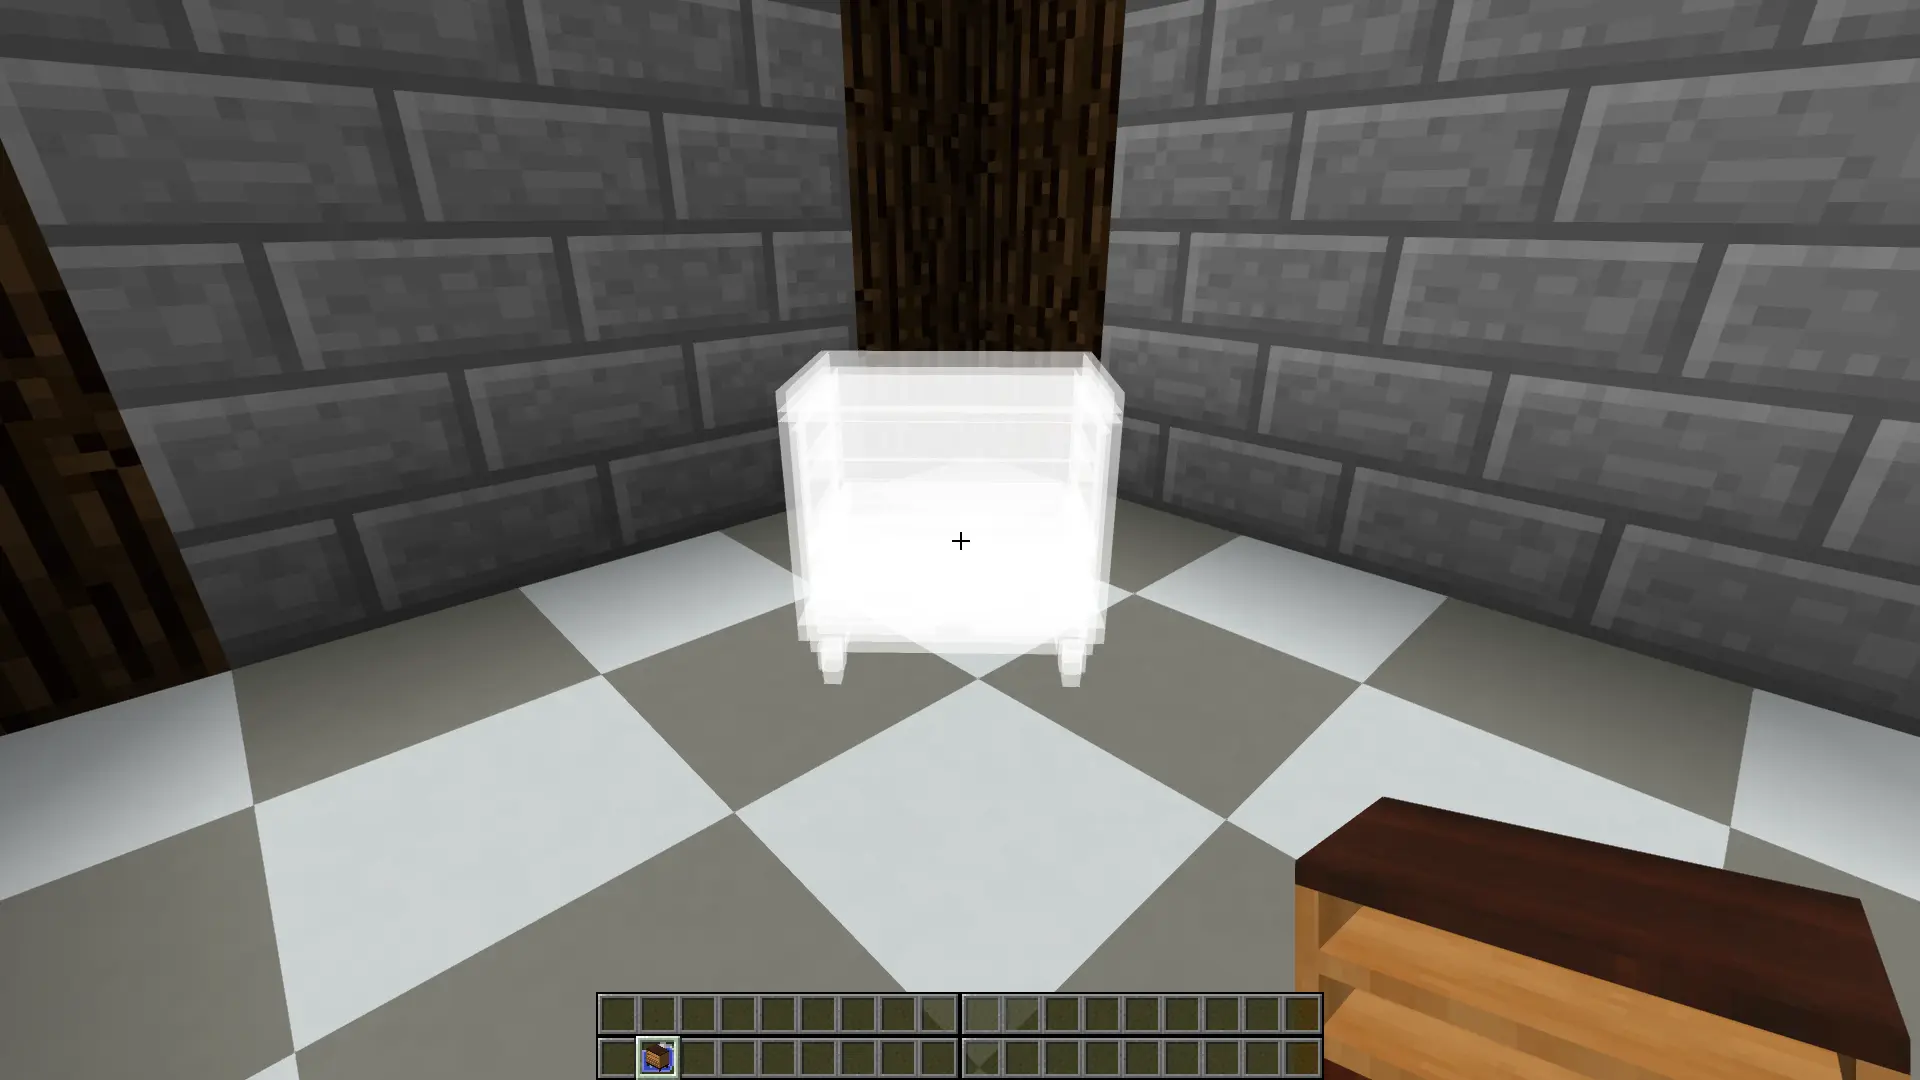 With it you can place a structure that's always rotated to an angle you set — for example, a weather vane, a pointer arrow, or an angled sign. Works for small decorations and even for an entire rotated house, though be warned — that's more likely to cause problems than be worth it.
Multi-animation
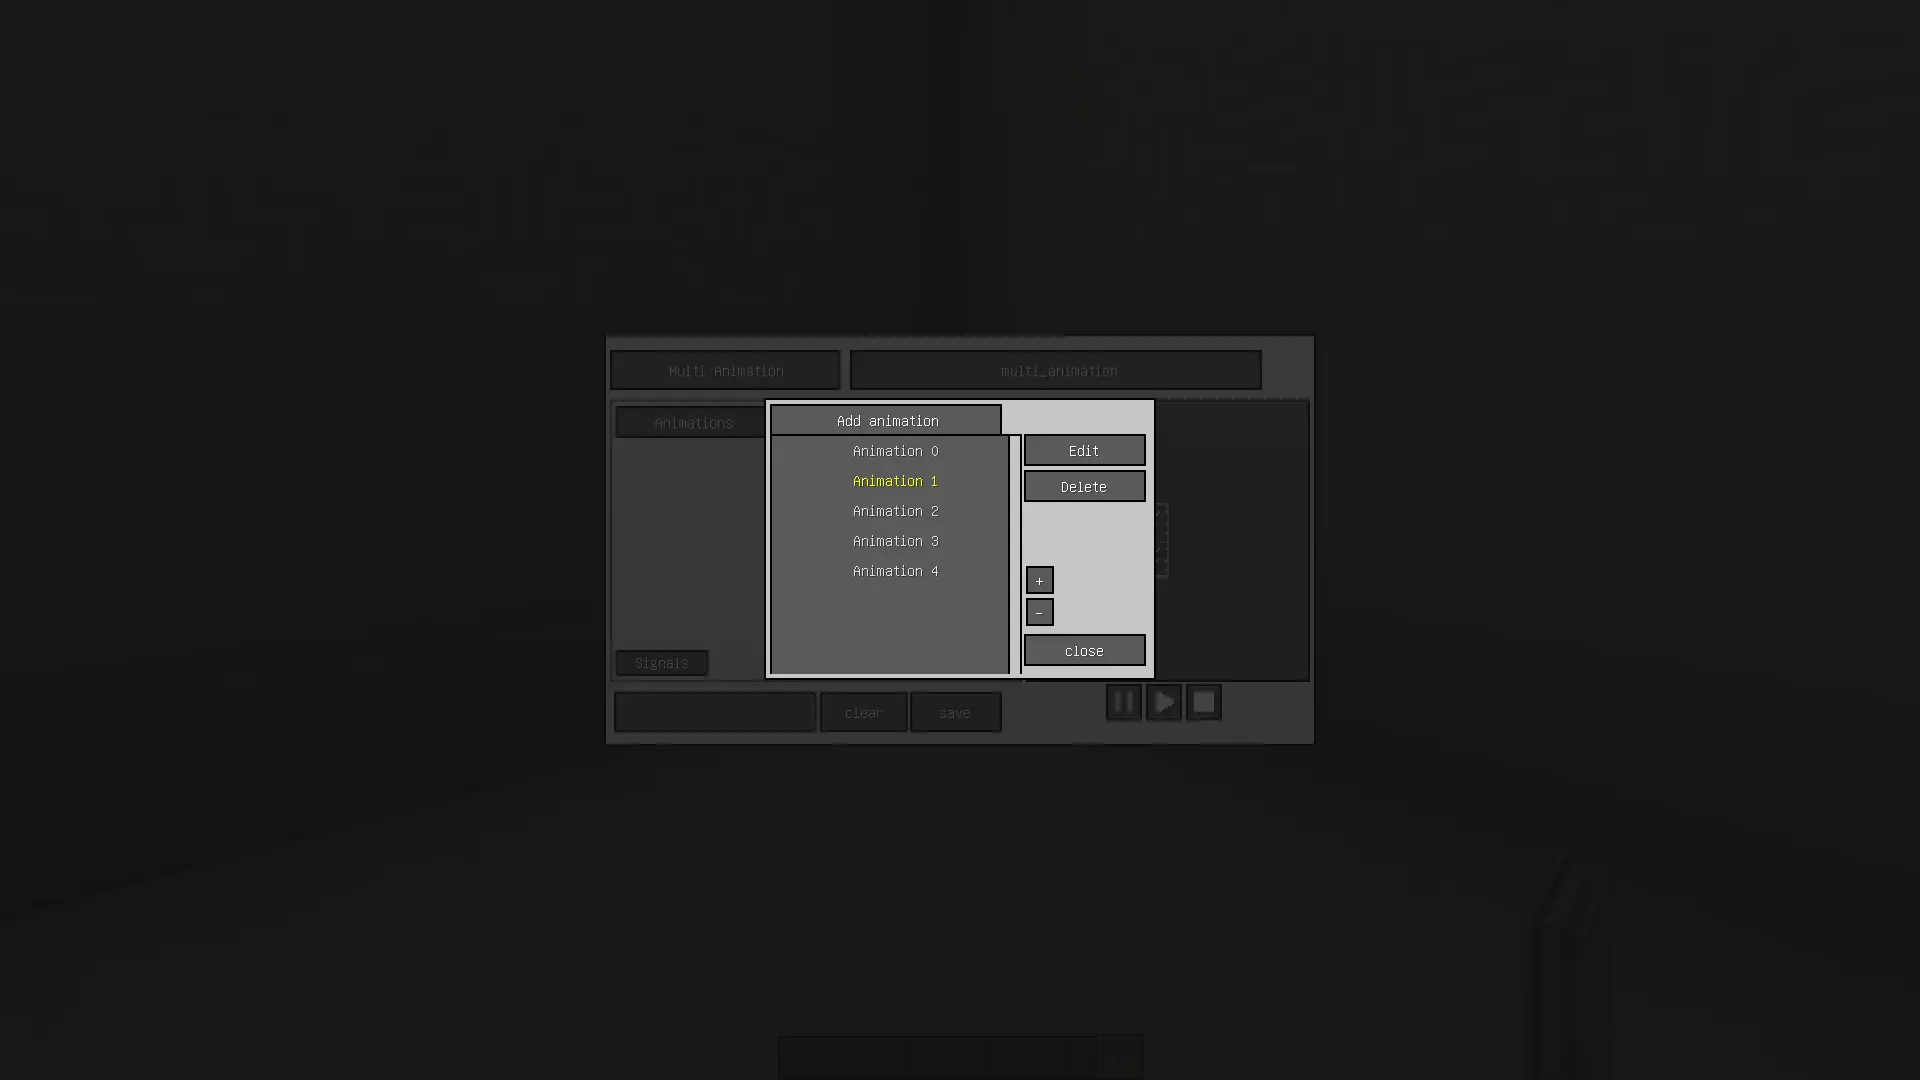
Multi-animations let you activate an animation with different scenarios and add several animations to a single structure at once. For example, you could make a window that, besides its main opening motion, can also tilt open for ventilation — a style especially common in Europe.
Multi-animation has a convenient interface for configuring each individual animation — the recipe lets you set up every scenario, down to a separate axis for each animation.
Activating a specific animation can be bound to right-click, Shift + right-click, or disabled entirely in favor of signal control. The structure exposes indexed ports animation_0, animation_1, … . Their number is configurable.
Overlay-animation
A variant of multi-animation for layered movement on a single structure. It uses almost the same configuration interface as multi-animation. The difference is that instead of switching between specific animations once a structure closes, Overlay animation lets you stack the combined offset from every activated animation, with no limit on how many can overlap. For example, you could take a little figure or any other structure, bind several animations to different buttons — forward, back, left, right — and move it around by pressing those buttons. This principle can be used to build simple mini-games. The "Obstacle" setting in the animation settings is useful here too — it prevents a step from happening if a block or tile is already in the way.
Checkpoint-animation
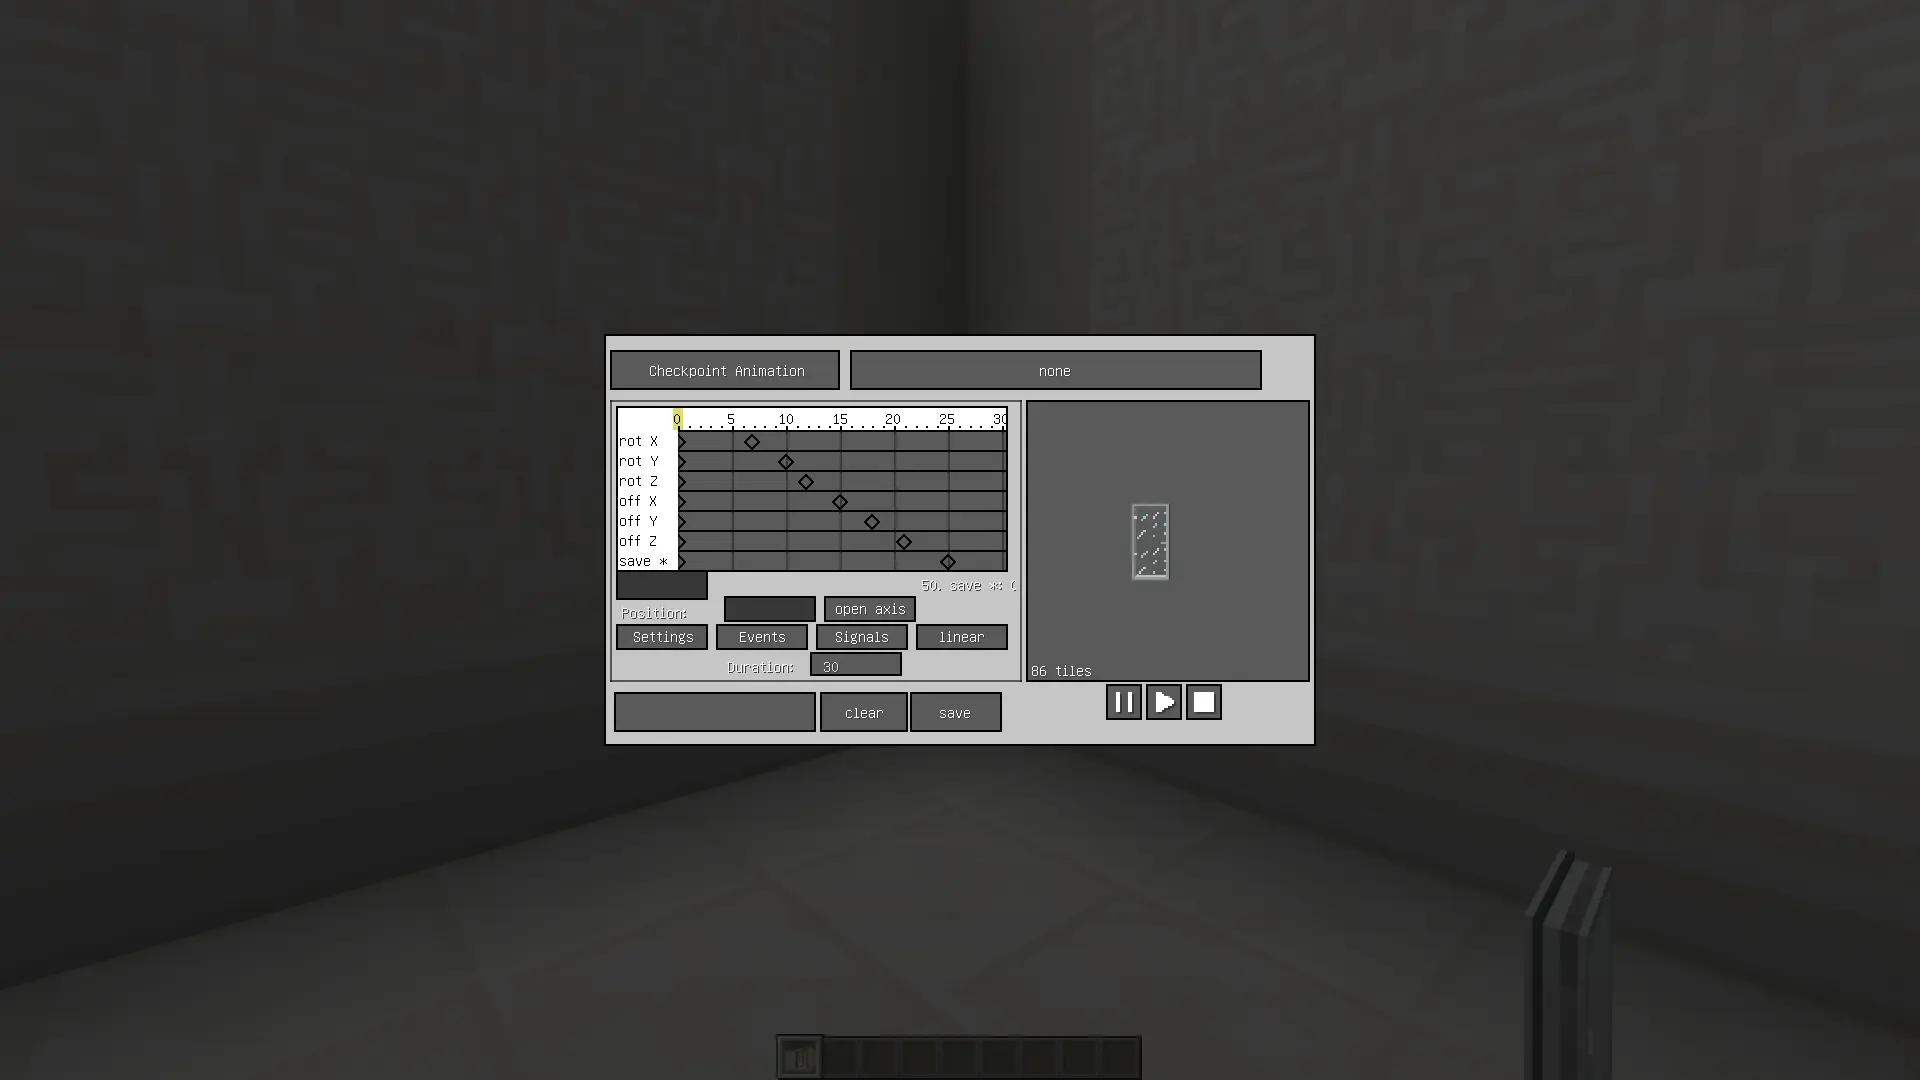
Adds step-by-step movement through saved points along a single motion's timeline. You add a point to the track, and after activation the structure moves to that point. By default, right-click moves the structure forward through the points, and Shift + right-click moves it back to the previous point.
Checkpoint animation has checkpoint_N signals: they move the structure to the chosen point from its current position, including smooth reverse movement along the timeline.
Loop animation
A recipe for continuous, repeating motion — for example, fan blades, gears, or a conveyor belt. The cycle adds acceleration and deceleration parameters in ticks, letting the motion start and stop more smoothly; a value of 0 keeps the instant start/stop. Acceleration and deceleration are configured in the recipe's settings.
Elevator
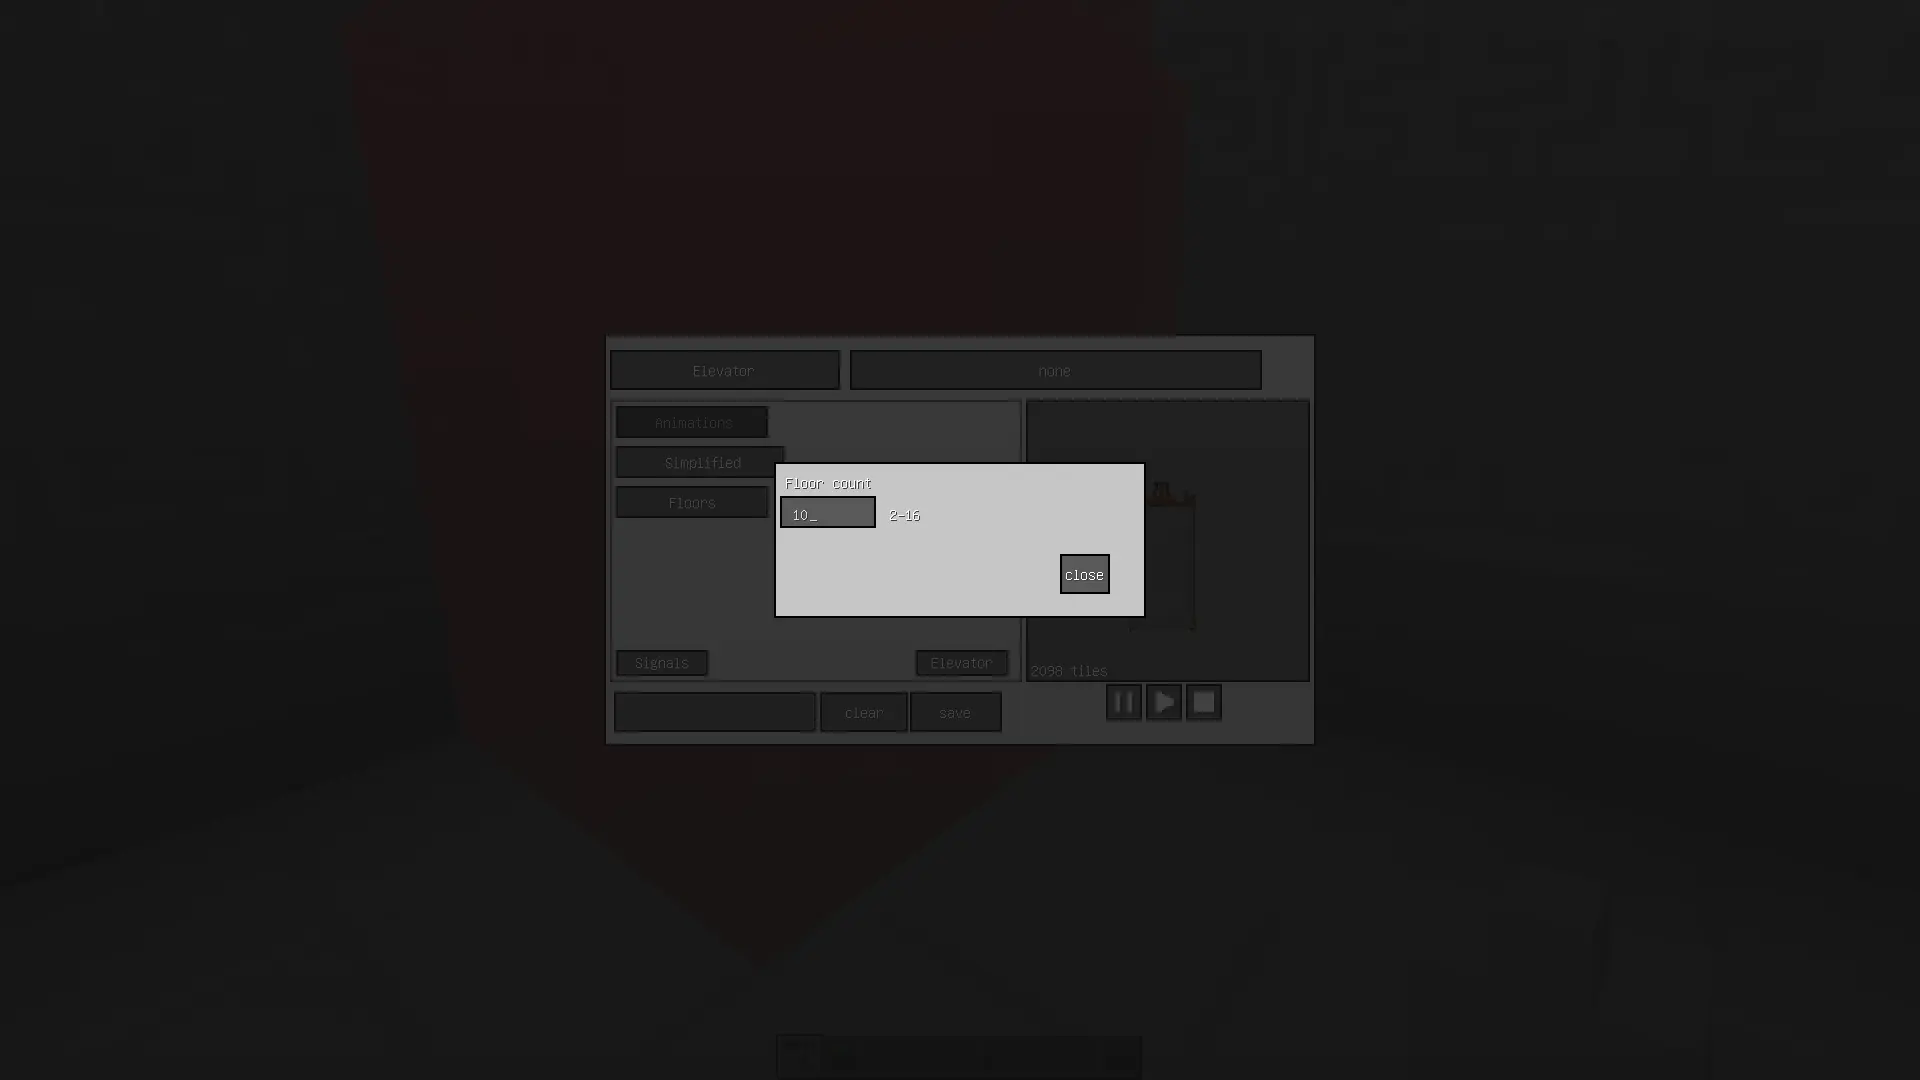
The Elevator is a multi-floor elevator with a wide range of settings and signals. The number of floors is set with the "Floors" button in the structure's settings inside the recipe.
There are two configuration modes:
- Simplified (default) — sets the distance between floors and the cabin's speed.
- Custom animations (enabled from the recipe's settings menu, "Elevator" button) — lets you configure the up and down movement animations separately, with a custom animation for each direction.
The same settings menu also lets you enable "Ignore call signals while the cabin is moving." By default, the elevator remembers the next call signal it receives while moving and travels to that floor once it arrives. The elevator can also stop its movement at any point after the
stopsignal is triggered.
⚠️ Important warning: before interacting in any way with the animations nested inside the elevator cabin, use the "Activator" — just click the cabin with the Activator and the elevator will rise one floor. This is needed so the elevator becomes animated in advance and doesn't break once the nested animations are activated. Also, the very first time the nested animations are activated, a player standing inside the cabin's area may get launched upward — after each nested animation has been activated once, everything returns to normal.
Elevator signals
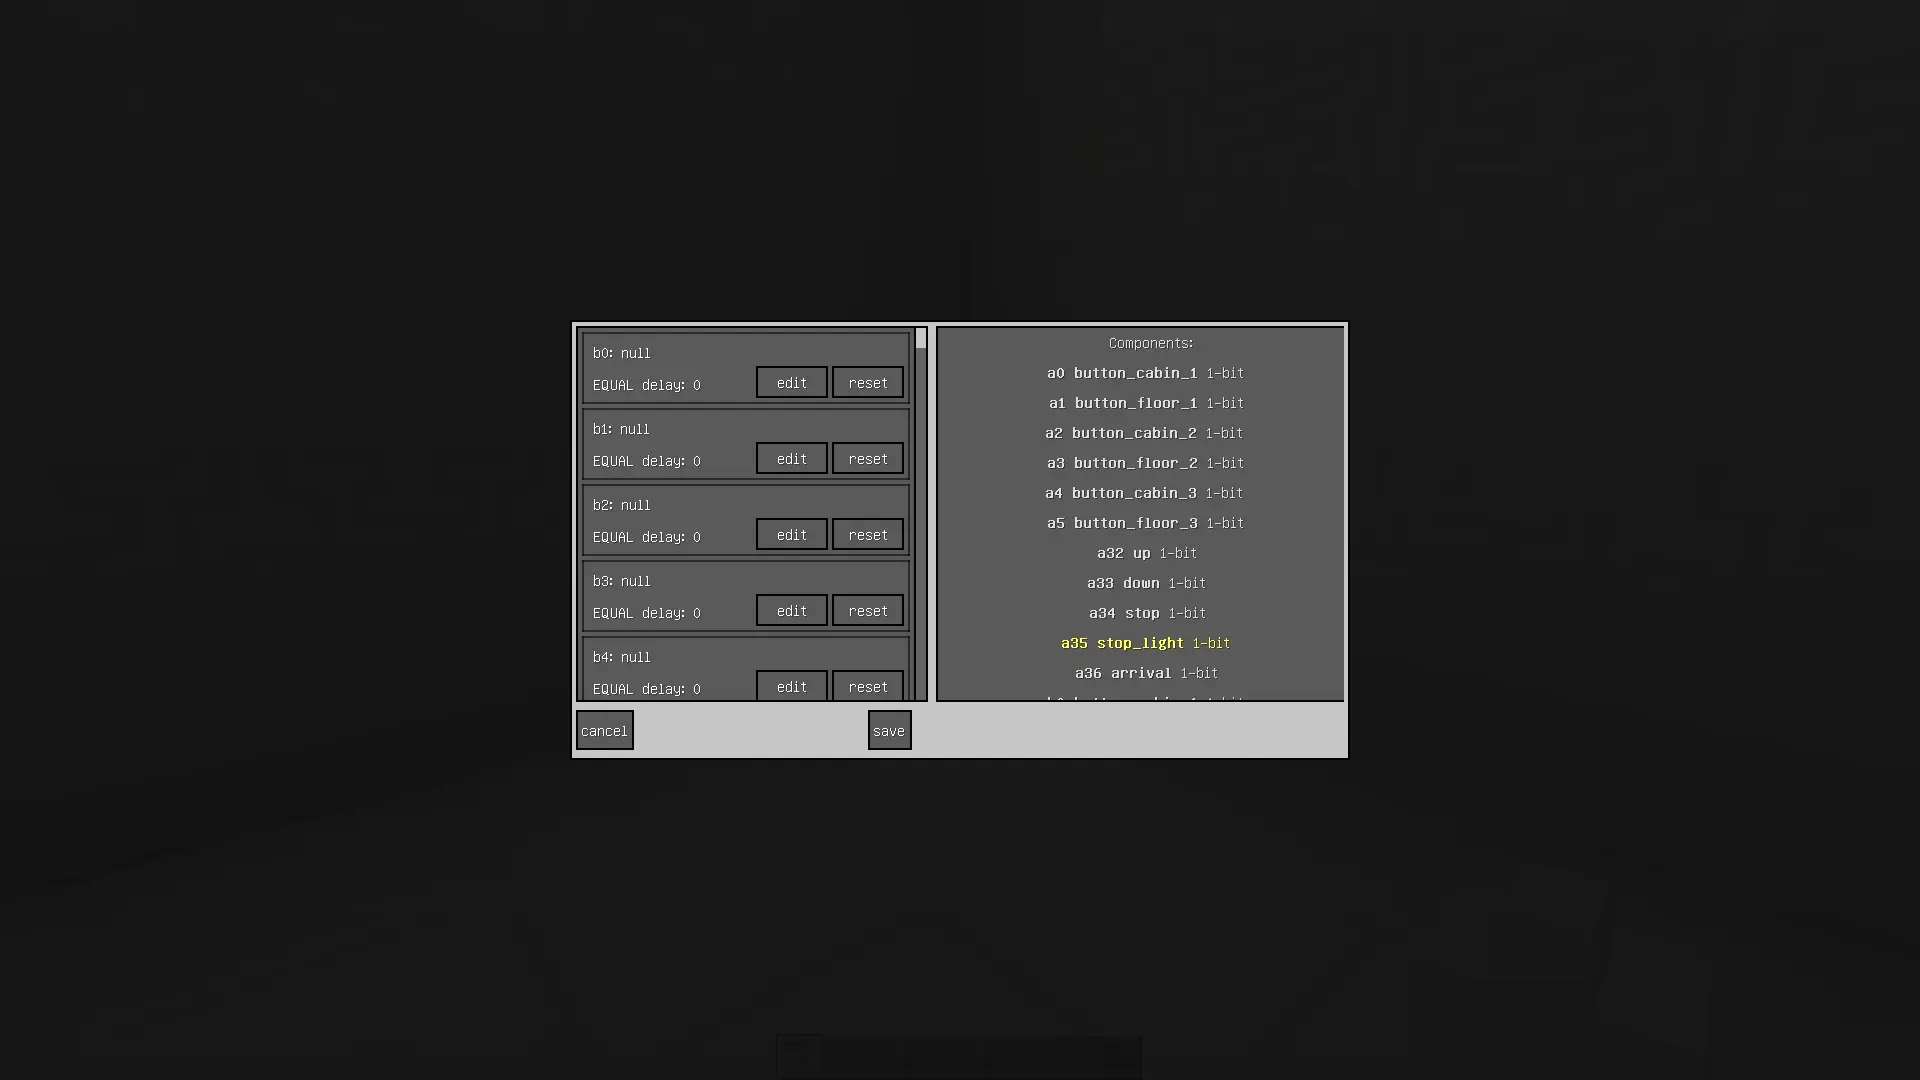
The Elevator has many of its own signals for convenient use and logic customization.
button_cabin_N and button_floor_N are used to call the cabin to a specific floor — every signal is numbered, and you connect to them anything that should call the cabin: doors, buttons, or any other triggers. There are two signals for convenience: button_cabin_N is meant for buttons inside the cabin, button_floor_N for buttons outside it. The current_floor_N signal is active while the cabin is sitting on that specific floor — useful for triggering doors or setting up special conditions on arrival.
The number of floor signals is set in the config, 16 by default. For each floor N, the following are available:
Additional signals:
upsends the cabin one floor up.downsends the cabin one floor down.stopstops the cabin instantly while it's moving; the signal needs to be triggered again for the cabin to resume moving.stop_light— the same asstop, but movement can resume by triggeringstop_light,stop,up/downagain, or any other cabin call.
- arrival is active whenever the cabin is at any floor — useful when what matters is the fact that the cabin has arrived, not which specific floor.
Additional structures
Creative storage
A separate storage that isn't limited by the number of storage blocks in the structure — instead, you can set any number of slots.
Visibility
Toggling the visible signal makes the tiles in a structure invisible or visible again — letting you create decorations that appear once a trigger is activated. Pairing the Visibility structure with any storage lets you make items visually appear or disappear depending on whether the storage contains anything. A similar tile change can also be achieved with ALET's mutator, but this mode is more convenient for that specific purpose.
Wallpaper
Changes the material of linked tiles to whatever block the player is holding, via right-click on the wallpaper. Handy for quickly repainting large surfaces — for example, changing the wallpaper in a room or a building's facade — without rebuilding the structure. Works with block items (ItemBlock). Allowed and blocked blocks are set in the config; by default a blacklist is enabled containing minecraft:grass, since that particular block causes odd behavior. When Blacklist mode = true, the whitelist and the list of allowed mod IDs are ignored entirely — only Blocked block ids applies.
Furniture
A specialized structure for furniture, originally designed for use on servers — it can snap the structure into corners and can only be placed on a flat surface.
Configuration
LittleVecX adds a Mods → LittleVecX → Config screen. It includes:
- the number of animation and elevator ports — changing this requires a restart;
- a whitelist or blacklist of blocks for Wallpaper;
- the Industrial Screwdriver's queue settings;
- detailed diagnostic logging. Logging is off by default and is meant for diagnosing animations, elevators, selections, and network actions.
Who is LittleVecX for
LittleVecX is for anyone already building with LittleTiles who wants to go beyond the base functionality. If you've ever wished for more precision editing tiny details, wanted to build a genuinely functional multi-floor elevator, bring a build to life with layered animations, or give a building more flexible internal logic — this addon is built for exactly that. It also suits anyone who'd like some of the features from newer LittleTiles versions while staying on 1.12.2.
Backstory
The idea for LittleVecX grew out of my own needs: I was building on 1.12.2, since that was the version my main project lived on, and LittleTiles' base functionality wasn't enough for me. Over time, development of the 1.12.2 addon went on hold for a long while — I moved my map over to newer game versions, and work on LittleVecX continued for 1.21.1 instead.
But over time it became clear that some people are still building on 1.12.2 — some because of other mods exclusive to that version that never made it to newer ones, others simply because that version feels more familiar and comfortable to them. So I decided to bring the 1.12.2 addon to a proper first release and put it out publicly. I've tried to close out every bug and issue I know about, but the mod is still far from perfect. It's unlikely to see any major updates going forward — but if I ever find the time, I'll come back and fix whatever bugs have piled up.
Credits
Thanks to CreativeTeam for developing LittleTiles and CreativeCore <3
Also thanks to Docvin for creating ALET 1.12.2, some of whose solutions I drew on.
And a special thanks to everyone who followed the development — without you, LittleVecX wouldn't have made it onto the major mod pages.
Links


The LittleVecX Team