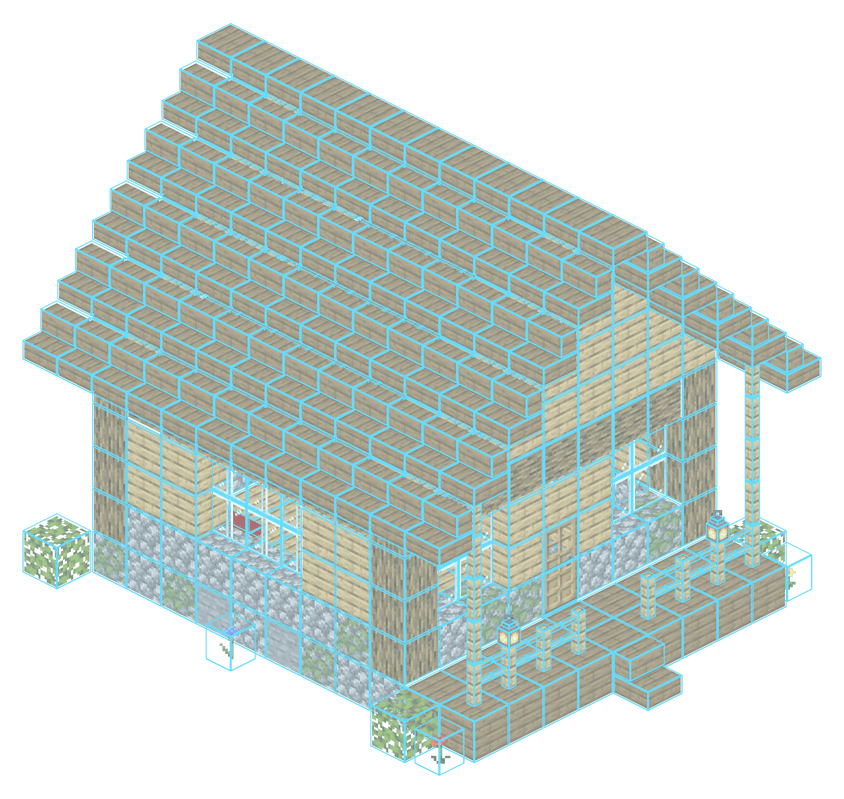
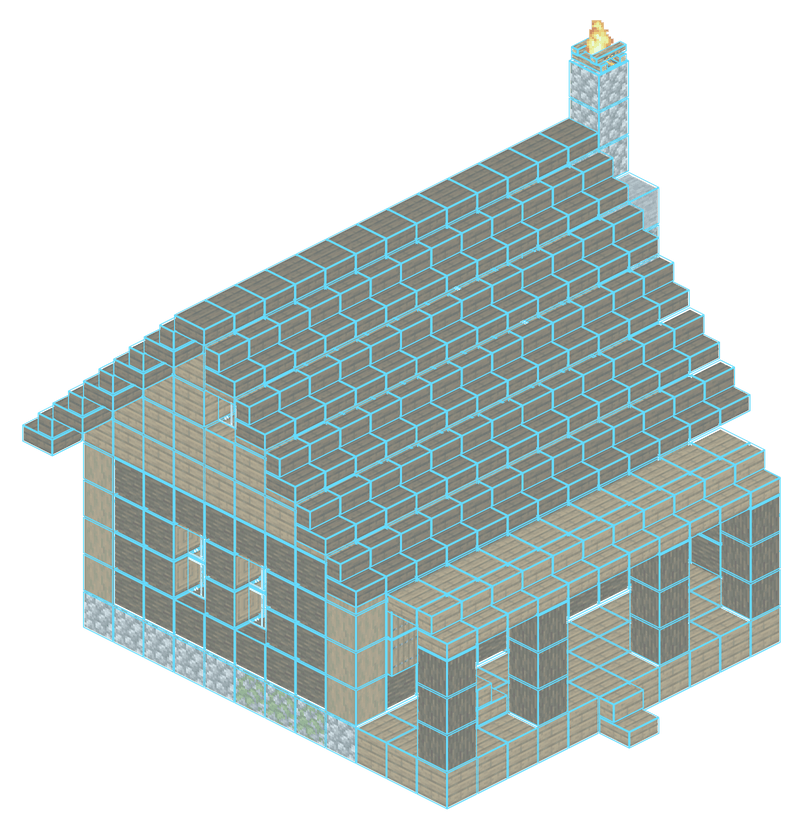
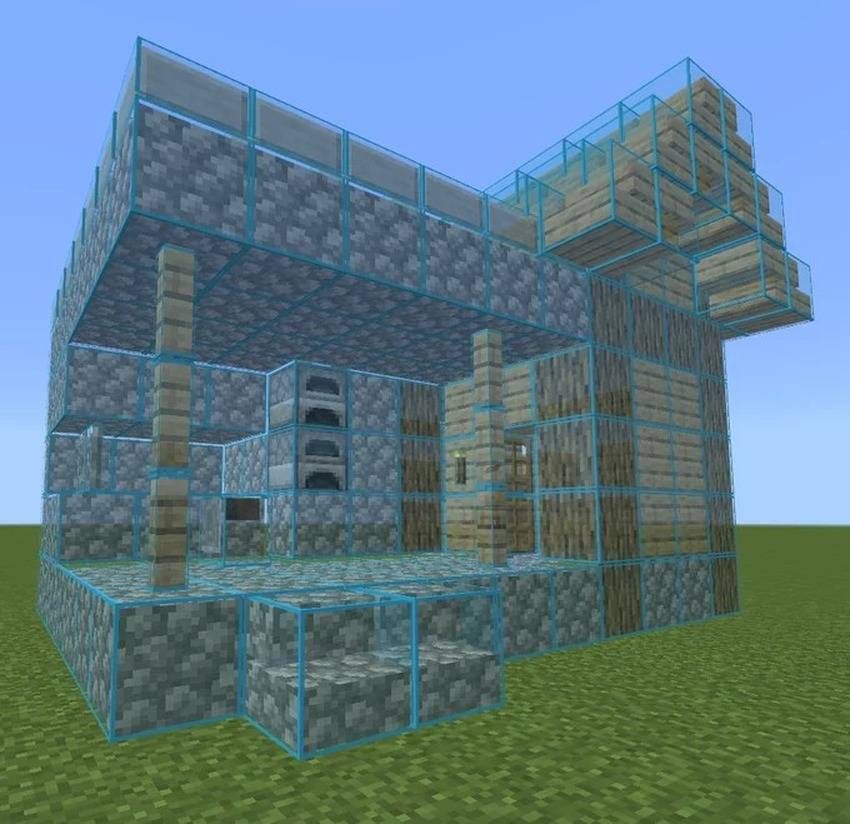
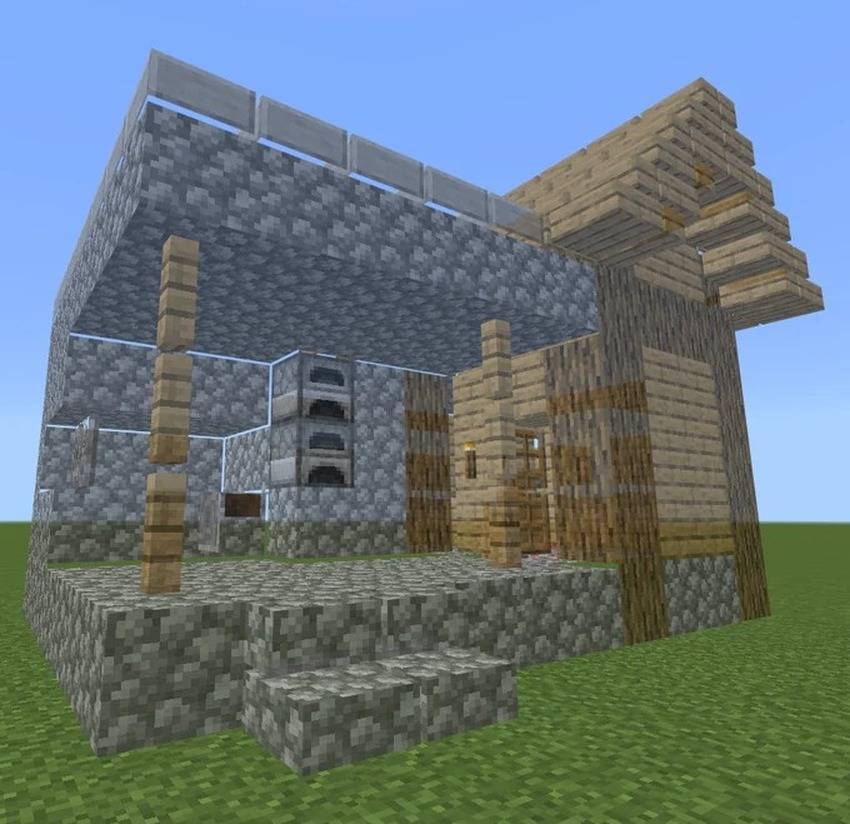
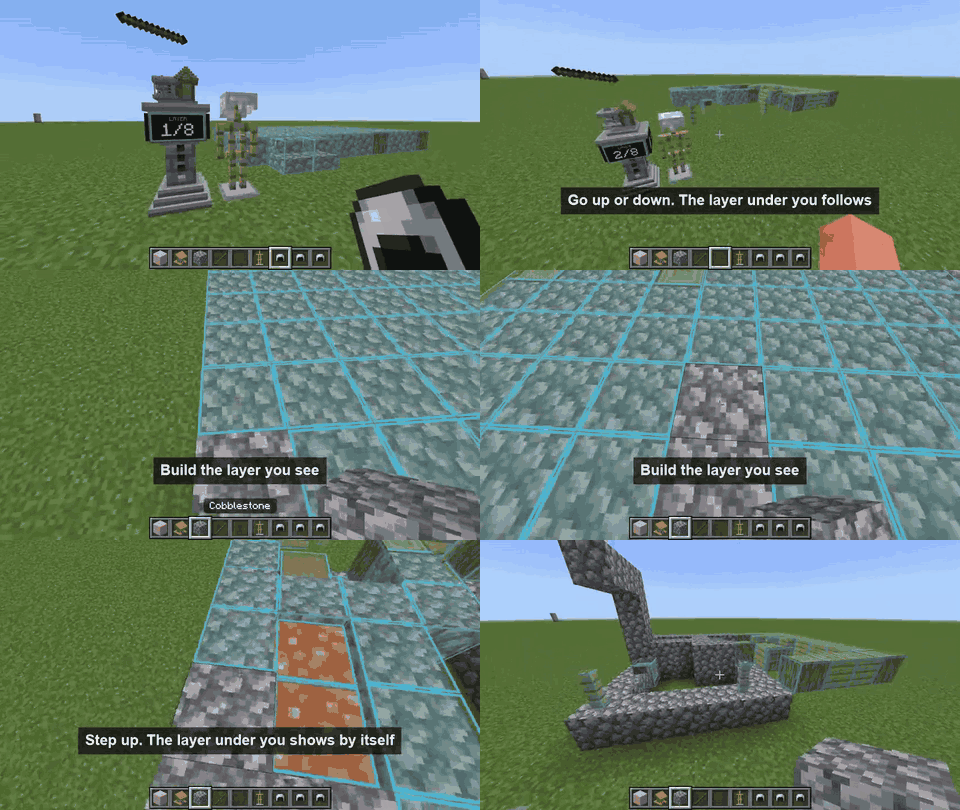
With Buildmatica you can turn any build or farm into a see-through hologram blueprint, and then build the exact same thing anywhere in your world, block by block.
Have you heard of the Litematica mod for Java? Buildmatica works in a similar way, but it is made for Minecraft Bedrock Edition.
It is a texture pack (resource pack), so it works on servers and Realms.
Achievement friendly. No experiments and no add-on scripts.
Java builds work too. Load Java structures and Litematica schematics (.litematic, .schem, .schematic, .nbt) and build Java builds and farms on Bedrock.
Starter Builds included. A few ready builds come with it, so you can try it right away.
In this showcase, I built a house with Buildmatica. Watch it to see how the pack works, from the see-through blueprint to the finished build.
Quick start
Download Buildmatica.mcaddon and open it. It adds the main pack and the Starter Builds pack.
On voxenmc.com/buildmatica, open Make a build and drop your build file there, like small_house.mcstructure.
Pick an item for the build, like a Stick, and download your builds pack.
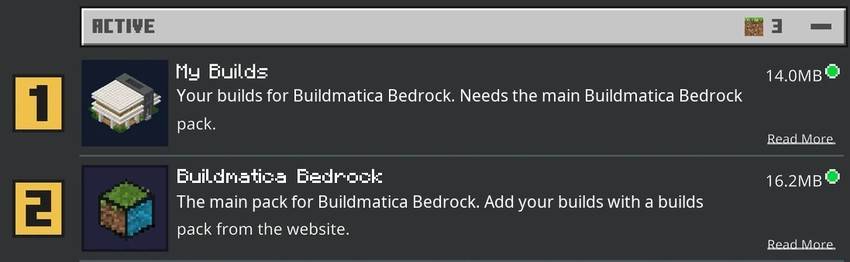
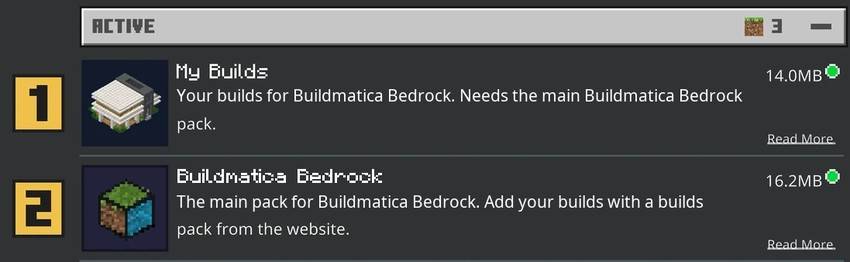
Turn the builds pack on too. Keep it above the main pack.
In your world, place an armor stand and give it the Stick. The see-through house shows up.
Place the real blocks inside the blueprint.
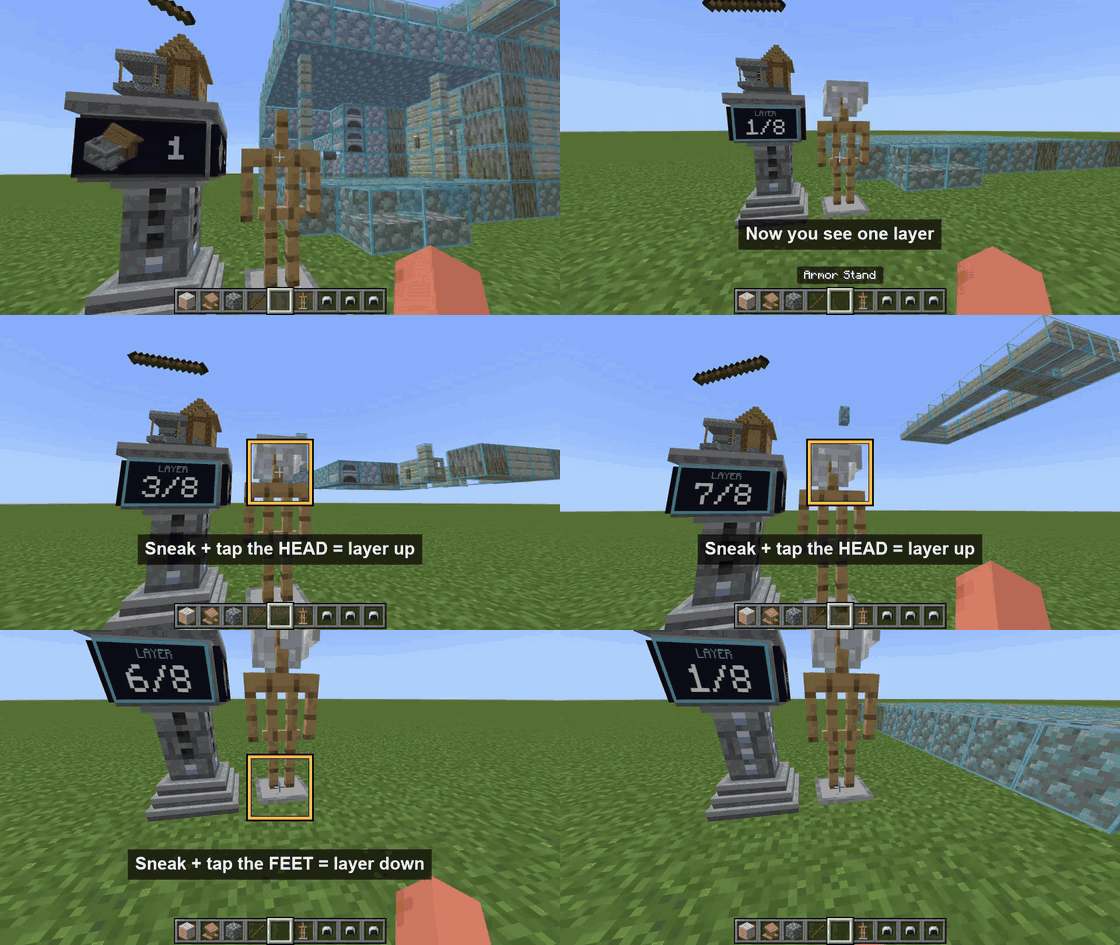
To build layer by layer, put a helmet on the armor stand. Then sneak and tap the head of the stand to go one layer up, or sneak and tap its feet to go one layer down.
Just want to try it? Turn on the Starter Builds pack above the main pack, give an armor stand Oak Planks, and the Starter House shows up.
Attention, please read!
The main pack works like a loader. It shows the builds, but your own builds go in a separate builds pack. In Buildmatica.mcaddon you also get a small Starter Builds pack with a few builds, so you can try it right away.
You can make a hologram of:
Your own build from your world.
A Java build, like a Litematica schematic you downloaded. Java schematic files are supported.
A build from other players. I made a Community builds page on the website, where players upload their builds and farms for everyone to use. You can use their builds, and if you want, you can upload your own builds too.
You put all your builds in one small builds pack (an extension) that you make on the website: voxenmc.com/buildmatica
New to Structure Blocks? Watch this tutorial to see how to export your own build: Structure Block tutorial
Keep the main Buildmatica pack below, and your builds pack above it. It only works in this order.
Open Buildmatica.mcaddon. It adds two packs to your game:
Buildmatica is the main pack. It works like a loader and shows the builds. Nothing works without it.
Buildmatica Starter Builds is a builds pack (an extension) with a few ready builds, so you can try Buildmatica right away.
Go to Settings, then Global Resources, and turn on both packs. Keep the builds pack above the main pack.
2. Try the Starter Builds
The Starter Builds pack has a few starter builds. You can use them to test Buildmatica, or build them in your world like normal. But I recommend you make your own custom builds. That is what Buildmatica is made for. Click here to make your custom builds.
Place an armor stand and give it the item of the build you want:
Starter House
Give the armor stand: Oak Planks
Log Cabin
Give the armor stand: Spruce Log
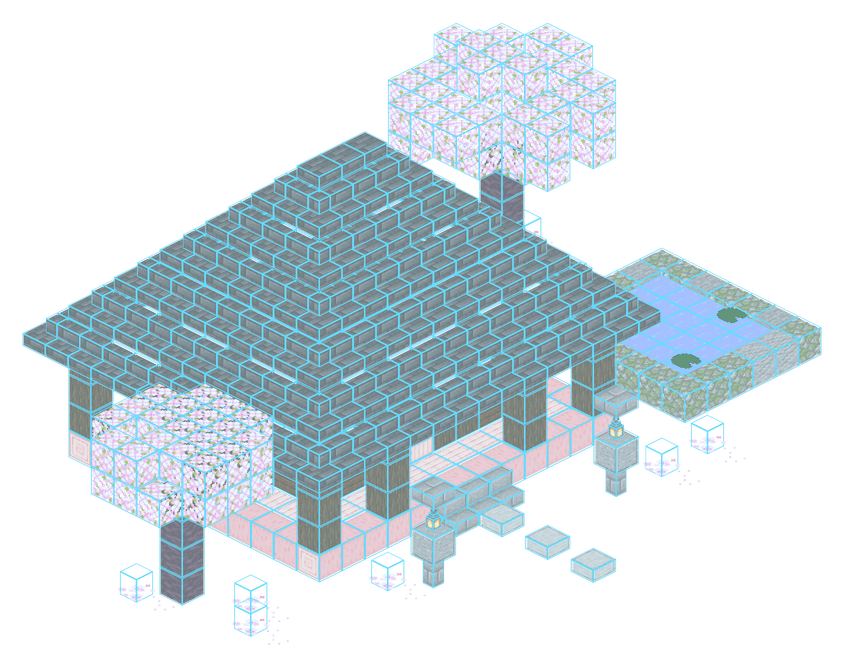
Cherry Blossom House
Give the armor stand: Cherry Sapling
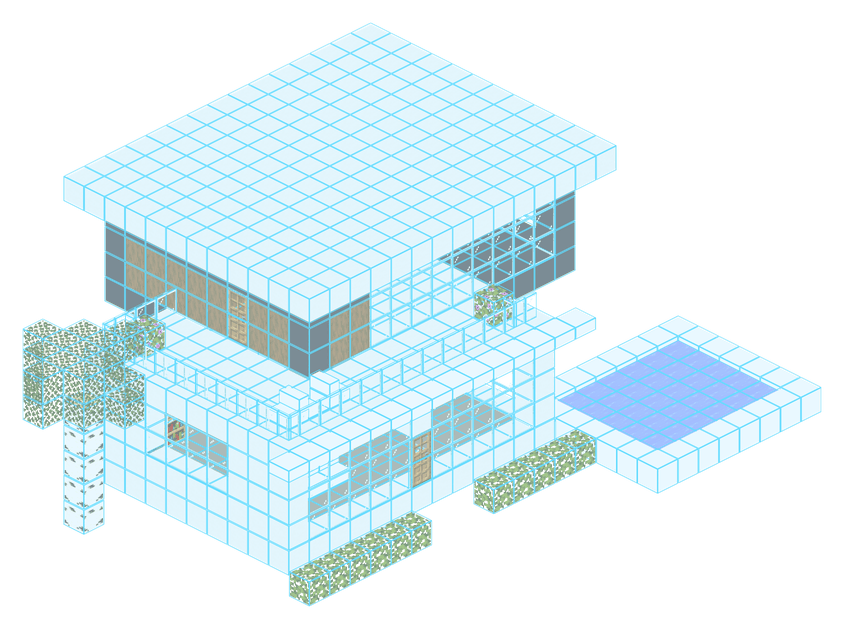
Modern House
Give the armor stand: Block of Quartz
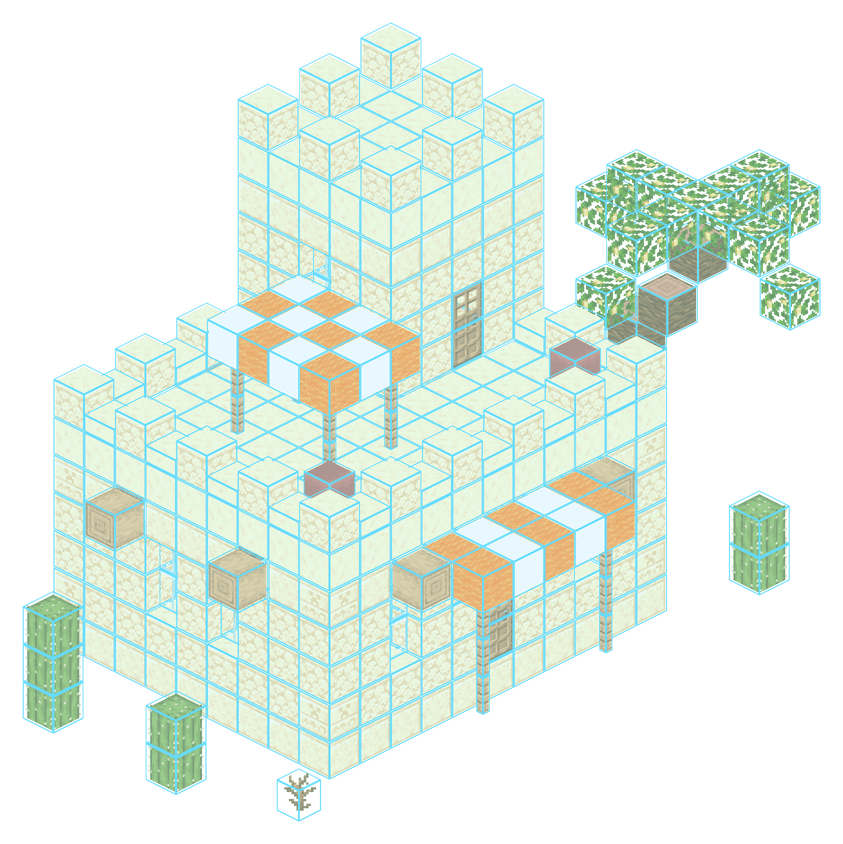
Desert House
Give the armor stand: Sandstone
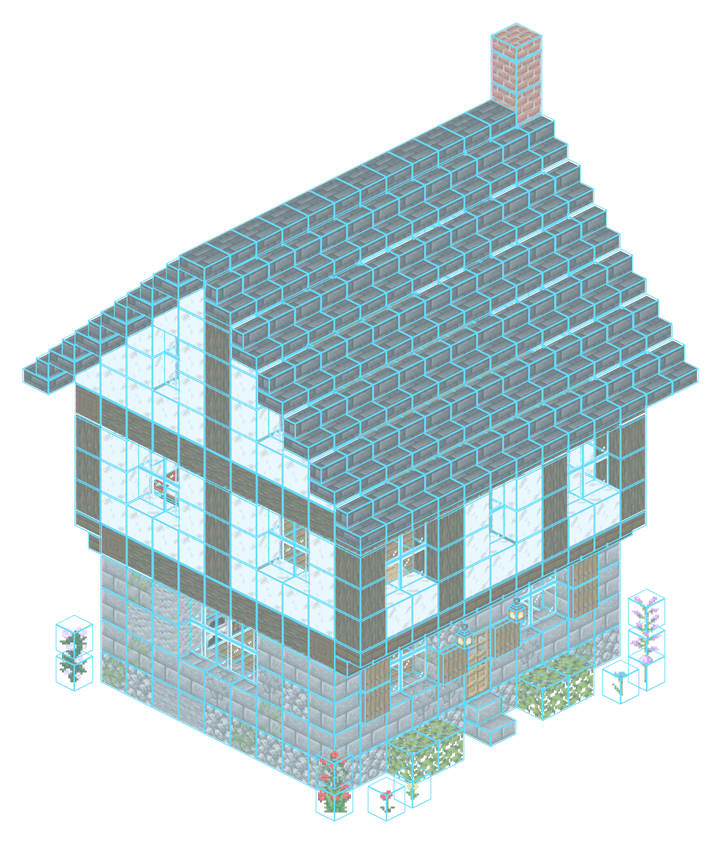
Medieval House
Give the armor stand: Brick
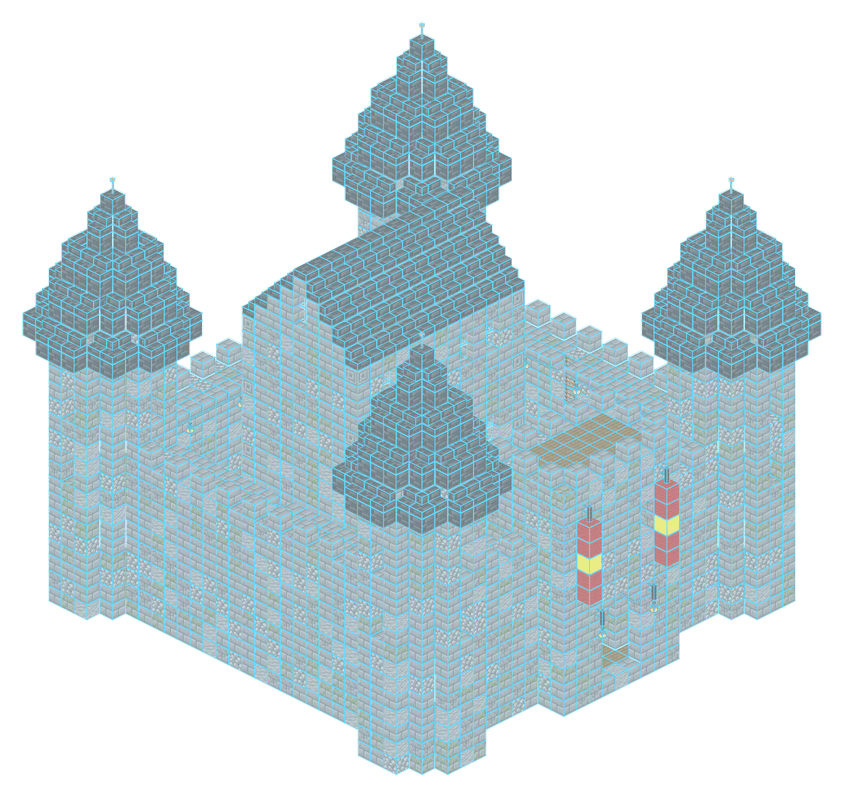
Stone Castle
Give the armor stand: Iron Sword
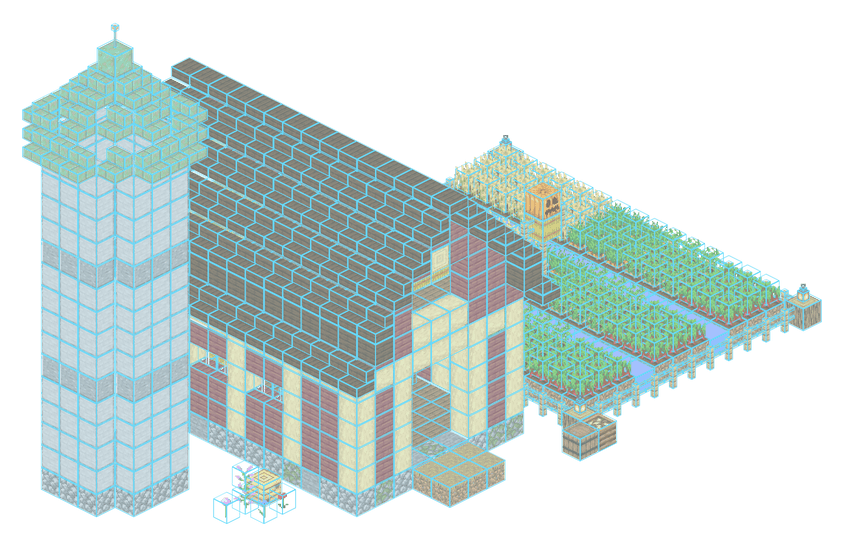
Barn Farm
Give the armor stand: Wheat
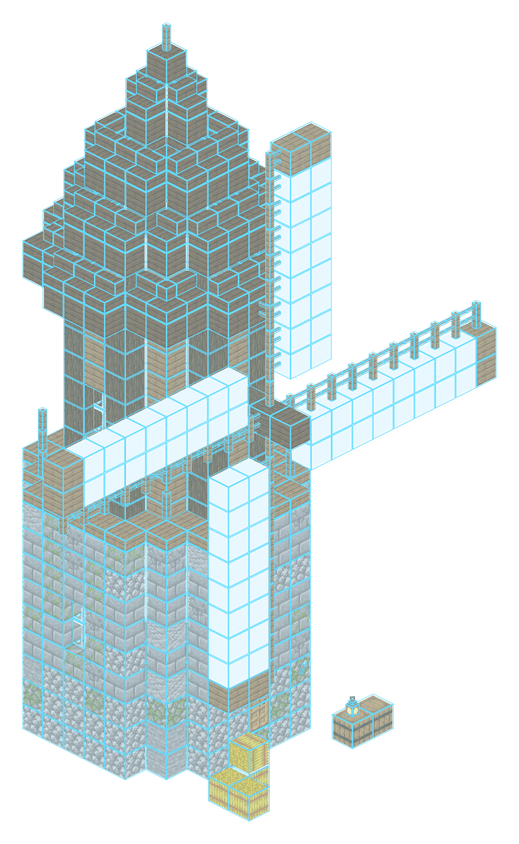
Windmill
Give the armor stand: Bread
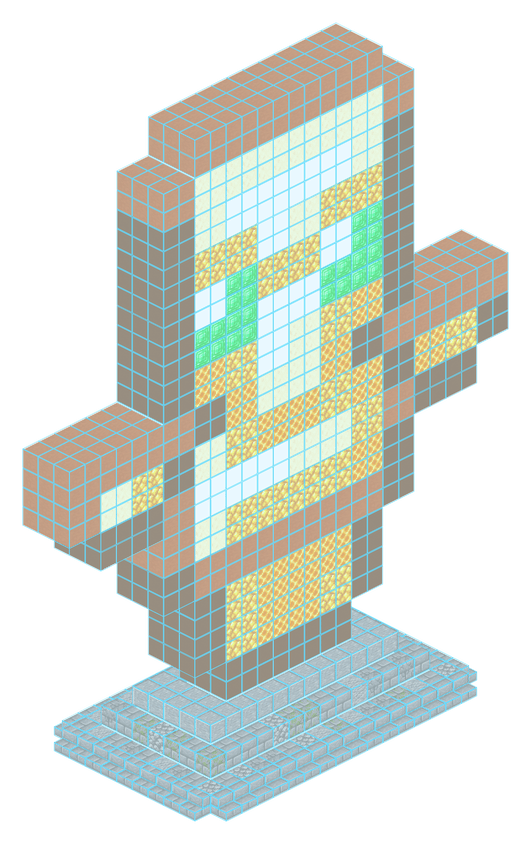
Totem Statue
Give the armor stand: Totem of Undying
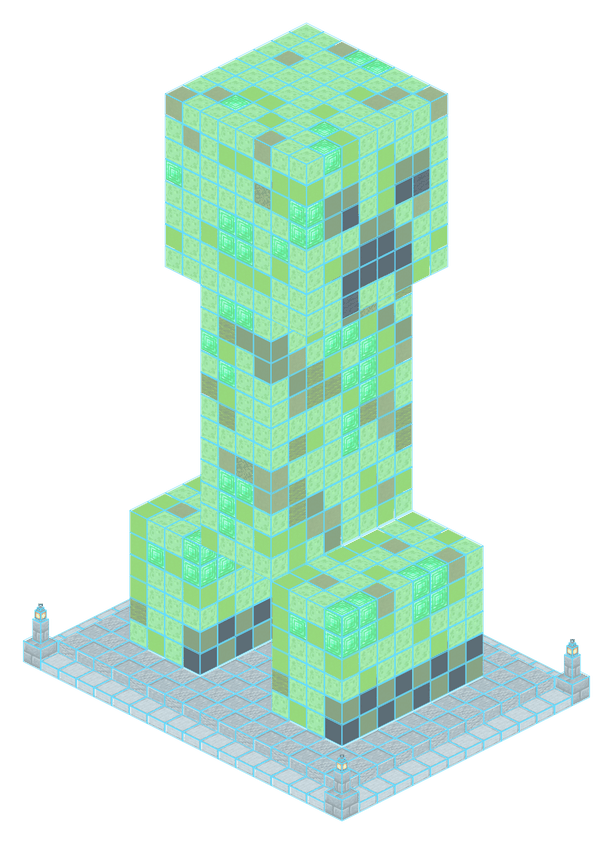
Creeper Statue
Give the armor stand: Gunpowder
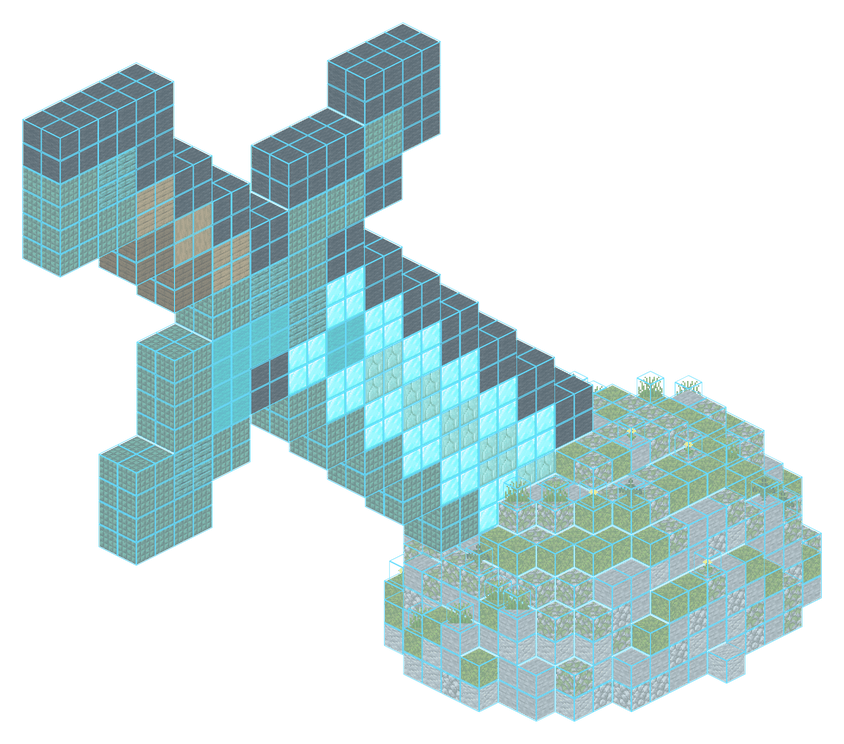
Sword in Stone
Give the armor stand: Diamond Sword
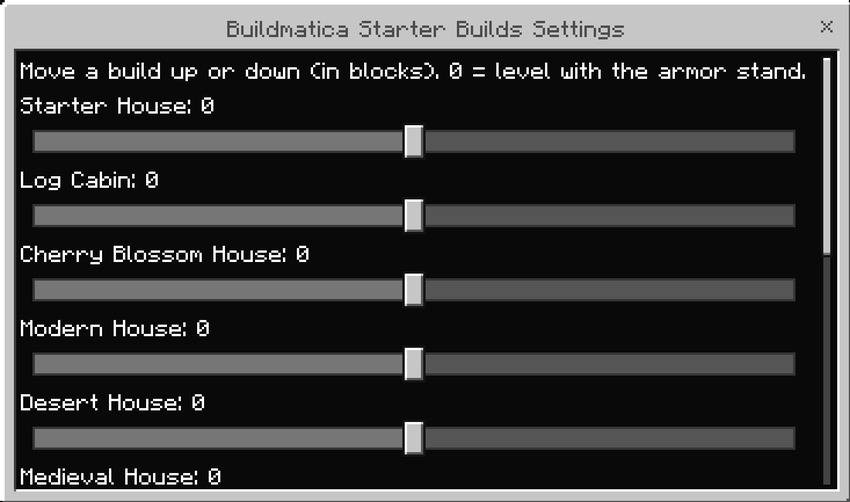
Build too high or in the ground? Open the gear button of the Starter Builds pack. Each build has its own height slider.
Make custom builds
Turn any of your own builds into a blueprint. You can also use a Java schematic, or a build from other players. You put your builds in your own builds pack, which you make on voxenmc.com/buildmatica.
3. Get a build file
You can use your own build, or a build someone else made.
Your own build: turn on cheats in your world and type /give @s structure_block. Place the Structure Block next to your build, set it to Save, and change the size until the white box covers the whole build. Press Export to get a .mcstructure file.
A build from other players: open Community builds on the website and press Add to my pack.
A Java build: files that end with .litematic, .schem, .schematic or .nbt work too. This means you can use Litematica schematics as well.
Watch how to export a build with a Structure Block:
On mobile, the Export button on the Structure Block is turned off. Keep Buildmatica turned on. It turns the Export button on for you.
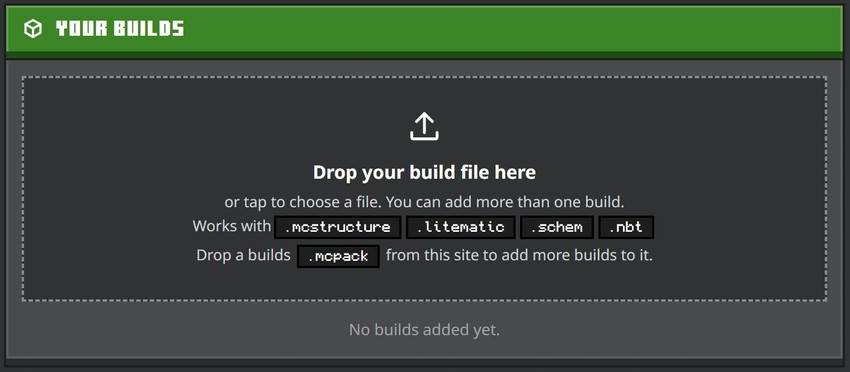
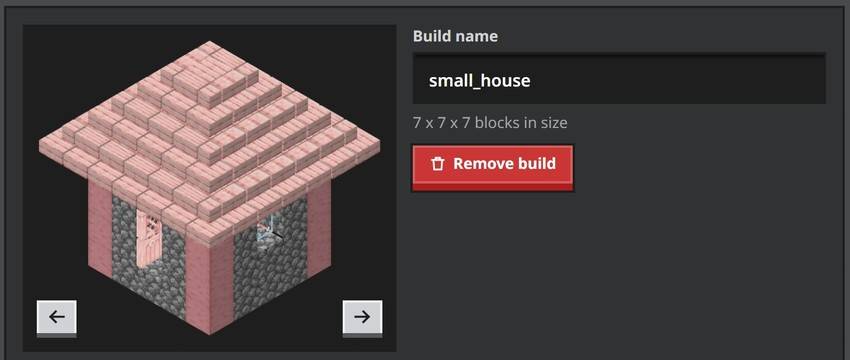
Drop your build file in the box, or tap the box to choose the file.
You can add many builds to one pack.
Press the arrows under the picture to turn the build and see every side.
Type a name in Build name.
Remove build takes the build out of your pack.
5. Pick how to show each build
To see a build's blueprint in your world, you give the build an item (or a name tag). Then you give that item to an armor stand, and the blueprint of that build shows up.
Example: you want a blueprint of the Creeper Statue, so you give it Gunpowder. Now, whenever you want the Creeper Statue blueprint in your world, give Gunpowder to an armor stand. The Creeper Statue blueprint shows up right there.
Pick one for each build:
Item: the armor stand holds this item to show the build.
Name tag: name the armor stand with this name to show the build.
You don't need to remember them. In the game, open the Buildmatica menu. It lists all your builds and shows which item or name tag shows each build.
I recommend the item. A name tag is not easy to get, and you need a new name tag for every build.
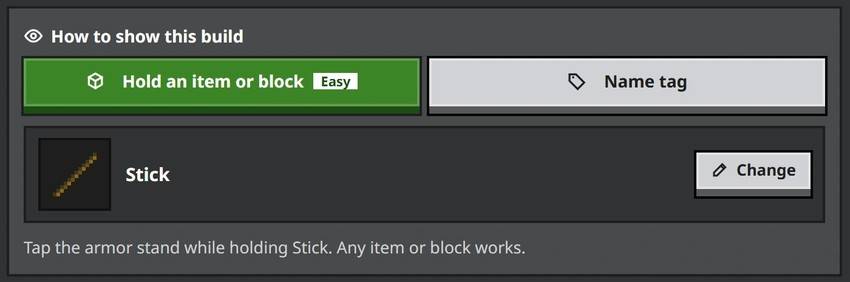
Hold an item or block (the easy way, and the default): you give this item to the armor stand and the build shows up.
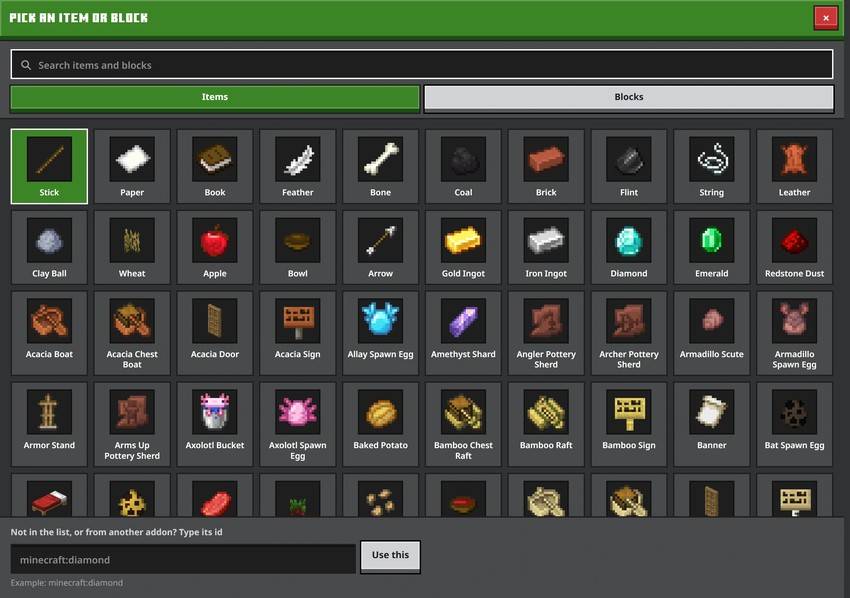
Press Change to pick another item or block:
An item from another addon works too. Type its id in the box at the bottom of the list and press Use this.
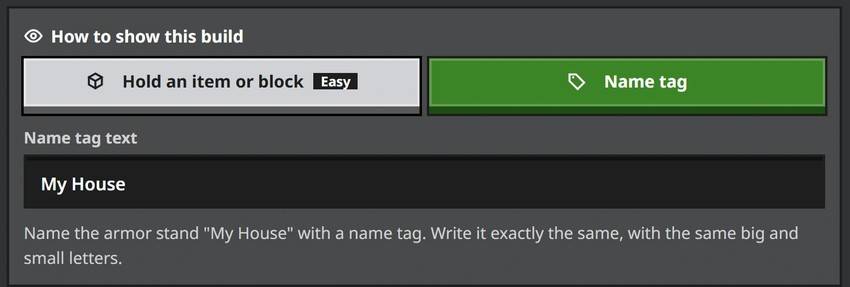
Name tag: type a name. In the game, you name the armor stand with a name tag that has this name.
Write the name exactly the same in the game, with the same big and small letters.
Do not give two builds the same item or the same name tag. Give every build its own. That is how the game knows which build to show.
6. See the blocks you need
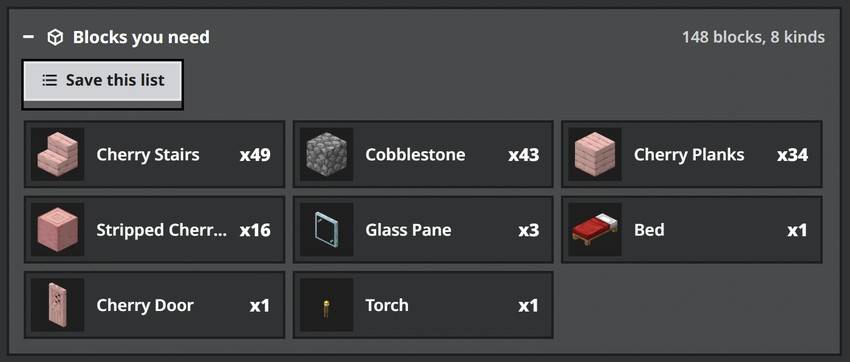
Under each build, Blocks you need lists every block and how many.
Press Save this list to get it as a picture, as a text file, or to copy it.
You also get this list inside the game, in the Buildmatica menu.
7. Download your builds pack
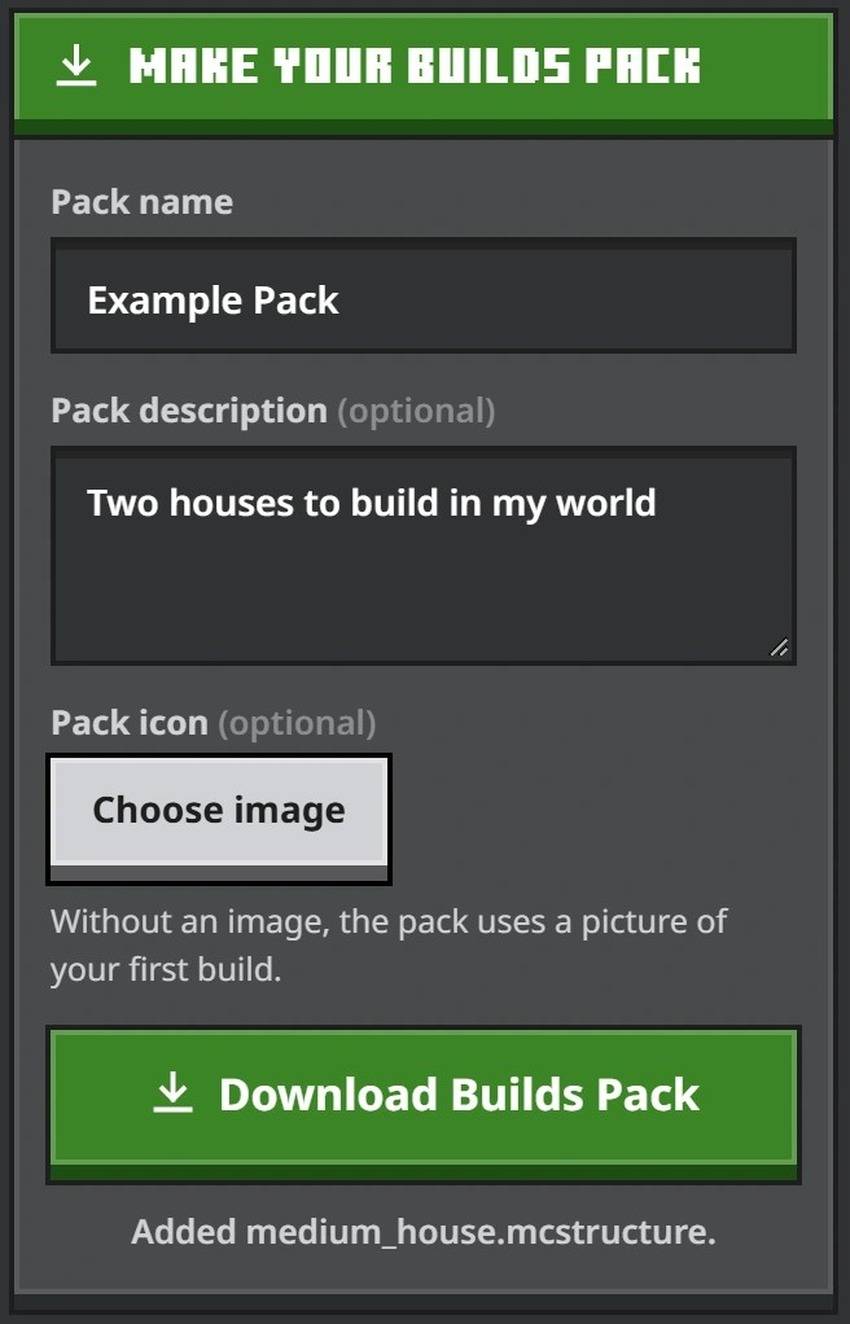
Type a pack name. A description and a pack icon are optional.
Press Download Builds Pack.
To add more builds later: drop your builds .mcpack on Make a build. Your builds, items, name tags, pack name and icon come back. Add the new builds and download the pack again.
8. Turn on your builds pack
Open your builds pack file.
Go to Settings, then Global Resources, and turn on your builds pack.
Keep your builds pack above the main pack in the list.
Only one builds pack works at a time. If you turn on more than one, only the top one works. So keep all your builds in one pack.
When you make a new builds pack, take the old one off and put the new one on.
Pack settings
9. Change how it looks and works
Open Settings, then Global Resources, pick Buildmatica (the main pack) and press the gear button.
The settings are in three parts: Hologram, Projector and Layers. You can change them any time.
Build too high or in the ground? Open the gear button of your builds pack. Each build has a height slider. Move it left to move the build down, or right to move it up. 0 is level with the armor stand.
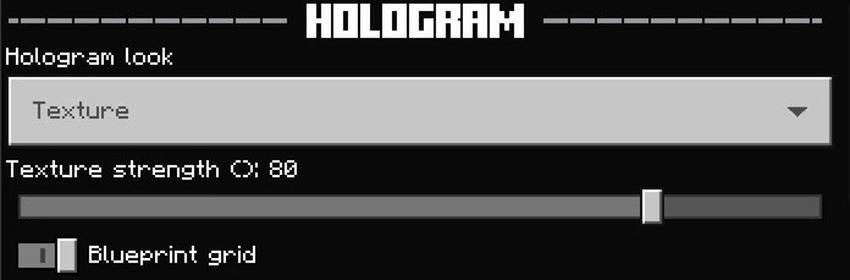
Hologram
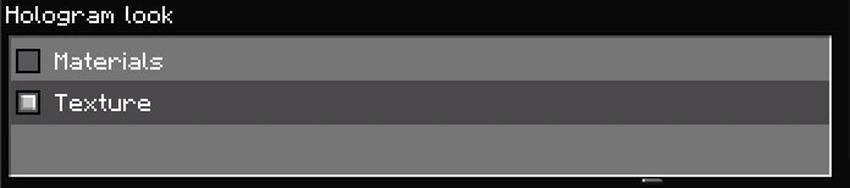
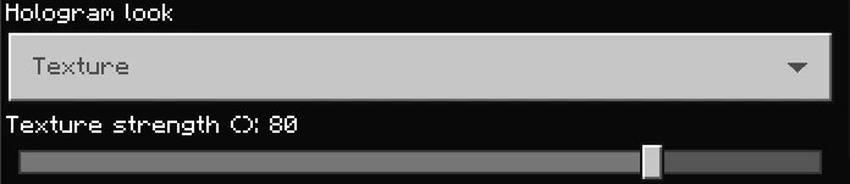
Hologram look: how the blueprint is drawn.
Texture (default): uses normal Minecraft textures. Always looks clear.
Materials: uses your texture pack. Can look dark sometimes.
Texture strength: move the slider to change how see-through the blueprint is (5 to 100, default 50). Only works when Texture is picked in Hologram look.
Blueprint grid: the blue lines around every block of the blueprint. They show where each block goes.
On (default): you see the blue lines.
Off: no lines. You only see the blocks.
Projector
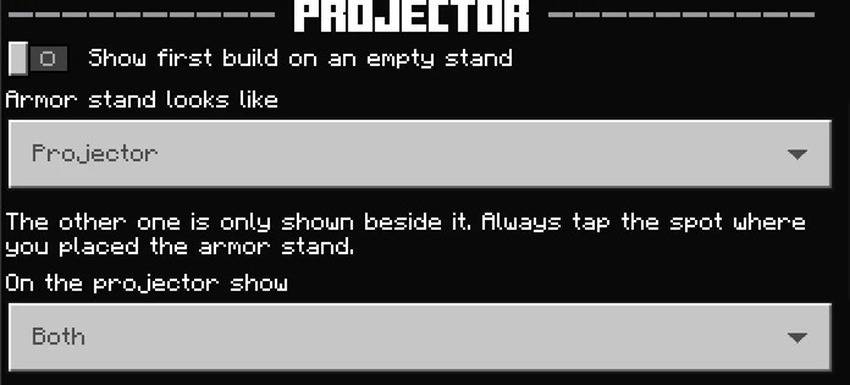
Show first build on an empty stand (default: Off): when on, an armor stand with no item and no name tag shows your first build. When off, a stand shows nothing until you give it the item.
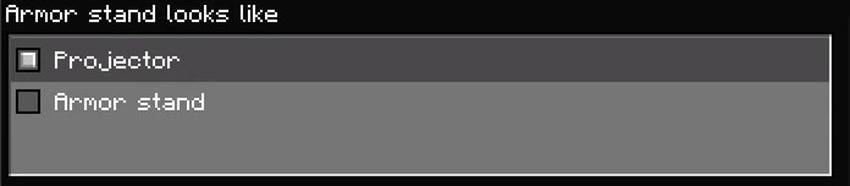
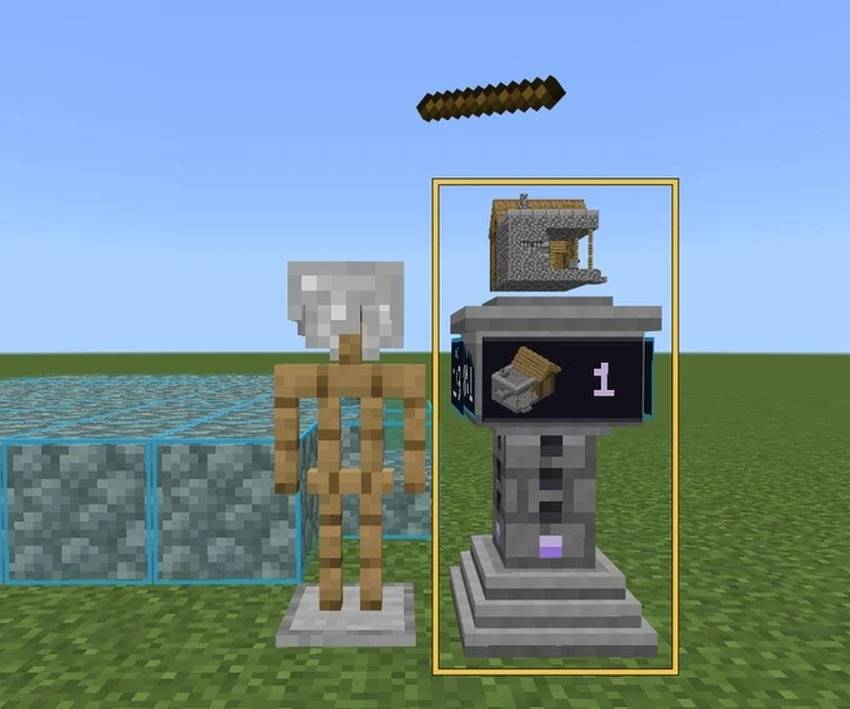
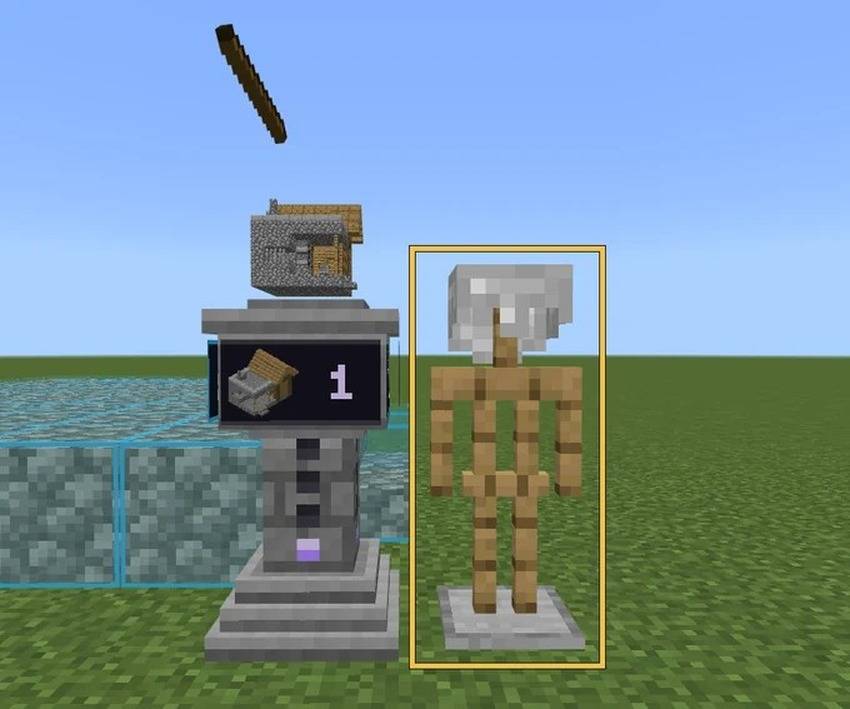
Armor stand looks like: what you see at the spot where you placed the armor stand. The other one is shown beside it.
The yellow box is the spot where you placed the armor stand. Always tap there. The one beside it is only a render, you cannot tap it.
Projector (default): the stand turns into the stone projector. An armor stand is shown beside it.
Armor stand: the stand stays an armor stand. The stone projector is shown beside it.
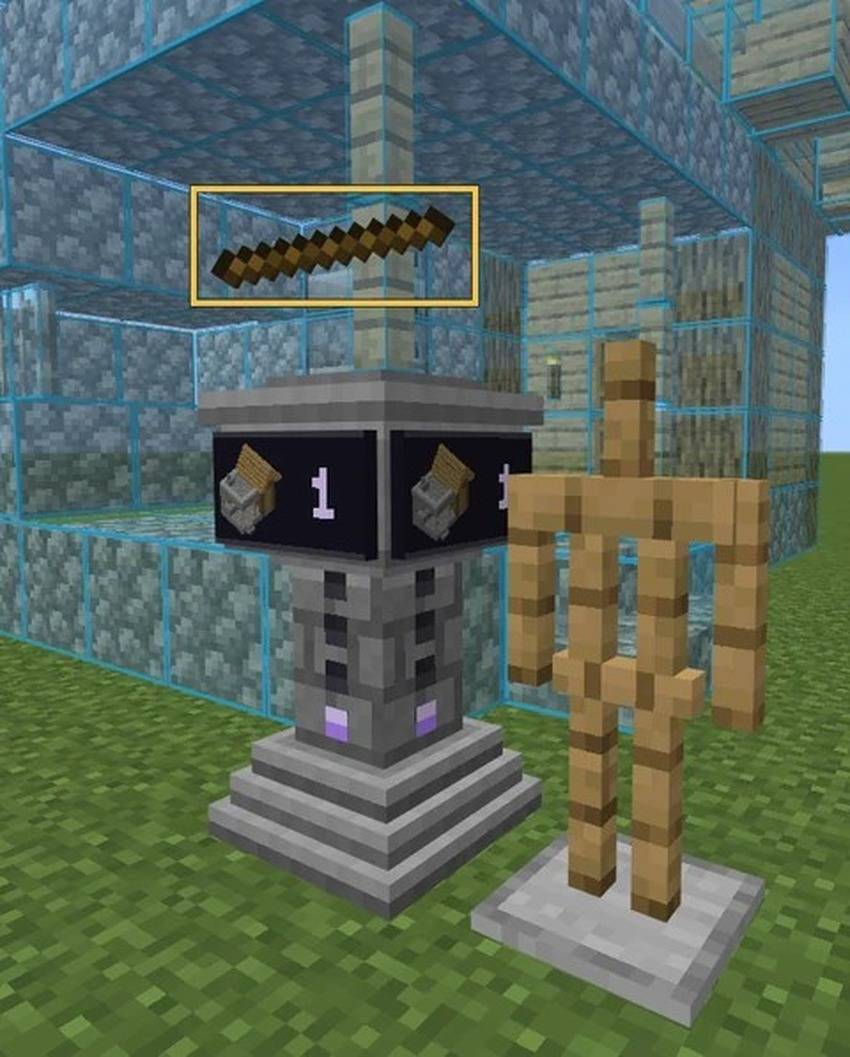
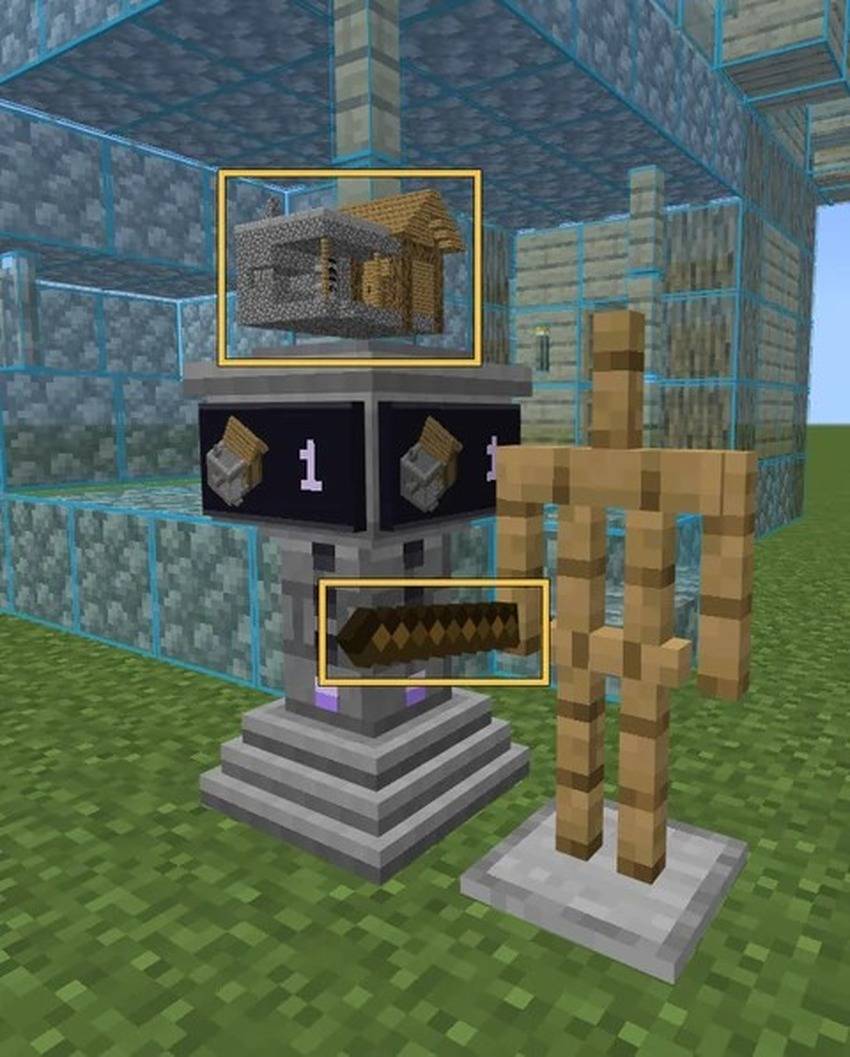
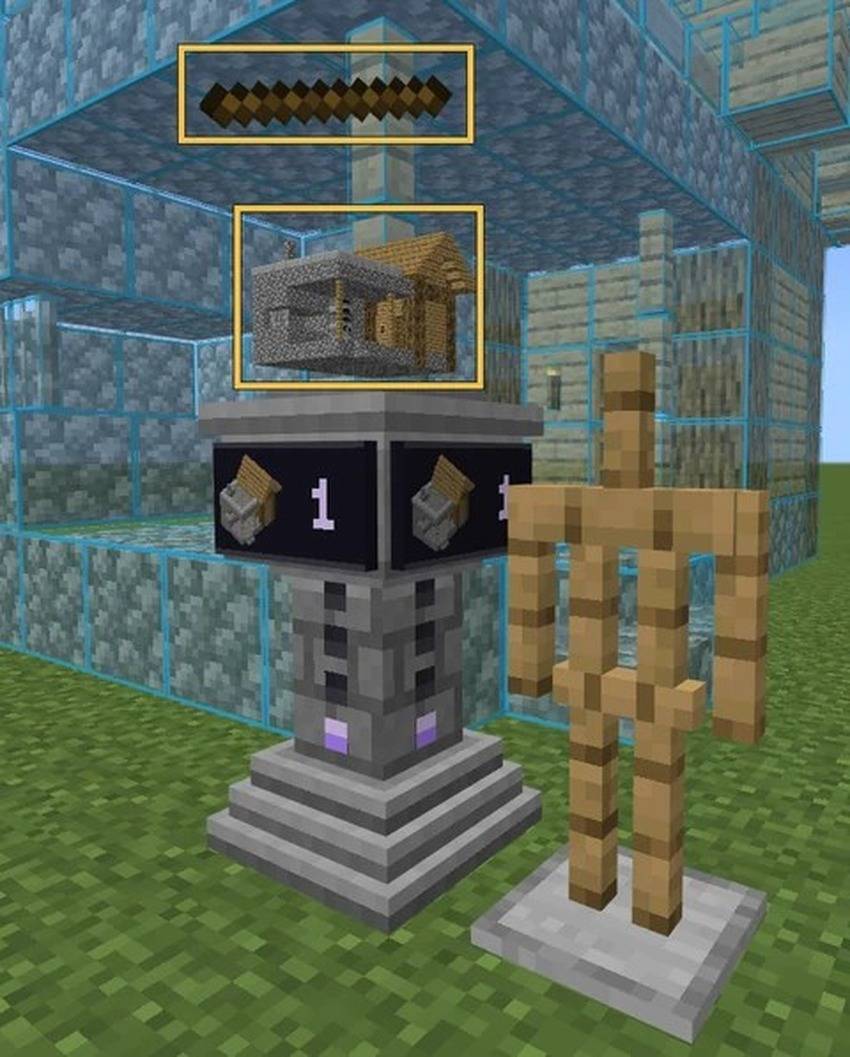
On the projector show: what floats above the projector. The yellow boxes show it in each picture.
Item (default): the item you gave the stand.
Small build: a small model of the build. The item stays in the stand's hand.
Both: the small model, with the item above it.
Layers
These only work when the armor stand wears a helmet. With no helmet you always see the whole build.
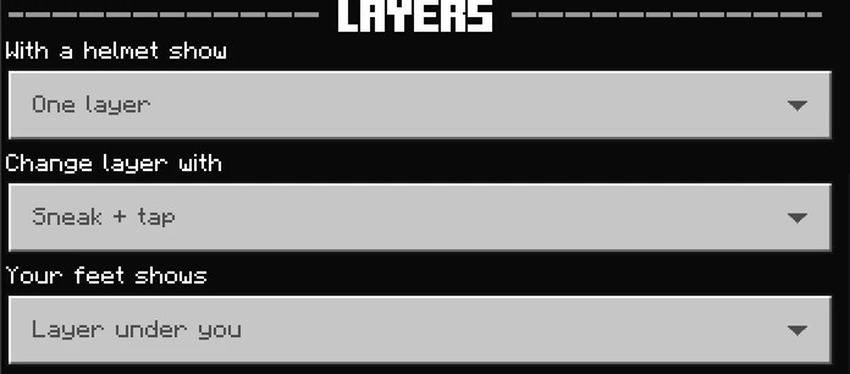
With a helmet show: which layers you see.
One layer (default): only the layer you are on. The screen on the projector shows which layer you are on.
This and below: the layer you are on and every layer under it.
This and above: the layer you are on and every layer over it.
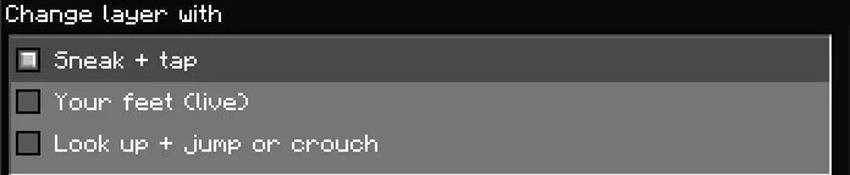
Change layer with: how you move to another layer.
Sneak + tap (default): sneak and tap the head of the stand to go one layer up. Sneak and tap the feet to go one layer down.
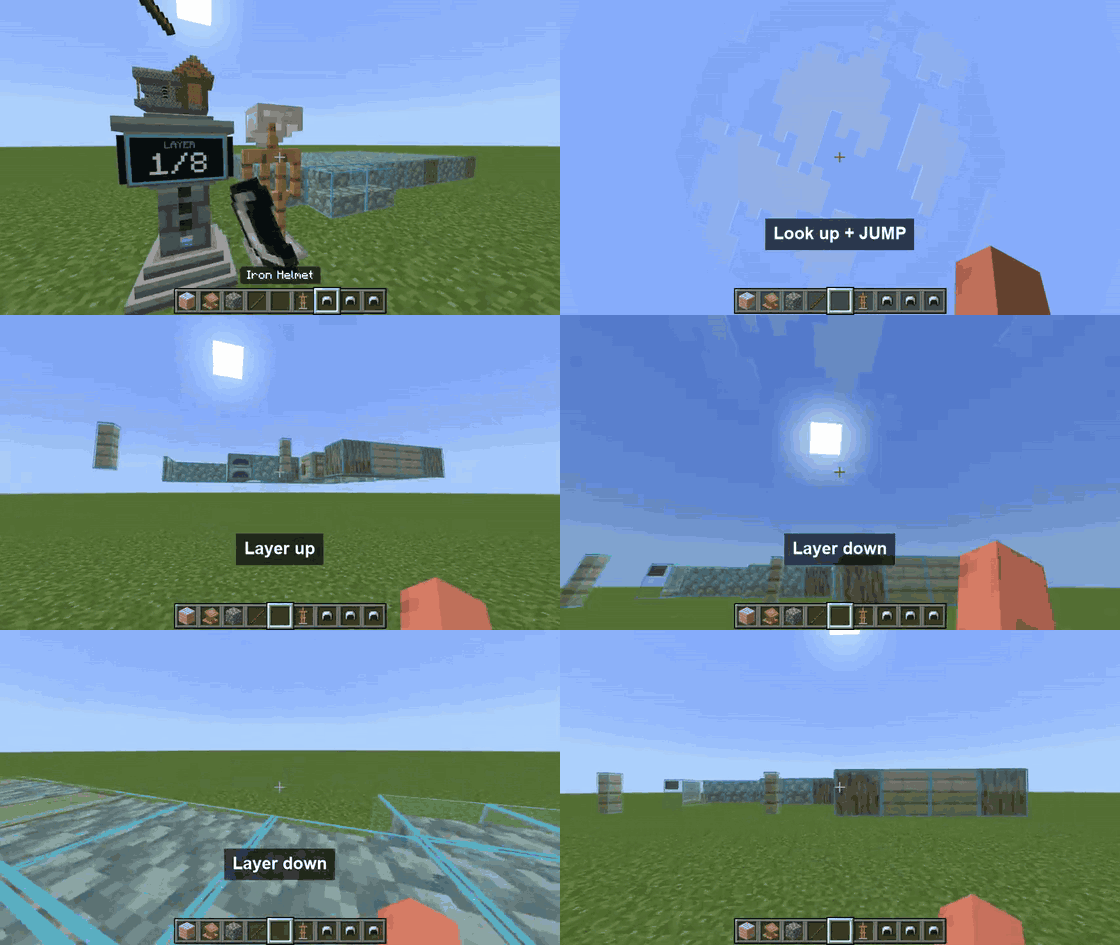
Your feet (live): the layer moves by itself with the height you stand at. Go up and the layer goes up.
Look up + jump or crouch: look straight up, then jump to go one layer up or crouch to go one layer down.
Your feet shows (only for Your feet): which layer you see.
Under you + your layer (default): the layer under your feet and the layer you stand in.
Layer under you: only the layer under your feet.
Your layer: only the layer you stand in.
Layer above you: only the layer above the one you stand in.
The menu in the game
10. Open the Buildmatica menu
Press the Buildmatica button. You find it on the start screen, on the pause screen, in chat and in your inventory.
11. Look at a build and its blocks
Open the Builds tab. Every build in your pack is one row in the list.
On the left is a picture of the build.
Next to it is the name of the build.
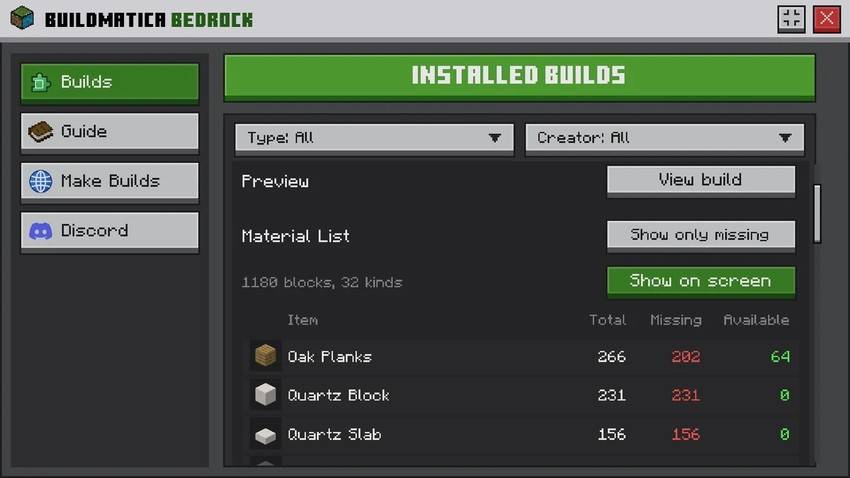
Use shows the item or name tag you give the armor stand to show this build. Here it is a Stick.
Press the row, or the arrow on the right, to open the build.
An opened build shows these things:
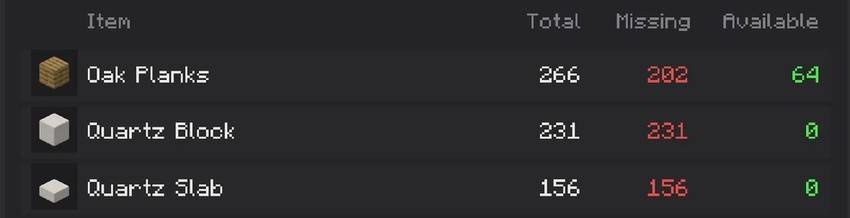
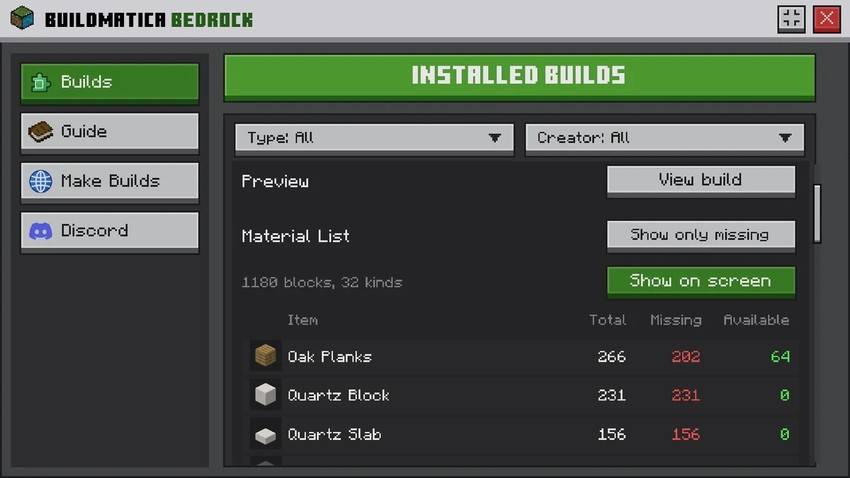
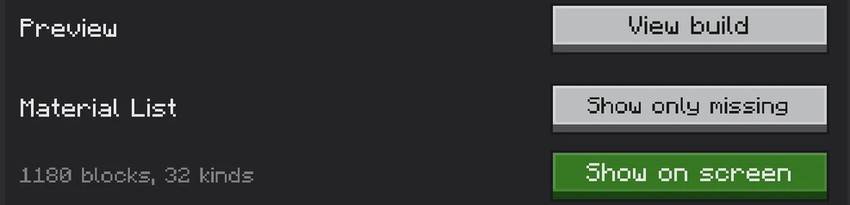
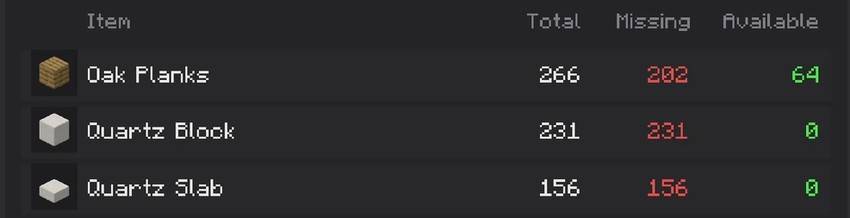
Material List: every block the build needs, with three numbers.
Total: how many the build needs.
Missing: how many more you need. Shown in red.
Available: how many you have in your inventory. Shown in green.
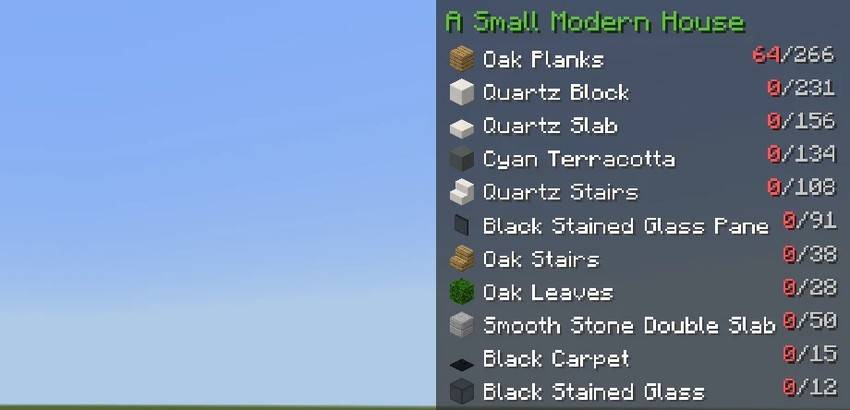
Show on screen: the block list stays in the corner while you play, so you do not need to open the menu. The red number is how many you have in your inventory. The grey number is how many you need. On PC, the down arrow key hides or shows the list.
Community
12. Use builds from other players
Open Community builds on voxenmc.com/buildmatica. Search, or filter by type and creator, and sort the list.
Press a build to see it from all sides, its size and the blocks it needs.
Add to my pack puts it in your pack. Download file gives you the .mcstructure file.
13. Share your own build
Press Log in on the website and make an account.
Open Community builds and press Upload build. Bedrock .mcstructure and Java .litematic, .schem, .schematic and .nbt files can be uploaded.
Give it a name, pick a type and write a few words about it.
Having any issues with my mods or found a bug? Or maybe you have an idea for a mod that you would like me to make? Join my Discord server and let me know! I'm active there regularly and would love to hear your feedback, suggestions, and ideas.
See live health bars above every mob and player — sheep, pig, villager, Warden and more! Two subpacks included: Always Visible or Only When Hit for 5 seconds. Never guess a mob's health again!
Animated Glowing Ores makes every ore glow with a smooth animated effect, visible from a distance. Pick from many animation styles in-game. Each ore keeps its own natural color. Requires Vibrant Visuals. Achievement friendly.
Enter a Herobrine-corrupted dimension with Nether biomes, corrupted lightning-strike mobs, 18+ custom ores, and abandoned structures. Enter via Netherrack portal. Achievement friendly.
See live health bars above every mob and player — sheep, pig, villager, Warden and more! Two subpacks included: Always Visible or Only When Hit for 5 seconds. Never guess a mob's health again!
Animated Glowing Ores makes every ore glow with a smooth animated effect, visible from a distance. Pick from many animation styles in-game. Each ore keeps its own natural color. Requires Vibrant Visuals. Achievement friendly.
Enter a Herobrine-corrupted dimension with Nether biomes, corrupted lightning-strike mobs, 18+ custom ores, and abandoned structures. Enter via Netherrack portal. Achievement friendly.