xsoras | ShaderBench
Create a server, get 25% off your first month

Description

SHADER BENCHMARKING MOD
ShaderBench
A small client-side mod for comparing the shader packs you already have installed.
I made it because swapping shaders manually, watching the FPS counter for a while, then trying to remember which one actually ran better gets old pretty fast. ShaderBench just does that part for you.
Average FPS • 1% Low • 0.1% Low • Frame Times • Run Checks
What it actually does
Mostly tries to stop you from comparing two completely different situations.
01
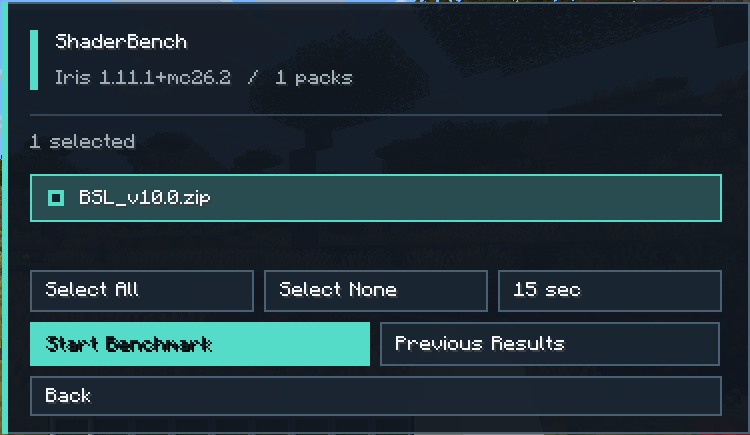
Pick your shader packs
ShaderBench reads the packs already in your
shaderpacks folder. Select whatever you want to compare and leave the rest alone.02
It switches through Iris
The selected shader is enabled through Iris, then ShaderBench waits a bit before measuring. The first few seconds after a shader loads are usually messy anyway.
03
Frame times are recorded
The world stays loaded and the camera stays where you left it. Frame times are collected for the selected measurement period.
04
You get the results
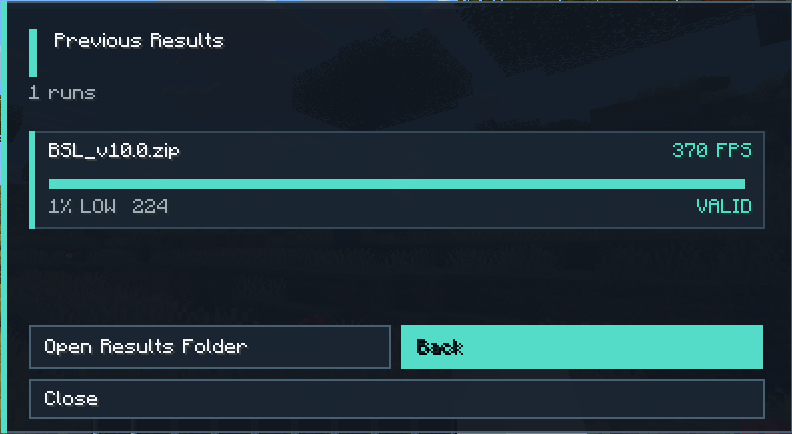
The tested shader packs are shown together when the run ends. The raw results are saved too, in case you need them later.
Installation
Nothing unusual here.
1. Install Iris
Install Iris and whatever dependencies it needs for your Minecraft version. ShaderBench uses Iris to switch shader packs.
2. Put ShaderBench in your mods folder
Download the file for your Minecraft version and put it in
mods. ShaderBench is client-side, so the server does not need it.3. Add your shader packs
Put the packs you want to test in
shaderpacks, join a world, then bind Open ShaderBench in Controls. There is no default keybind.4. Run it
Pick the packs, choose how long you want each one measured, then start. Keep the camera still and try not to alt-tab halfway through the test.
Timing
The defaults are short enough to be useful without sitting there forever.
5s Warmup
15s Default measurement
30s Longer run
60s Long run
15s Default measurement
30s Longer run
60s Long run
The ShaderBench panel stays over the live world while a test is running. You can see the current shader, progress, live FPS and recent frame times.
RESULTS
Saved locally.
Finished runs are saved in
shaderbench/results/. Both JSON and CSV are written.Your previous Iris shader is restored after the benchmark. ShaderBench does not upload any of the results.
JSON • CSV • Local only • Shader restored
What the numbers mean
Average FPS
Calculated from the average frame time during the test. Useful, but obviously not the whole picture.
1% Low
Shows shorter drops that the average can hide. This is usually where two similarly fast packs start feeling different.
0.1% Low
Mostly useful for spotting the nastier frame-time spikes.
Compromised
If you move, turn the camera, lose focus, change graphics settings, or hit a large frame stall, the result can be marked as compromised. It still gets saved. It just probably should not be used as a serious comparison.
Keep the same world, spot, camera angle, resolution, render distance and graphics settings if you want the numbers to mean anything.
Compatibility stuff
ShaderBench relies on Iris for shader switching. Some parts of that can change between Iris versions, so an Iris update can occasionally break things.
Shader compilation itself can also fail because of the shader pack, Minecraft, Iris, your graphics driver, or some GPU-specific nonsense. If a pack behaves strangely, trying another pack is usually a decent first check.
ShaderBench
shaderBench Team


Owner