


EmoteStudio
- By
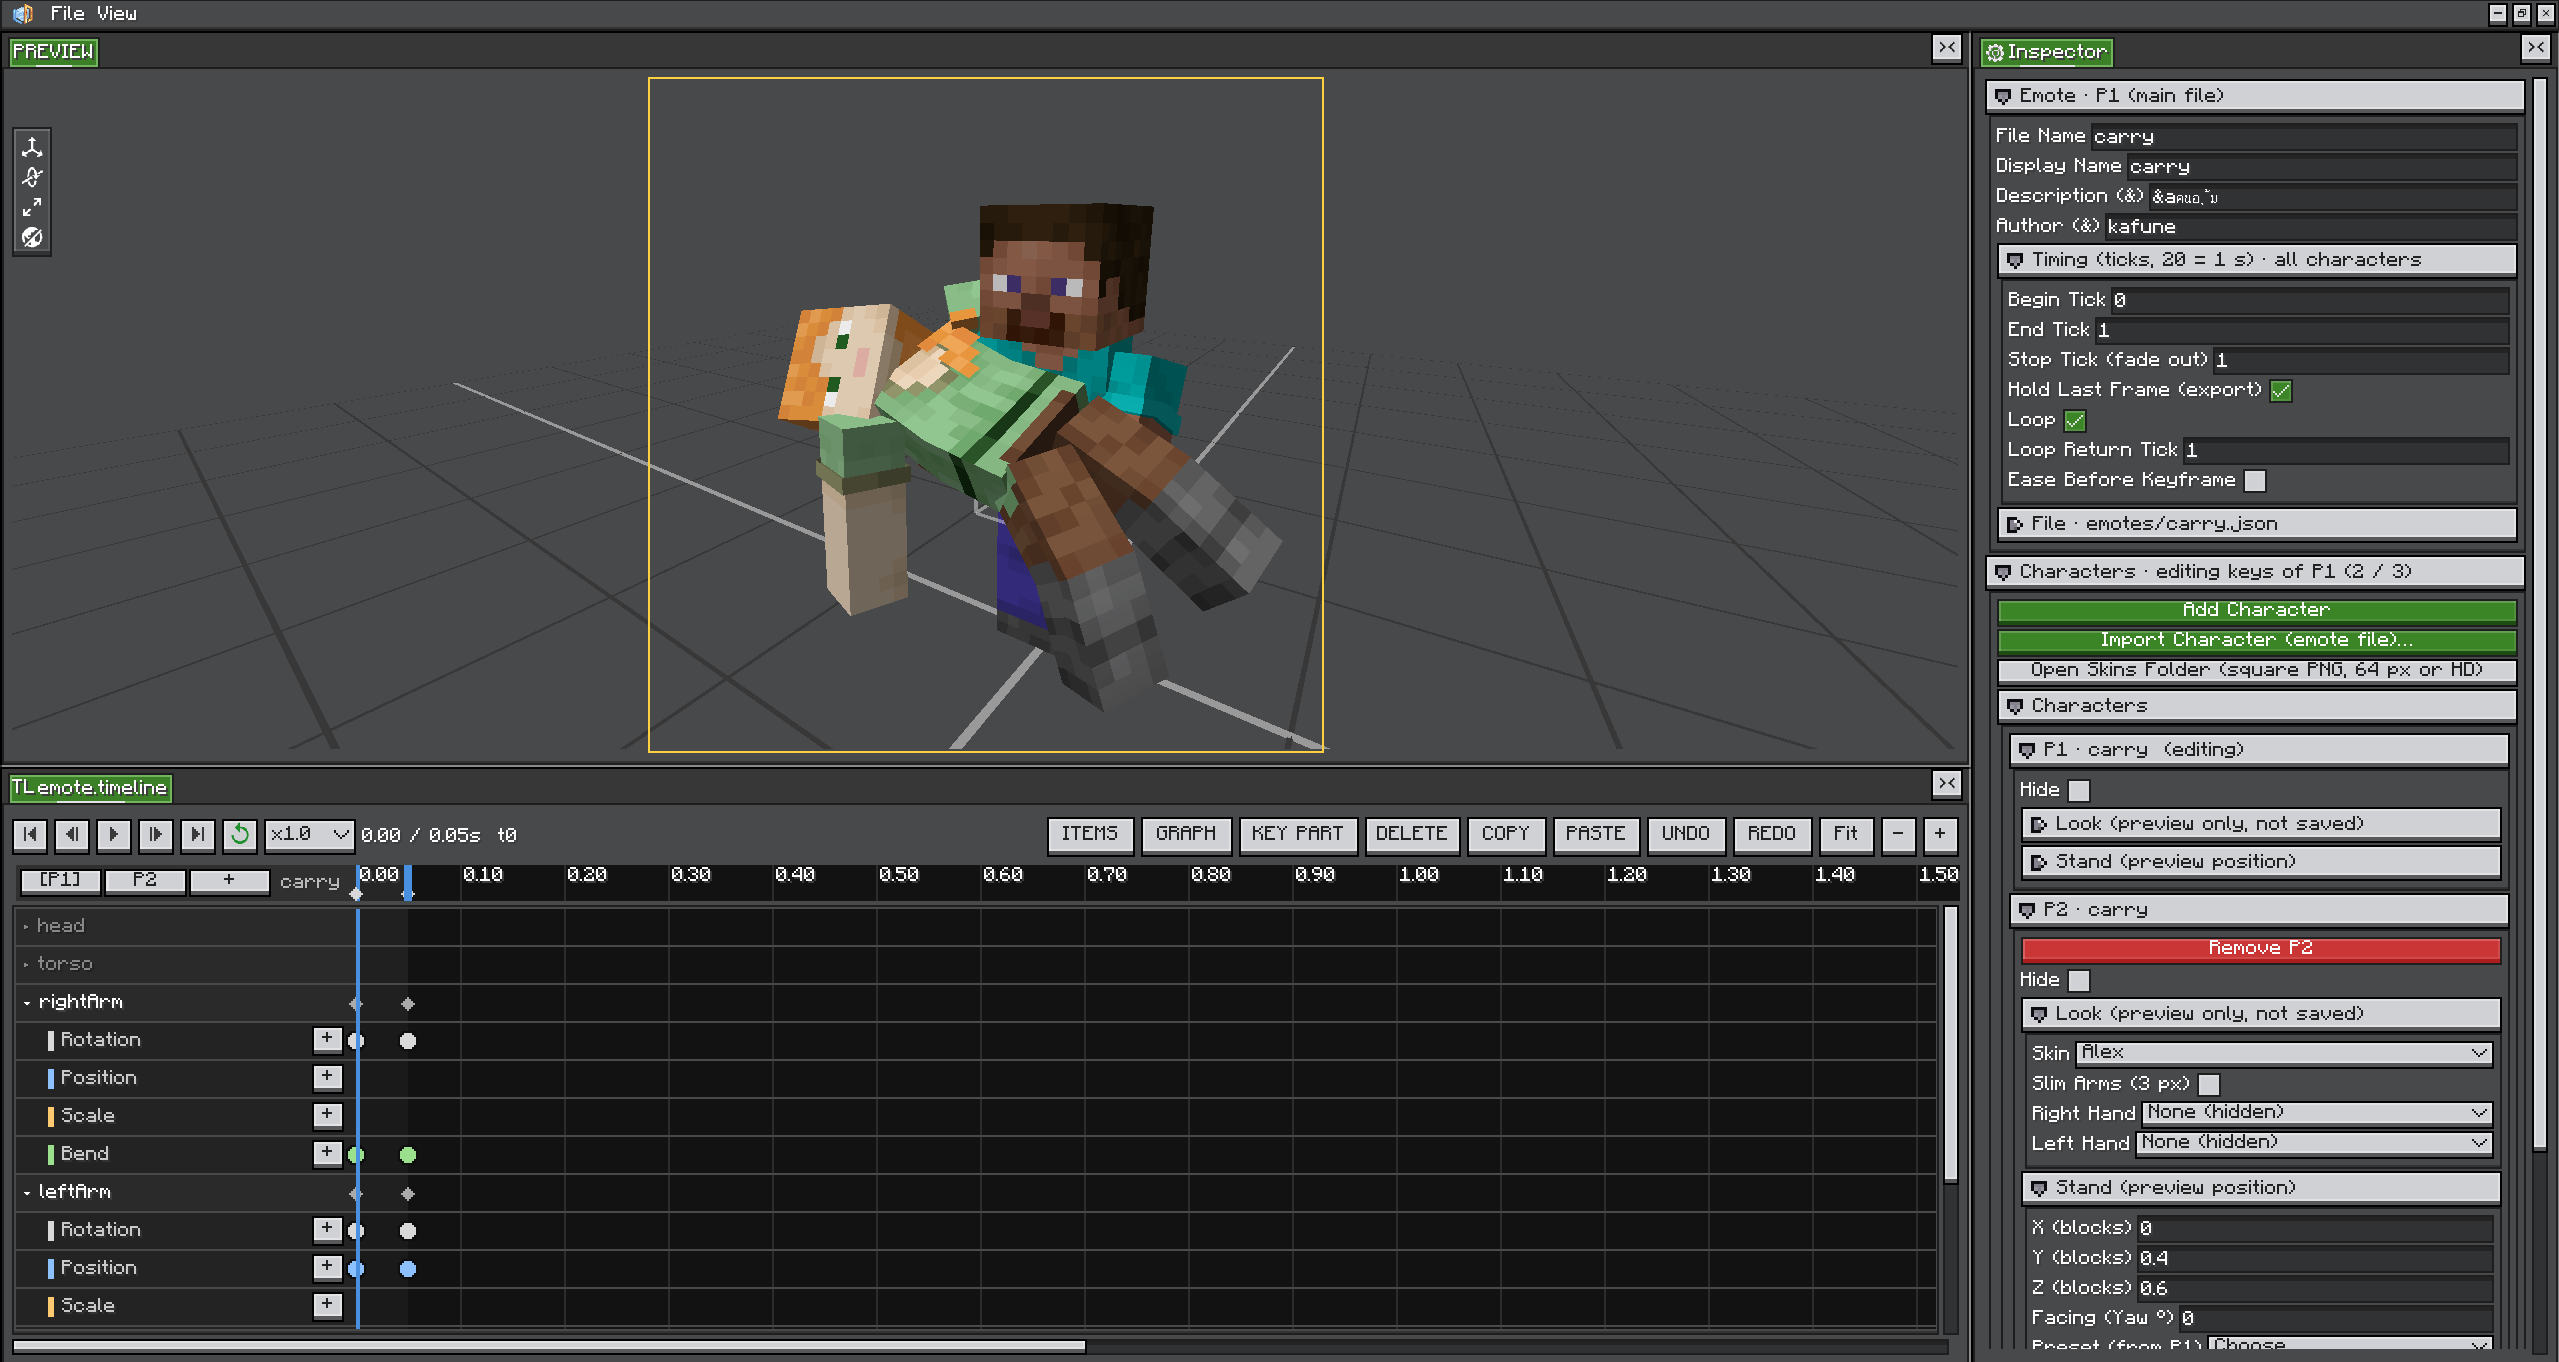
An in-game animation editor for Emotecraft emotes. Pose, keyframe and preview your emotes right inside Minecraft, with support for multi-character scenes such as Carry On and piggyback.
Description
Emote Studio
An in-game animation editor for Emotecraft emotes. Pose, keyframe and preview your emotes right inside Minecraft, with support for multi-character scenes such as Carry On and piggyback.
Features
- In-Game Editor: Edit Emotecraft JSON emotes with a 3D preview, a timeline and transform gizmos
- Graph Editor: Fine-tune easing with custom curves for each part
- Multi-Character Scenes: Up to 3 characters per emote, with Carry On / Piggyback position presets
- Custom Skins: Preview with your own skin, the default skins or any PNG from the skins folder
- Emote Picture: Take a picture of the emote for one character or every character in the scene
- Client-Side: No server-side installation required
Requirements
- Minecraft: 1.21.1 (NeoForge)
- LDLib2: 2.2.42 or higher
- Player Animator
- Emotecraft (to play your emotes in game)
How to Use
Opening the editor
/emotestudio: opens the editor and asks which emote to open or create/emotestudio <file>: opens that file directly (Tab shows the files you can pick)
Emotes are read from and saved to .minecraft/emotes/. Only .json emotes can be edited. Emotecraft's binary .emotecraft files are not supported.
Making an animation
- Click a body part on the model or in the timeline
- Move the timeline to a tick, then pose the part with the gizmo
- Press
Kto key the whole part, or use Add Keyframe - Press
Spaceto play the animation and check it - Press
Ctrl + Sto save
Drag the end handle on the timeline to change the length. In Emote Settings / Files you can set Begin / End / Stop tick, Loop, Loop Return Tick, Display Name, Description and Author.
Shortcuts
| Key | Action |
|---|---|
Space |
Play / Pause |
← / → |
Step one tick |
K |
Key the whole selected part |
Delete |
Delete the selected keyframes |
R / V / S |
Rotate / Move / Scale gizmo |
G |
Toggle the graph editor |
Ctrl + Z / Ctrl + Y |
Undo / Redo |
Ctrl + C / Ctrl + V |
Copy / Paste keyframes |
Ctrl + S |
Save |
In the graph editor, drag ● to move a point and right-click to delete it.
Multi-character scenes
- Add Character adds a new partner, and Import Character (emote file)… adds an existing emote as a partner
- Pick a character in Characters to edit its keyframes. Every character shares the same timing.
- Use the position presets to place the character for Carry On (held by P1) or Piggyback (on P1's back)
- On save, P1 is saved as
<name>.jsonand each partner is saved beside it as<name>_p2.json,<name>_p3.json
Skins
Put a square PNG skin (64 px or HD) in .minecraft/emotes/skins/, then choose it in the character settings. Open Skins Folder opens that folder for you. Tick Slim Arms for skins with 3 px arms.
Emote picture
Open Camera · emote picture:
- Show Picture Frame shows the area that will be in the picture
- Focus chooses which character to save the picture for. The other characters are shown at 30% brightness.
P1/P2/P3: saves the picture only for that character (<name>.png,<name>_p2.png…)All: saves the same picture for every character in the scene
- Take Picture saves the PNG beside the emote file (save the emote first)
How It Works
- Emote Format: Reads and writes Emotecraft's JSON format, so saved emotes play in Emotecraft directly
- Extra Data: Custom curves, partner links and character positions are kept in extra fields that Emotecraft ignores
EmoteStudio Team


