Welcome to Golems Infinity! Enhance your Minecraft Bedrock experience with new Golems, each with a unique design and function.
To learn more about the Golems in-game, craft the Golem Guidebook.
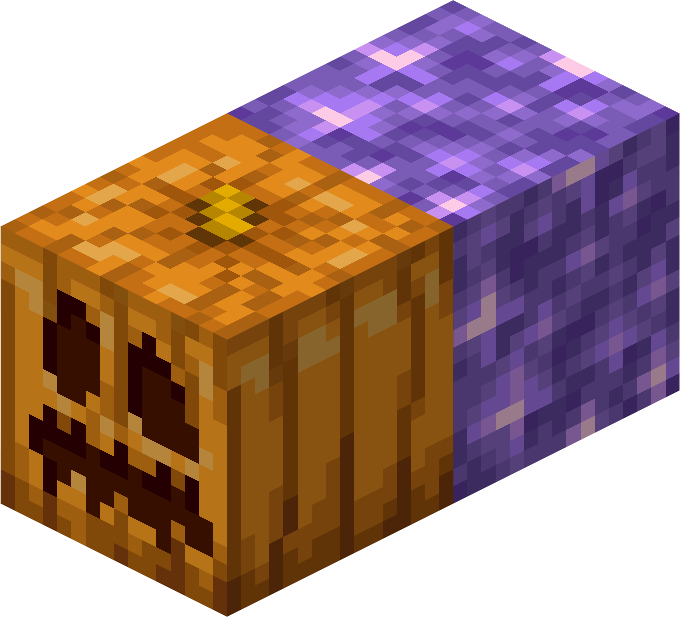
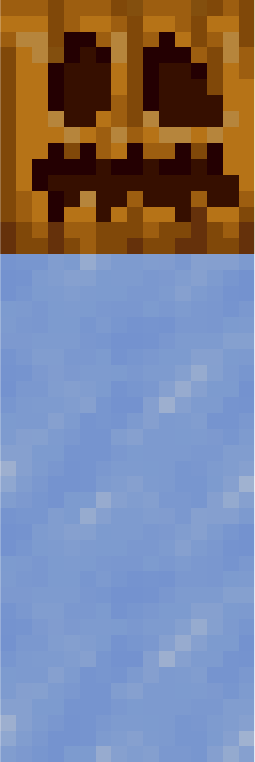
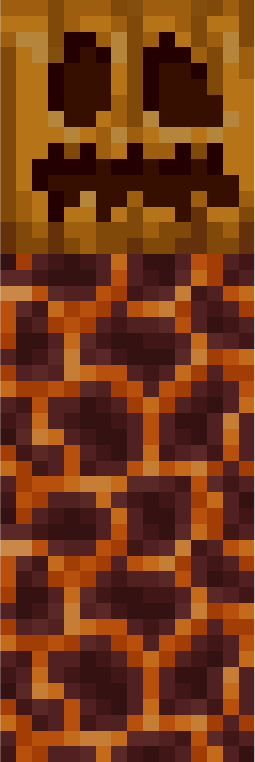
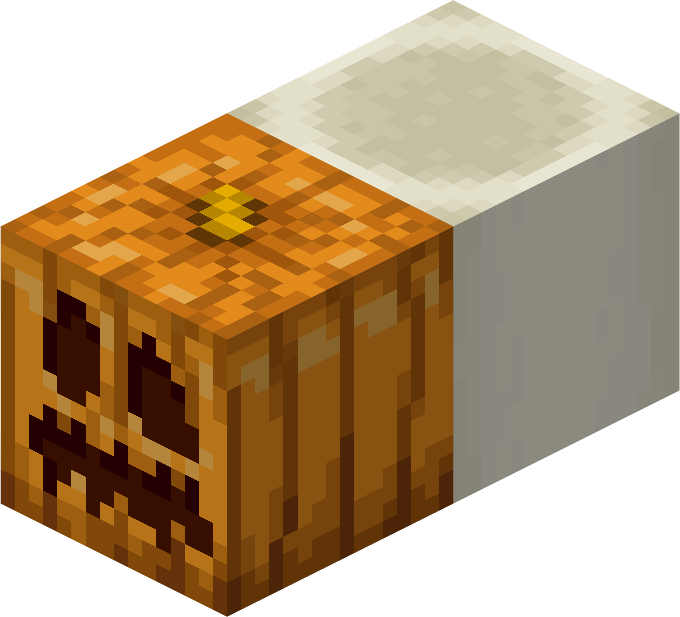
The Guidebook can be crafted by combining a Book with a Carved Pumpkin or Jack o'Lantern.
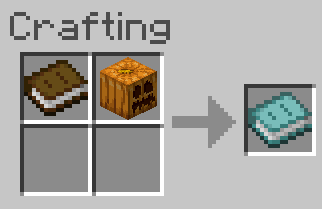
(The recipe is shapeless.)
The Golem Guidebook has information about all the Golems in the Addon, and you can even view holograms of each Golem's structure using the Guidebook.
GOLEMS:
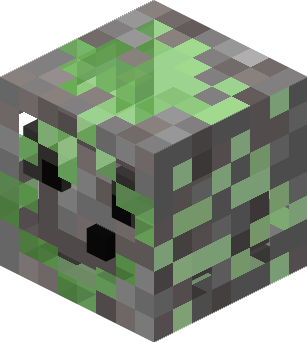
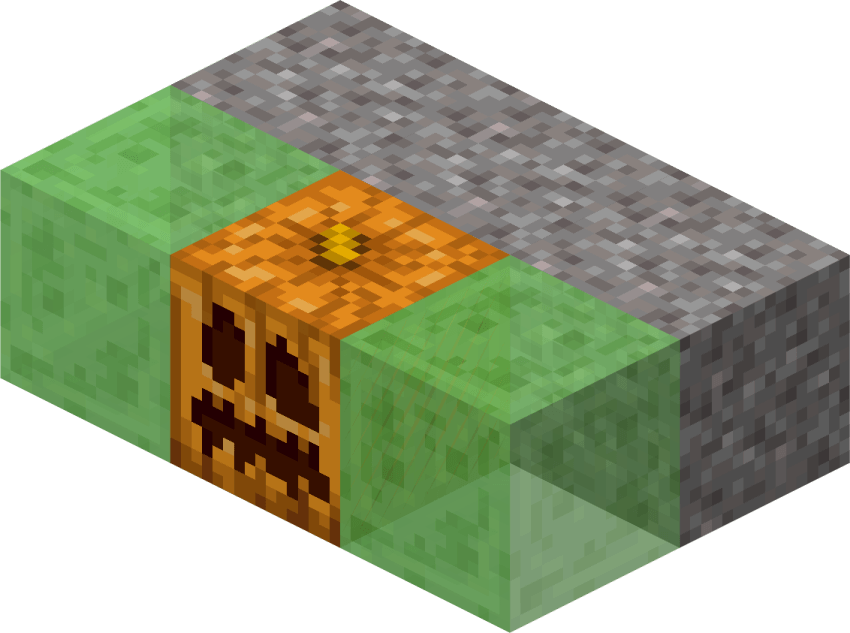
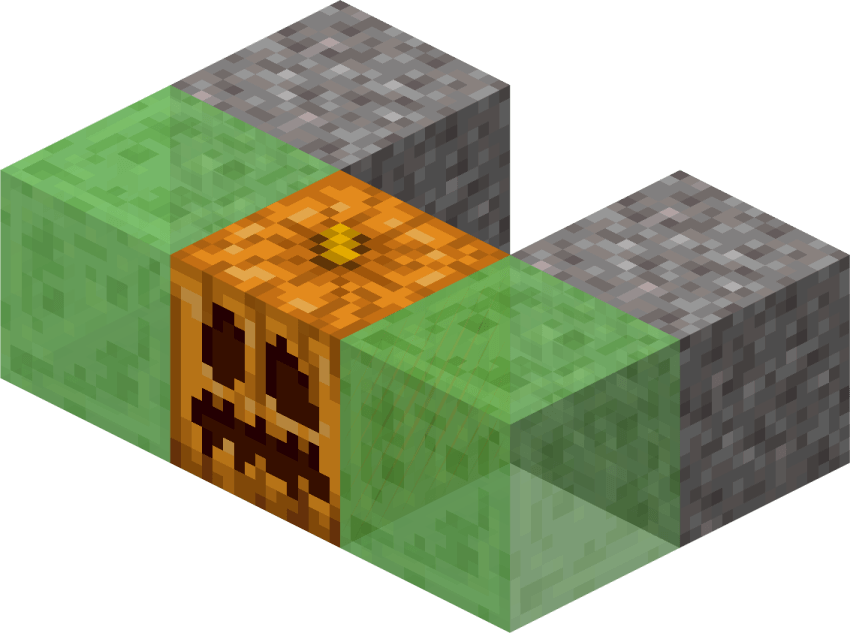
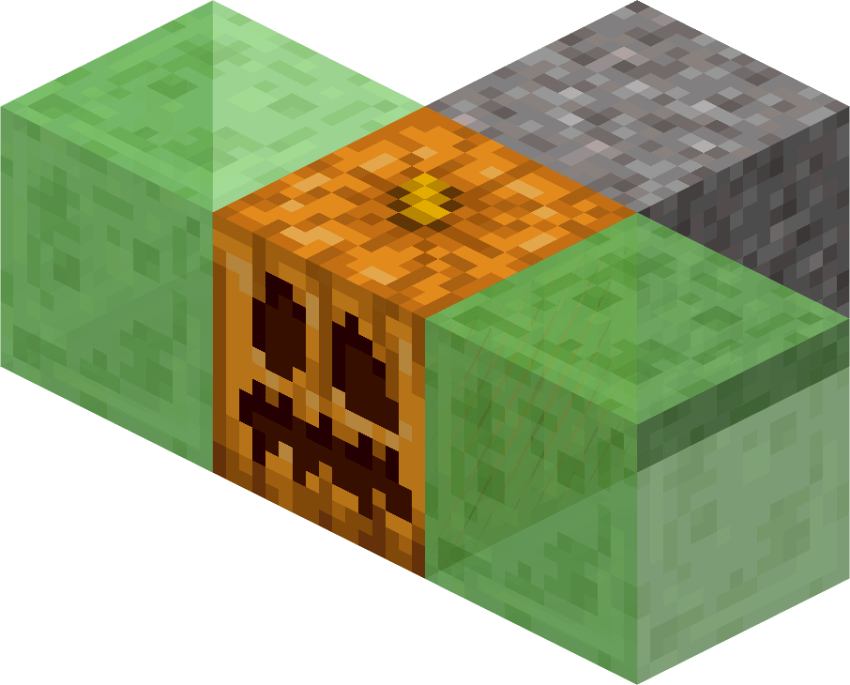
Emerald Golem:
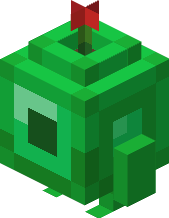
Utility Summary: Can be used to give yourself Hero of the Village without having to fight a raid.
Emerald Golem Information:
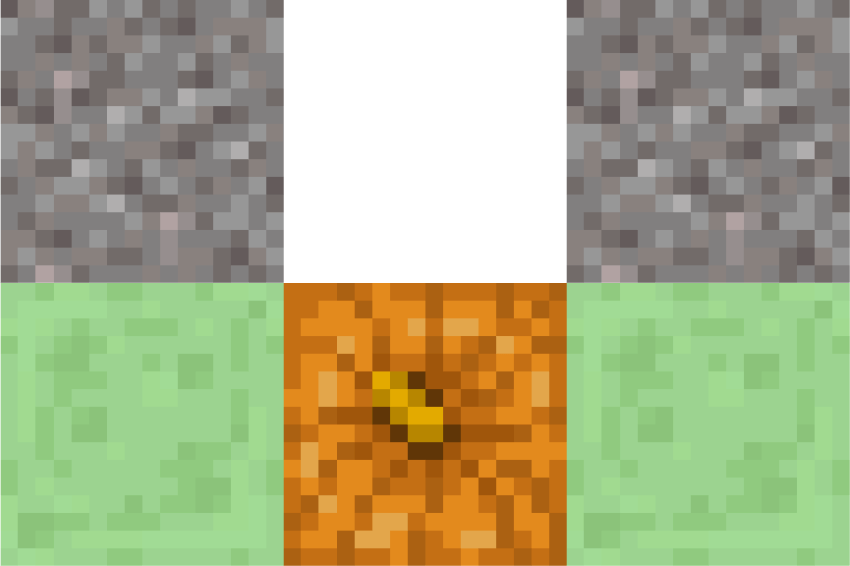
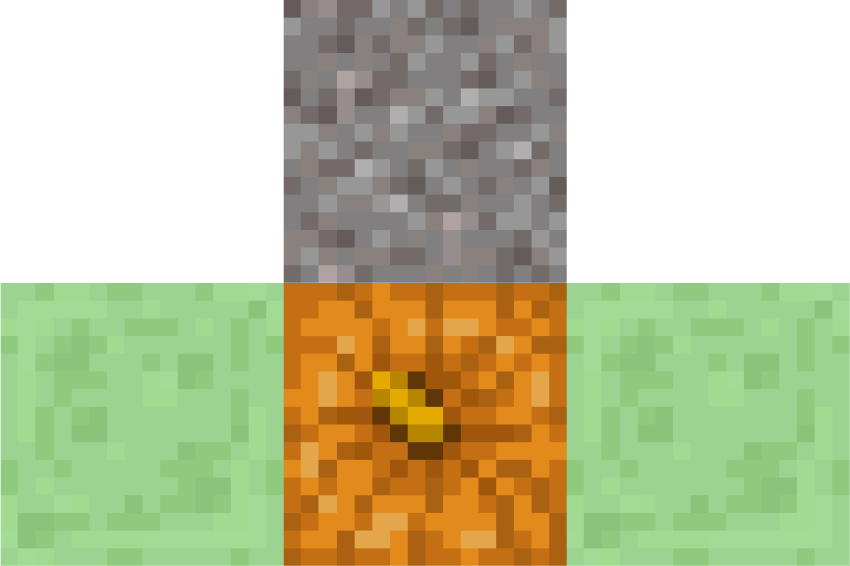
This is the structure for the Emerald Golem.
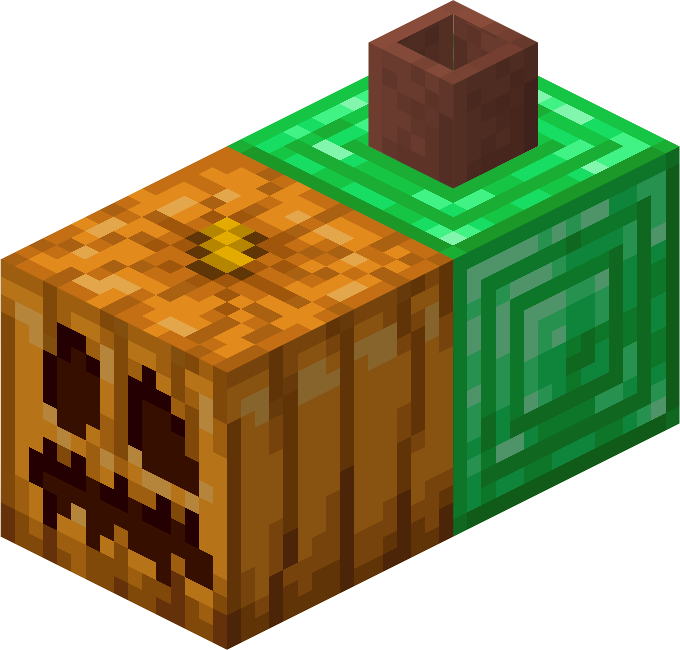
Side View:
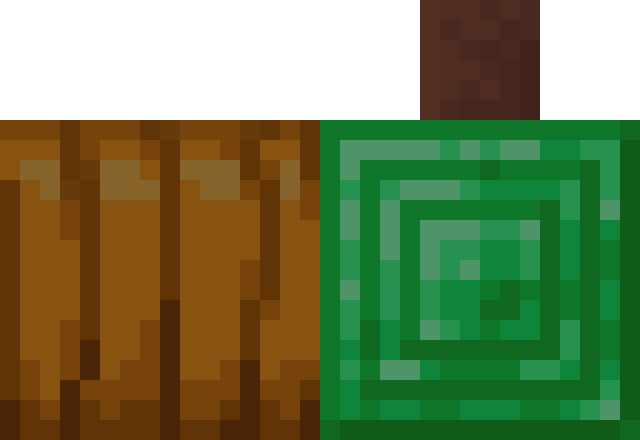
Required Materials:
1 Carved Pumpkin/Jack o'Lantern
1 Emerald block
1 Flower Pot
Emerald Golem Statistics:
Behavior: Passive
Healable: No
General Information:
If you right-click on it while holding an Emerald, it consumes the Emerald and becomes Corrupted. When it becomes Corrupted, you receive the Hero of the Village effect. After thirty seconds the Emerald Golem returns to Normal. You can Corrupt the Emerald Golem only three times. Each time it gets Corrupted, the Hero of the Village effect gets stronger, but also shorter. After you corrupt the Emerald Golem a third time, something will happen...
Quartz Golem:
Utility Summary: Can be used to exchange Nether Quartz for Ores.
Quartz Golem Information:
This is the structure for the Quartz Golem.
Side View:
Required Materials:
1 Carved Pumpkin/Jack o'Lantern
1 Quartz block
Quartz Golem Statistics:
Behavior: Passive
Healable: No
General Information:
You can trade with the Quartz Golem. If you give it Nether Quartz, it will give you any kind of Ore you seek. And that’s pretty much it.
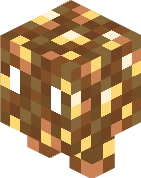
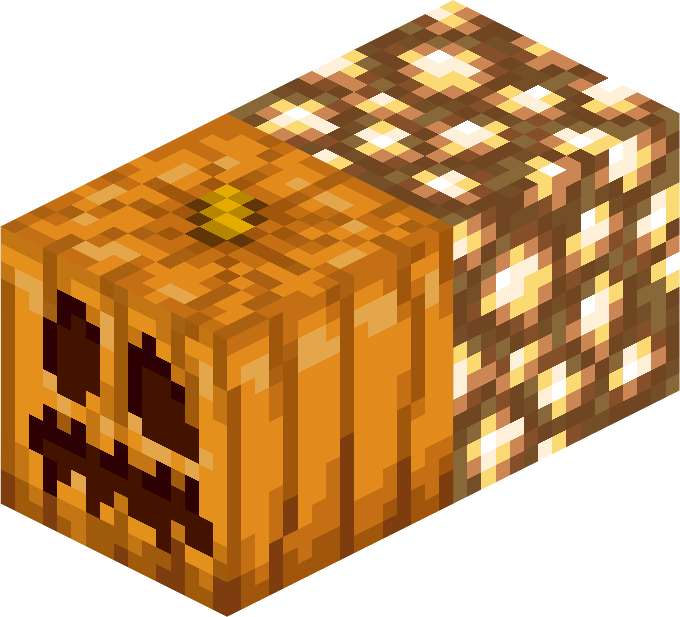
Gold Golem:

Utility Summary: Takes items received in Piglin trades and gives you Gold Nuggets in return.
Gold Golem Information:
This is the structure for the Gold Golem.
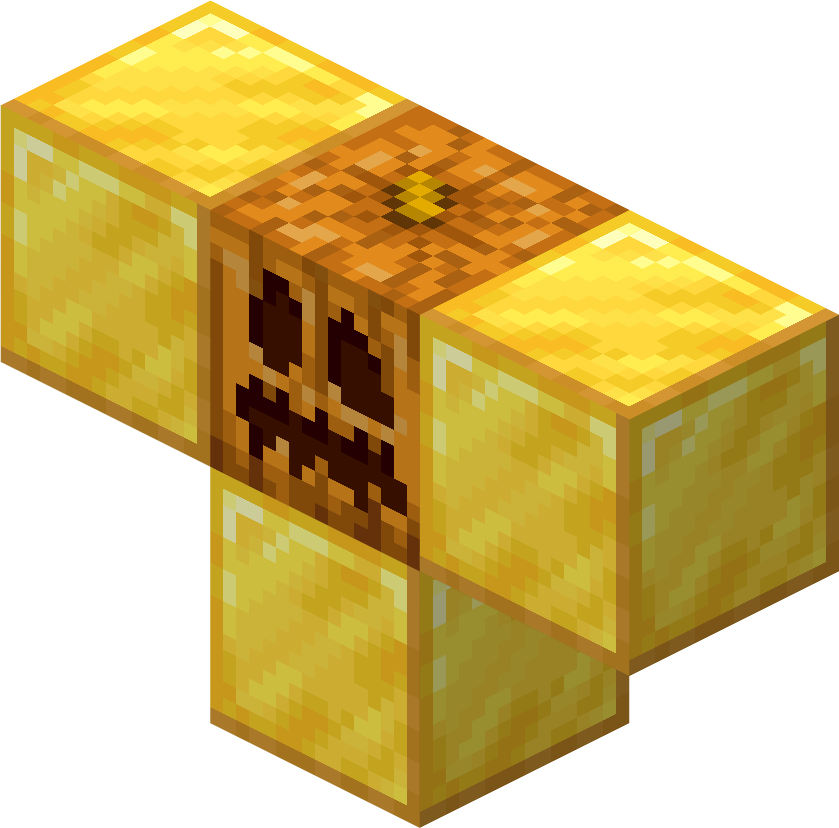
Side View:
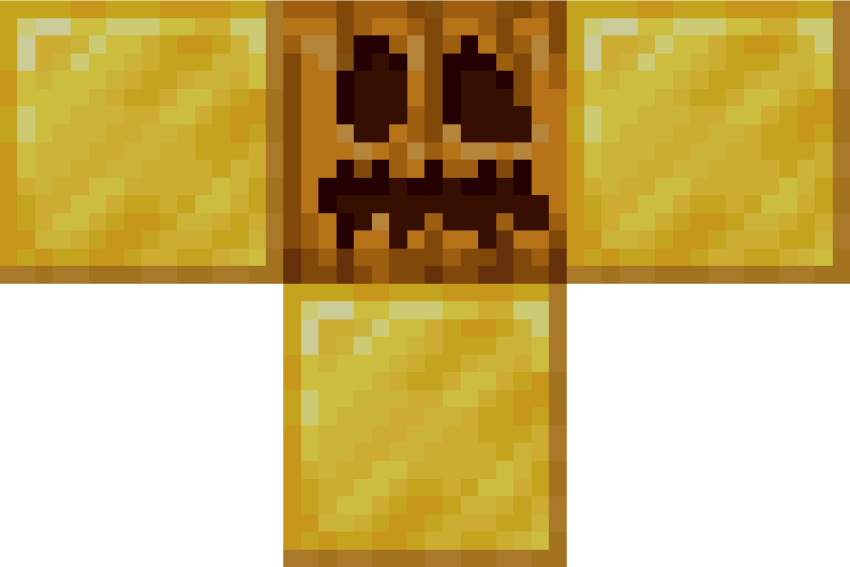
Required Materials:
1 Carved Pumpkin/Jack o'Lantern
3 Gold blocks
Gold Golem Statistics:
Behavior: Neutral
Healable: No
General Information:
The Gold Golem is hostile towards all mobs except Piglins, mobs wearing Gold Armor (Player included.), Golems that are partially made of Gold, and other Gold Golems. The Gold Golem can only sense targets within eight blocks of itself, however, if a Gold Golem starts attacking something, all other Gold Golems in a sixteen block area all run over to join the fight. If you have any items that a Piglin has given you (Like Soul Sand, Leather, Ender Pearls, Fire Charges, String, etc.) then you can right-click on a Gold Golem while holding that item and it will take your item and inspect it. Once it has inspected it, it will give you back a certain number of Gold Nuggets, depending on how rare the item you gave it was. It’s like a Piglin refund! But just make sure to keep your Gold Armor on. If a Gold Golem sees you with your Armor off, it might keep attacking you, even if you put your Armor back on. Gold Golems can spawn naturally in the Nether. If you hold a Gold Ingot in your hand, Gold Golems will follow you. Gold Golems will follow Piglins and mobs wearing Gold Armor.
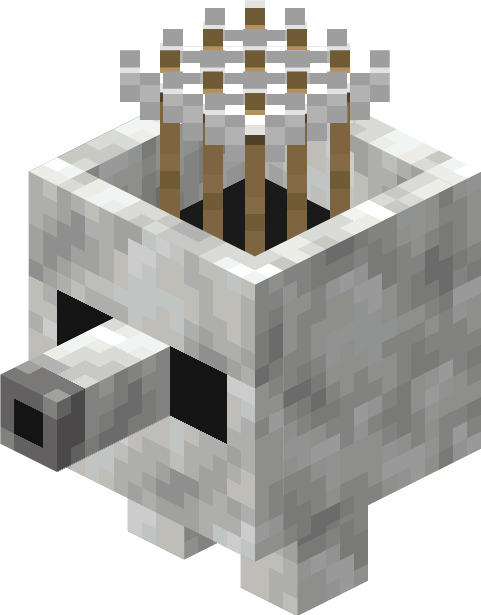
Coal Golem:
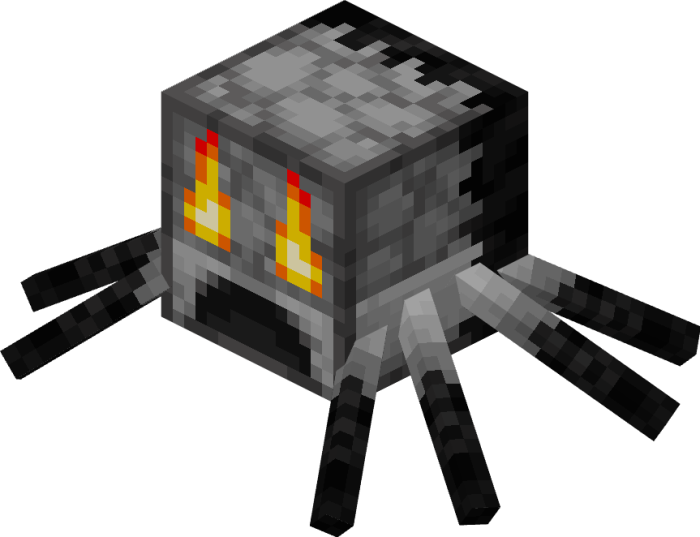
Utility Summary: Acts as a mobile Chest and Furnace, as well as providing light to see with.
Coal Golem Information:
This is the structure for the Coal Golem.
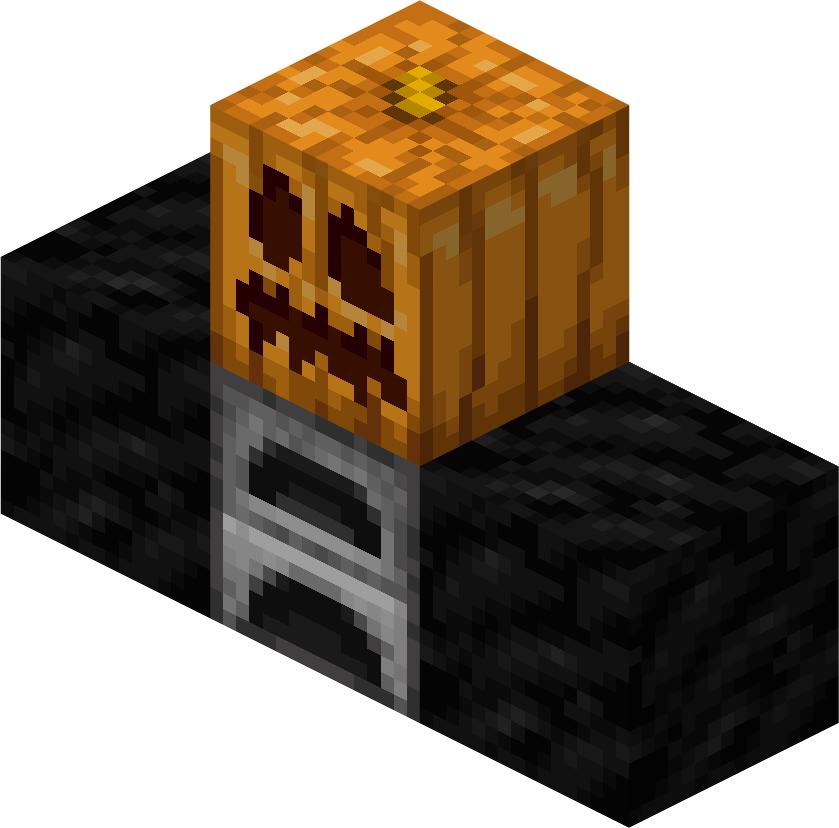
Side View:
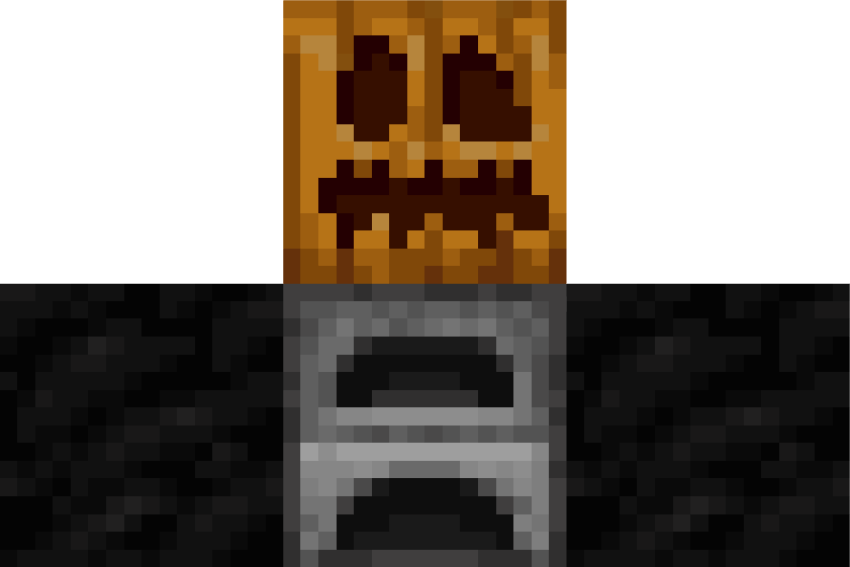
Required Materials:
1 Carved Pumpkin/Jack o'Lantern
2 Coal blocks
1 Furnace
Coal Golem Statistics:
Behavior: Passive
Healable: Yes; Coal
General Information:
You can tame the Coal Golem using Coal. Once you tame it, the Coal Golem will follow you around. The Coal Golem also produces light for you. If you right-click on the Coal Golem while holding Raw Copper, Raw Iron, or Raw Gold, then it will smelt the Raw Ores for you. However, after 40 to 60 minutes of being spawned, the Coal Golem will run out of fuel, which means it cannot smelt Raw Ores or give off light. To refuel it, you must right-click it with a Block of Coal; The Block of Coal will be consumed and the Golem will have enough fuel for the next 40 to 60 minutes. If you right-click on the Coal Golem without holding a Raw Ore, then you can access its Inventory. You can put items in and take items out of the Inventory, just like a Chest. The Coal Golem's items can also be siphoned out of its inventory using a Hopper.
Lapis Lazuli Golem:

Utility Summary: Can separate enchantments from items; removes an enchantment from an item and adds it to an unenchanted Book.
Lapis Lazuli Golem Information:
This is the structure for the Lapis Lazuli Golem.
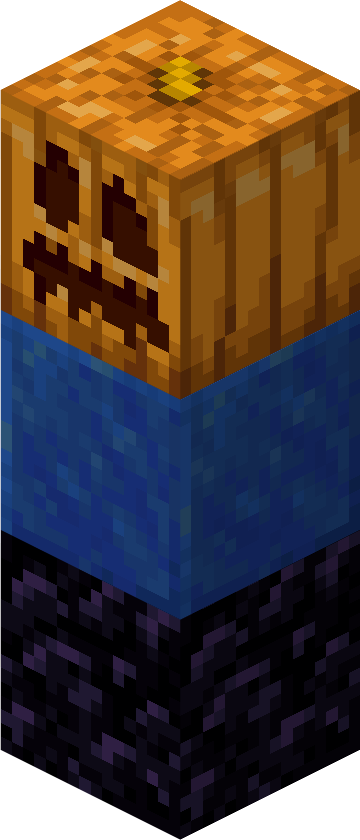
Side View:
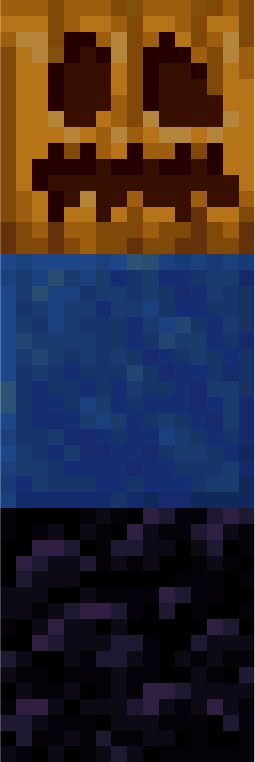
Required Materials:
1 Carved Pumpkin/Jack o'Lantern
1 Lapis Lazuli block
1 Obsidian block
Lapis Lazuli Golem Statistics:
Behavior: Passive
Healable: No
General Information:
At first, the Lapis Lazuli Golem will spawn without a Book. If you right-click on it while holding an unenchanted Book, the Golem will take the Book and will be ready to separate an enchantment. Next, right-click on the Golem while sneaking and holding an enchanted item. The Golem will take the item and use its psychic powers to remove a random enchantment from the item and add it to the Book. It will then return both the item and the newly-enchanted Book to you.
Redstone Golem:

Utility Summary: Can protect you from the undead, as well as be used as a Redstone farm.
Redstone Golem Information:
This is the structure for the Redstone Golem.

Side View:
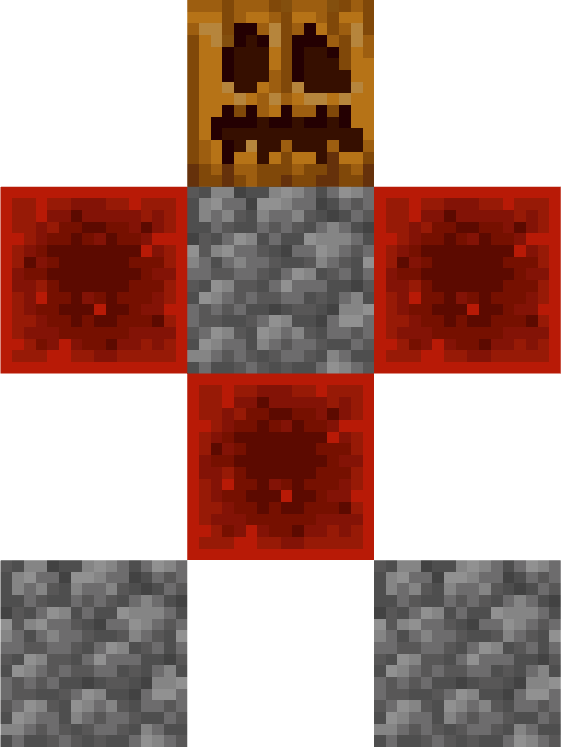
Required Materials:
1 Carved Pumpkin/Jack o'Lantern
3 Redstone blocks
3 Cobblestone blocks
Redstone Golem Statistics:
Behavior: Neutral
Healable: No
General Information:
If you right-click the Redstone Golem while holding a Pickaxe, then you ‘Mine’ the Redstone block off the Golem’s back, and it drops Redstone Dust. After half a Minecraft day (10 minutes.), the block will grow back. The better the Pickaxe, the more Redstone Dust is dropped. The Redstone Golem will attack undead mobs, but it will also attack Iron Golems, Villagers, and Wandering Traders. Redstone Golems attack by either swinging their arm at a target, or by summoning Redstone Landmines around themselves. Redstone Golems, under no circumstances, will ever attack Illagers. Initially the Redstone Golem won’t attack you, but if you hurt it then it will try to kill you.
Diamond Golem:

Utility Summary: Can protect you from monsters; it's a better version of the Iron Golem.
Diamond Golem Information:
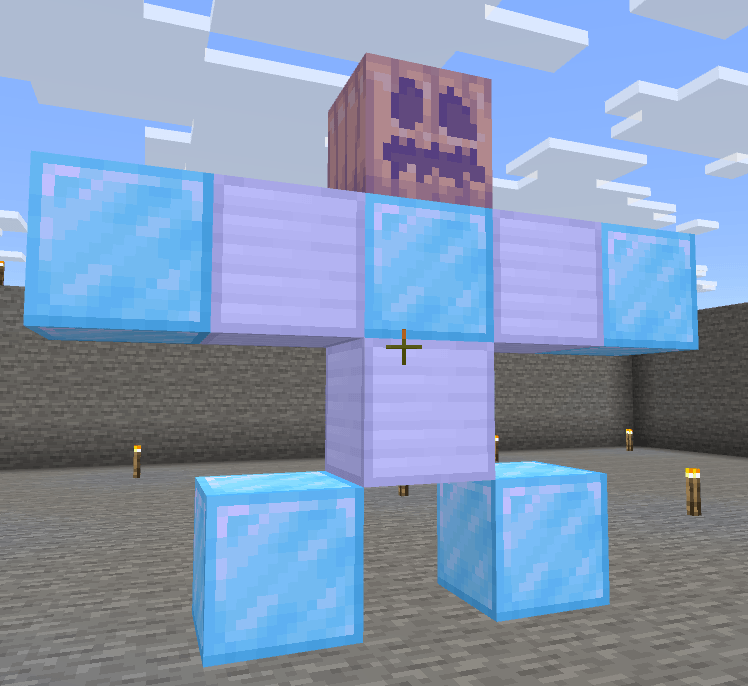
This is the structure for the Diamond Golem.
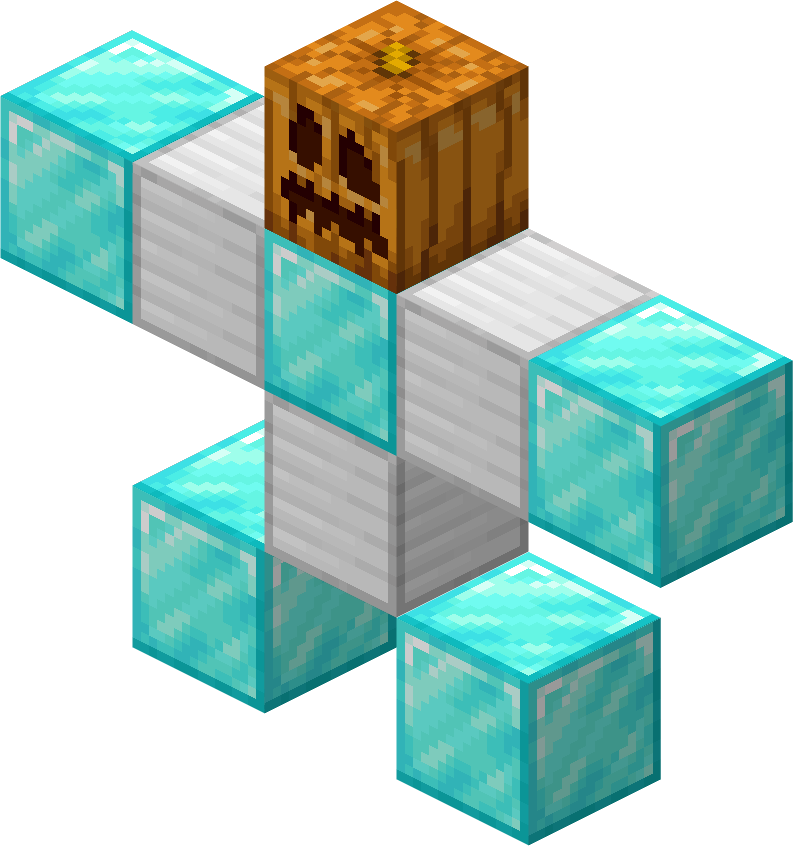
Side View:
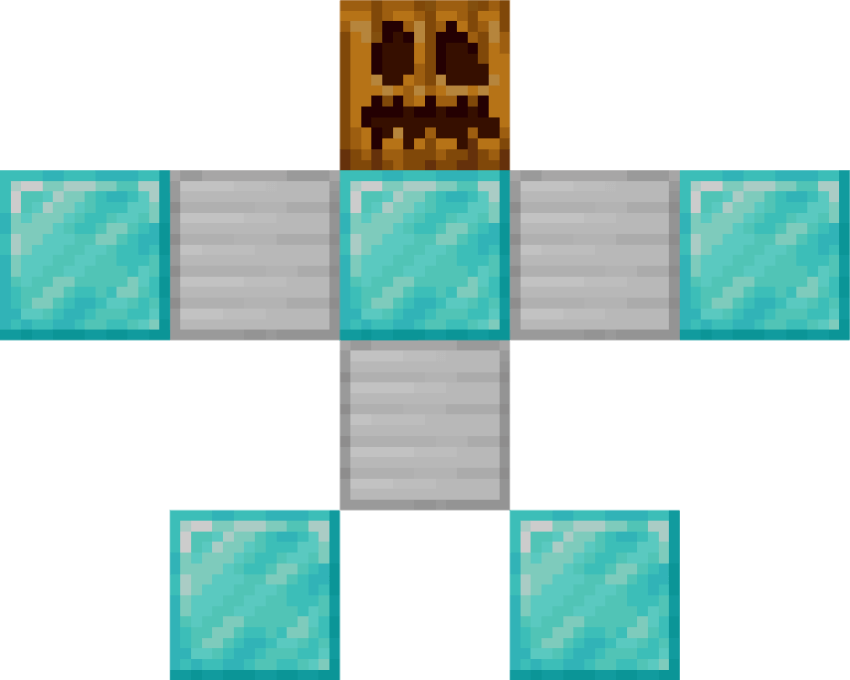
Required Materials:
1 Carved Pumpkin/Jack o'Lantern
5 Diamond blocks
3 Iron blocks
Diamond Golem Statistics:
Behavior: Passive
Healable: Yes; Diamond, Iron Ingot
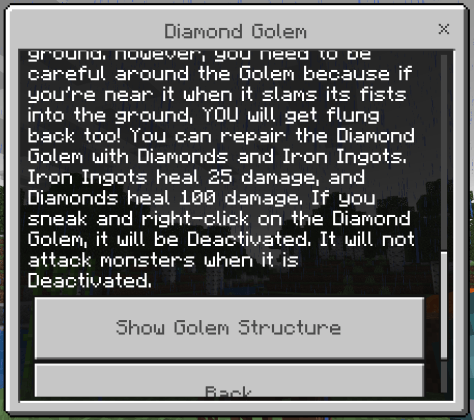
General Information:
The Diamond Golem acts similar to the Iron Golem. It walks around and attacks monsters. But there are a few differences. The Diamond Golem will attack and kill creepers, and the Diamond Golem has a powerful knockback attack. It also has as much health as a Warden. If there are more than three foes around it, the Golem will have a chance to slam its fists into the ground and create a shockwave that sends all mobs flying. Its fists get stuck in the ground after it does the attack, and it takes the Golem a little while to get them out. But don't worry, entity attacks and projectiles cannot hurt the Diamond Golem while its fist are stuck in the ground. However, you need to be careful around the Golem because if you're near it when it slams its fists into the ground, YOU will get flung back too! You can repair the Diamond Golem with Diamonds and Iron Ingots. Iron Ingots heal 25 damage, and Diamonds heal 100 damage. If you sneak and right-click on the Diamond Golem, it will be Deactivated. It will not attack monsters when it is Deactivated.
Netherite Golem:
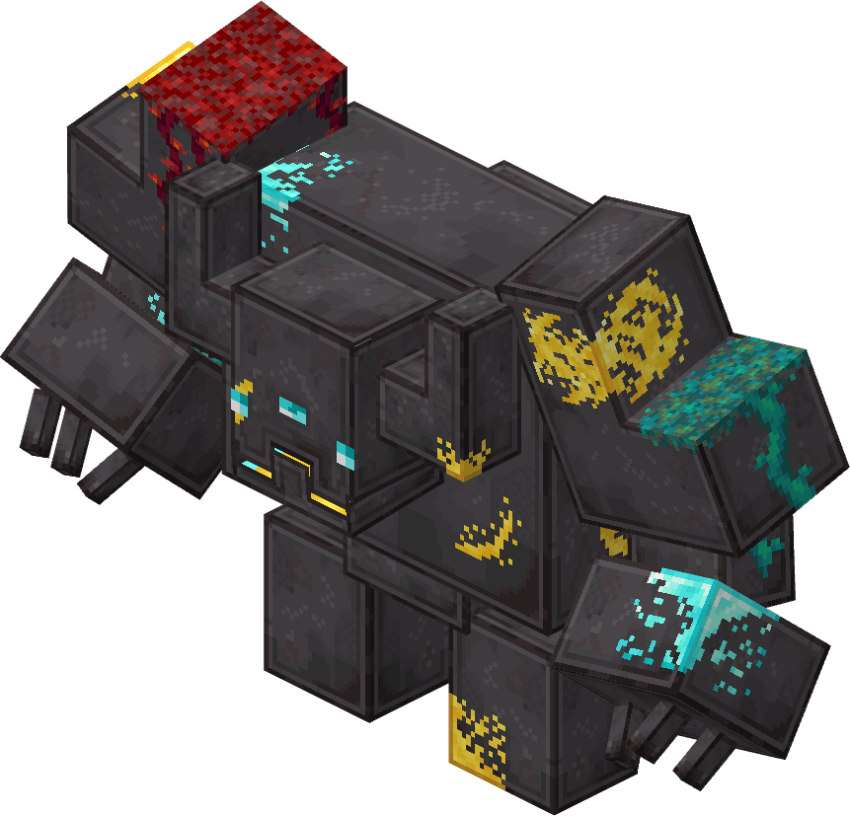
Utility Summary: Boss Golem; rewards include large amounts of Exp and a new item.
Netherite Golem Information:
This is the structure for the Netherite Golem.
Side View:
Required Materials:
1 Carved Pumpkin/Jack o'Lantern
1 Netherite block
4 Diamond blocks
5 Gold blocks
Netherite Golem Statistics:
Behavior: Hostile
Healable: No
General Information:
The Netherite Golem is a boss that drops 1000 to 1500 Exp. The Netherite Golem will attack Players, Diamond Golems, Iron Golems, and all types of Stone Golems. The Netherite Golem has 3 attacks, 1 ranged and 2 melee. Its ranged attack is it spits 2 large Fireballs at you, then creates an explosion at its position. Its common melee attack is it slams its fists into the ground and creates a shockwave weaker than the Diamond Golem's, but it does more damage. The second melee attack is it summons lava in a circle around it. The Netherite Golem is fire and explosion resistant, and can walk on lava. The Netherite Golem also creates a thin stone layer under it when it is on water, which allows it to walk over bodies of water. The Netherite Golem will also have bossfight music if spawned by building its structure. Once you kill the Netherite Golem, it will start shaking and explode. (Don't worry, the explosion doesn't do any damage or break any blocks.) When it explodes, it will scatter its Remains across the ground. Hit the Netherite Golem Remains to collect your items and Exp. (Tip: Get rid of all the lava before you destroy the Remains.) In total, the Netherite Golem Remains have a one hundred percent chance of dropping a Netherite Block, but they will only drop zero to four Diamond Blocks and zero to five Gold Blocks. In addition to the items above, the head of the Netherite Golem will drop a special NEW item, Igneous Netherite.
Bossfight music by Furnace.
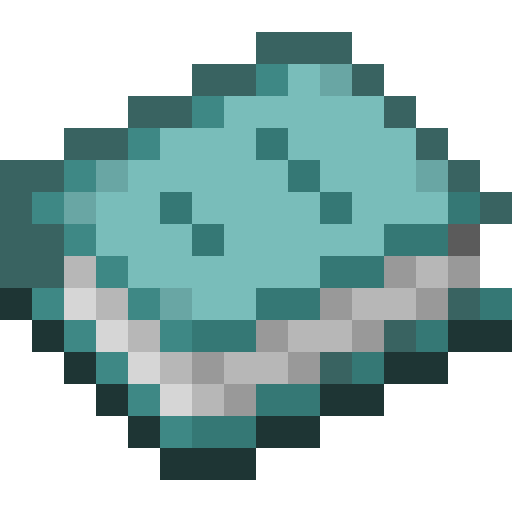
Igneous Netherite and Enchanted Netherite Apple:
Igneous Netherite is used with an Enchanted Golden Apple to craft an Enchanted Netherite Apple. It cannot be destroyed by fire or lava.
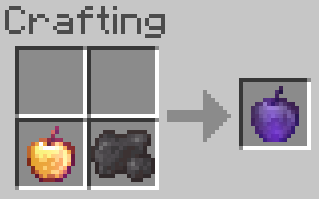
(The recipe is shapeless.)
The Enchanted Netherite Apple is extremely powerful. Like Igneous Netherite, it won't be destroyed by fire or lava. Eating it will give you many positive effects.
Glowstone Golem:
Utility Summary: Can ride on your shoulder and provide light for you.
Glowstone Golem Information:
This is the structure for the Glowstone Golem.
Side View:
Required Materials:
1 Carved Pumpkin/Jack o'Lantern
1 Glowstone block
Glowstone Golem Statistics:
Behavior: Passive
Healable: No
General Information:
The Glowstone Golem can ride on your shoulder like a Parrot. To make the Golem ride your shoulder, simply walk into it. It provides a light level of 15, which is more than a torch. It is the perfect Golem for exploring caves. And it doesn't come off your shoulder even if you fall, like a Parrot. Instead, it only comes off your shoulder if you sneak, or if it gets submerged in water. You can make the Golem follow you around is by holding out Glowstone Dust in your hand.
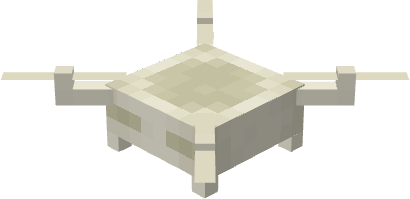
Tuff Golem:
Utility Summary: Can hold and display items.
Tuff Golem Information:
This is the structure for the Tuff Golem. (If you use a different wool color for the structure, the Golem will have the corresponding robe color.)
Side View:
Required Materials:
1 Carved Pumpkin/Jack o'Lantern
1 Tuff block
1 Wool block (Any color.)
Tuff Golem Statistics:
Behavior: Passive
Healable: No
General Information:
If you drop an item near the Tuff Golem when it's not holding anything, it will walk over and pick up the item. If you right-click on the Tuff Golem while sneaking, it will drop the item it is holding and you can go pick it up. You can also Deactivate the Tuff Golem if you right-click on it while sneaking. Right-click on the Tuff Golem again to Activate it again. You can also dye the Tuff Golem's robe. Just right-click on the Tuff Golem while holding a dye or dye substitute.
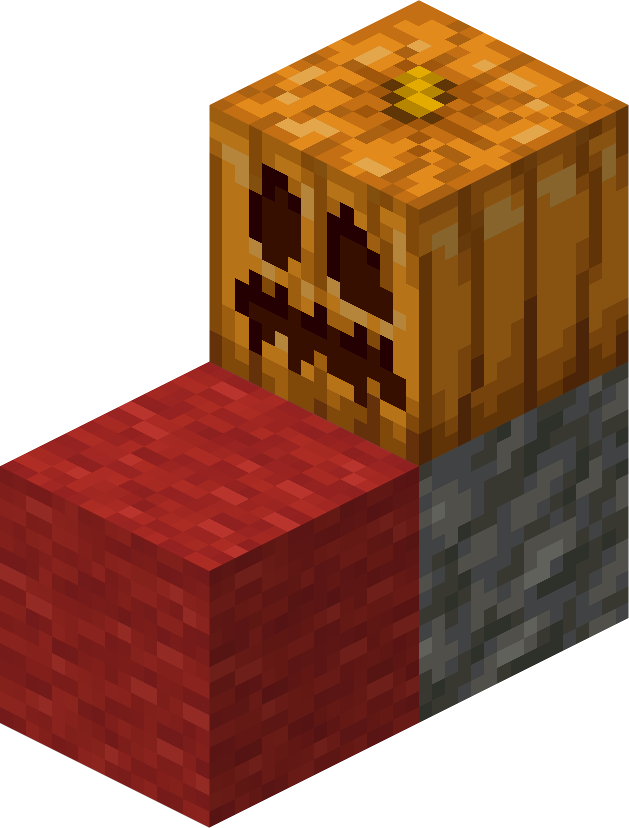
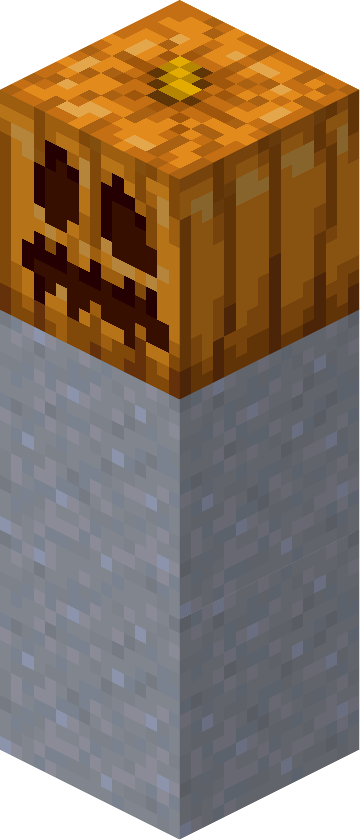
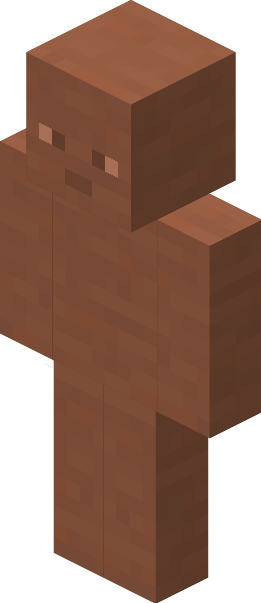
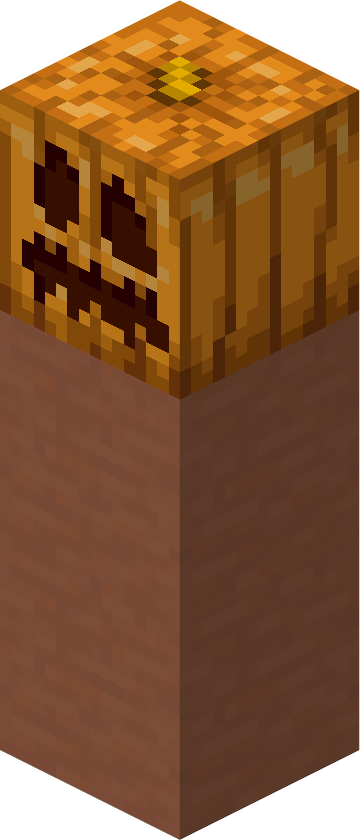
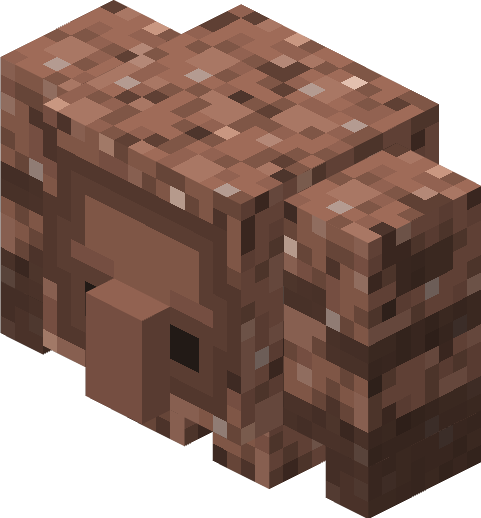
Dirt Golem:
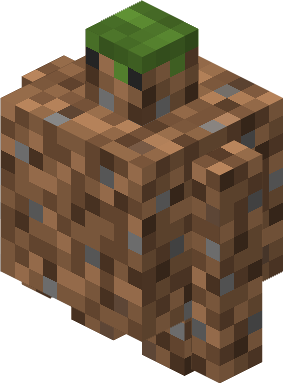
Utility Summary: Can plant and harvest crops.
Dirt Golem Information:
This is the structure for the Dirt Golem.
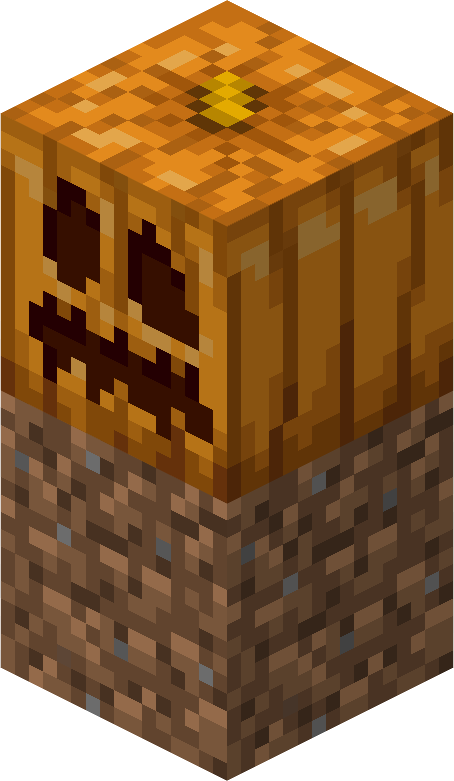
Side View:

Required Materials:
1 Carved Pumpkin/Jack o'Lantern
1 Dirt block
Dirt Golem Statistics:
Behavior: Passive
Healable: No
General Information:
The Dirt Golem has an inventory that you can access by right-clicking on it. Put some seeds in its inventory, and it will search for blocks of Farmland around it to plant the seeds in. Also, if you put Bone Meal in its inventory, it will use it to increase the crop's growth level by one. Once the crop is fully grown, the Dirt Golem will harvest it and put it in its inventory, where you can then collect it. The Dirt Golem can harvest Wheat, Carrots, Potatoes, Beetroot, Pumpkins, and Melons. (The Dirt Golem can harvest Pumpkins and Melons but is unable to plant them.) If a Dirt Golem comes into constant contact with any kind of water for over 8 to 10 minutes, it will turn into a Mud Golem. Make sure to shelter your Dirt Golems if it starts raining.
Sandstone Golem:
Utility Summary: Damages mobs that come into contact with it.
Sandstone Golem Information:
This is the structure for the Sandstone Golem.
Side View:

Required Materials:
1 Carved Pumpkin/Jack o'Lantern
1 Sandstone block
Sandstone Golem Statistics:
Behavior: Passive
Healable: No
General Information:
When a mob touches the Sandstone Golem, the mob takes damage. This behavior is similar to the Cactus block. It will damage every mob (Including Players.) except other Sandstone Golems. A difference between the Sandstone Golem and a Cactus is the fact that it does not destroy items when they touch the Golem, making it a viable kill source in mob farms.
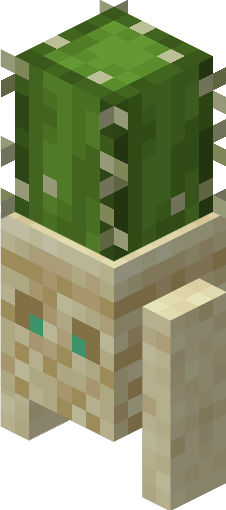
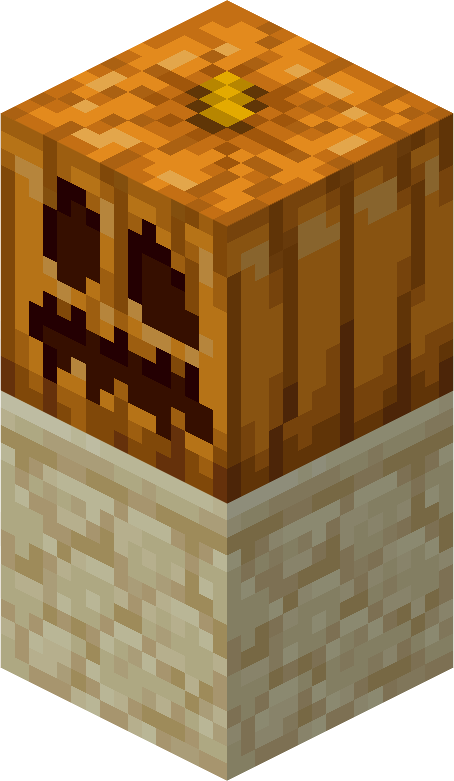
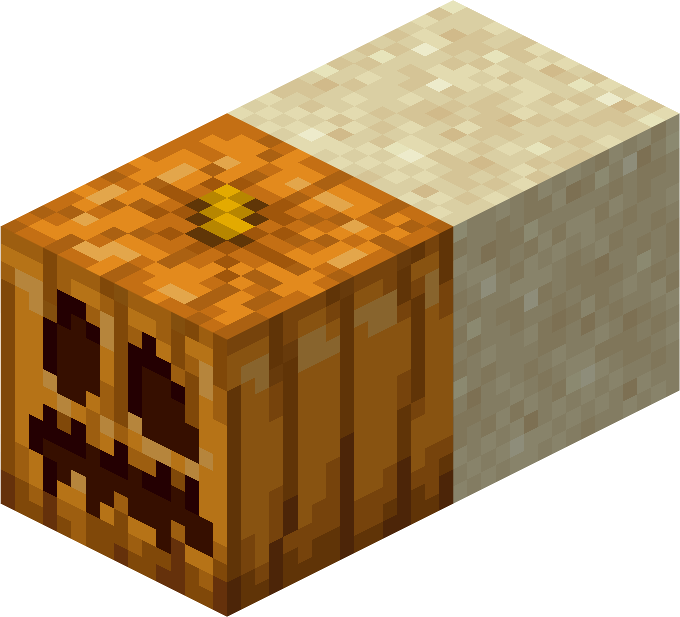
Sand Golem:
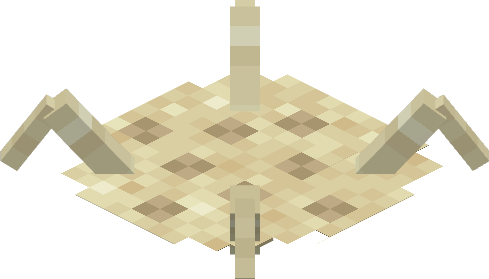
Utility Summary: Can trap mobs that step on it.
Sand Golem Information:
This is the structure for the Sand Golem.
Side View:
Required Materials:
1 Carved Pumpkin/Jack o'Lantern
1 Sand block
Sand Golem Statistics:
Behavior: Passive
Healable: No
General Information:
If you right-click on the Sand Golem, it will be set as a Trap. When a mob steps over the Sand Golem while it’s a Trap, the trap will be sprung and the mob will be stuck in place. This also works on Players. While the Sand Golem is a Trap, they’re practically indistinguishable from normal Sand blocks, especially if you’re not specifically looking for them. If you want to free a mob from the Sand Golem, right-click on the Sand Golem. If you don’t want the Sand Golem as a Trap anymore, you can right-click on it to return it to Normal. Sand Golems spawn naturally in Deserts.
Clay Golem:

Utility Summary: Acts as a dummy Player; it can use tools given to it.
Clay Golem Information:
This is the structure for the Clay Golem.
Side View:

Required Materials:
1 Carved Pumpkin/Jack o'Lantern
2 Clay blocks
Clay Golem Statistics:
Behavior: Passive
Healable: Yes; Clay block
General Information:
You can tame the Clay Golem with a Clay Ball, and once you do so, it will follow you around and teleport to you. If you drop any armor at its feet, it will go over and equip it. Additionally, if you drop a tool at its feet it will pick up the tool and hold it in its hand, and the Golem is even able to use the tool. Sneak and right-click on the Clay Golem to make it drop all its items, including armor.
Tools that the Clay Golem can use:
Sword:
When the Clay Golem has a Sword, it will attack any monsters nearby. (Except Creepers.) The Clay Golems will also attack any farm animals (Cows, Pigs, Sheep, and Chickens.) that are nearby. Additionally, if you attack a mob, the Clay Golem will also attack it, like a Wolf would do. The Clay Golem can also use a Trident or a Mace like a Sword.
Axe:
When the Clay Golem has an Axe, it will search for any trees nearby and chop them down.
Pickaxe:
When the Clay Golem has a Pickaxe, it will go to the nearest Stone blocks and start mining away. Get a number of Clay Golems together and you will have an automatic mine. They will clear out hundreds of blocks. However they don’t mine Ores. Just Stone. You have to go in and mine the Ores manually.
Shovel:
When the Clay Golem has a Shovel, it digs Grass, Dirt, Sand, and Gravel. You can put these Shovel Clay Golems in the mines with Pickaxe Clay Golems to clear out any Dirt or Gravel that might be blocking their path.
Hoe:
When the Clay Golem has a Hoe, it tills Dirt. You could use it to till a huge field if you don't want to do it yourself.
The Clay Golem has other additional abilities. It can pick put blocks it has mined, and use them to build up if it needs to reach a block up high. Clay Golems can also utilize Shields to block enemy attacks, but they can't pillar up if they are holding a Shield. Clay Golems will also follow you if you hold out a Clay Block in your hand. Additionally, if the Clay Golem has better tools, it will be more efficient. A Clay Golem with a Netherite Pickaxe will mine faster than one with a Wooden Pickaxe. Finally, if you right-click on a Clay Golem while holding Flint and Steel, it will turn into a Terracotta Golem.
Terracotta Golem:
Utility Summary: Acts as a dummy Player; it is the better version of a Clay Golem.
Terracotta Golem Information:
This is the structure for the Terracotta Golem.
Side View:
Required Materials:
1 Carved Pumpkin/Jack o'Lantern
2 Terracotta blocks
Terracotta Golem Statistics:
Behavior: Passive
Healable: Yes; Terracotta block
General Information:
The Terracotta is an upgraded version of the Clay Golem. There are a few differences between them, such as the Terracotta Golem does not follow you or teleport to you, you cannot make the Terracotta Golem drop its items (Except by killing it, of course.), and the Terracotta Golem is more efficient than the Clay Golem and has more health. If you want to leave your Clay Golems somewhere to mine, you can’t. Once you walk away, they will eventually teleport back to you. That is why you should turn them into Terracotta Golems. You choose where the Clay Golem should go, and what it should be doing, then finalize the decision by turning the Clay Golem into a Terracotta Golem. Terracotta Golems will follow you if they are idle, or if you hold out a Terracotta Block in your hand.
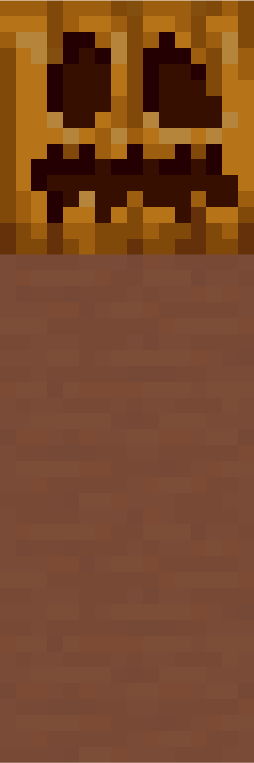
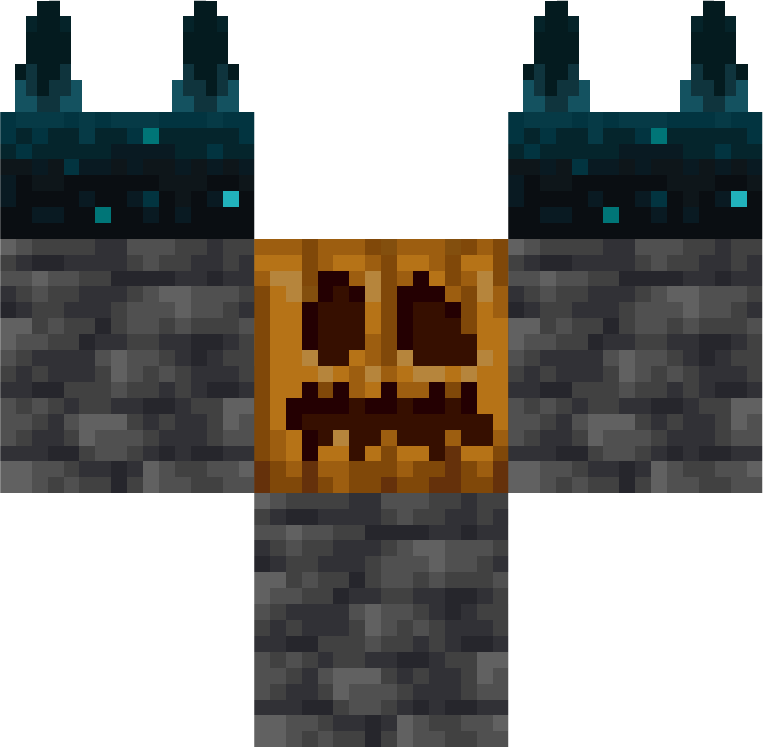
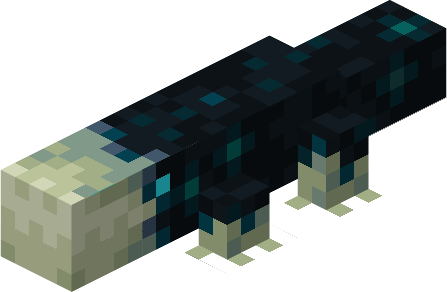
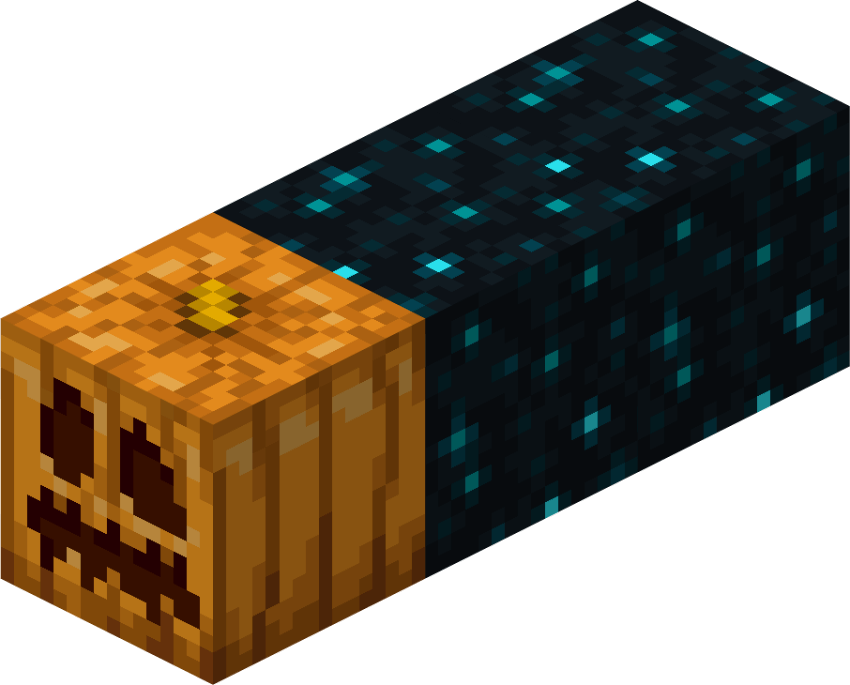
Deepslate Golem:

Utility Summary: Can despawn Wardens and disable Sculk Shriekers near it.
Deepslate Golem Information:
This is the structure for the Deepslate Golem.
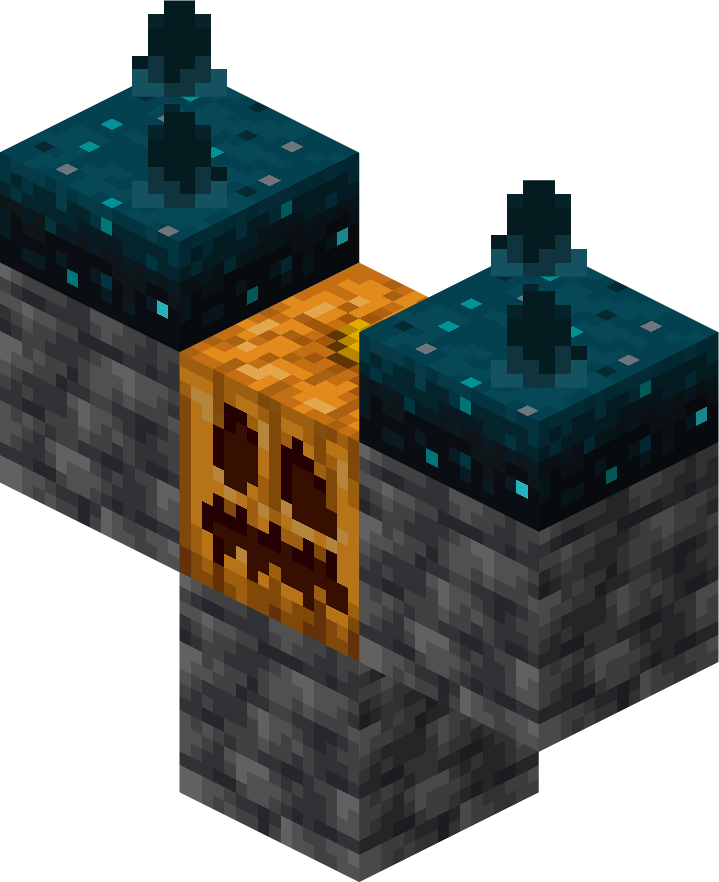
Side View:
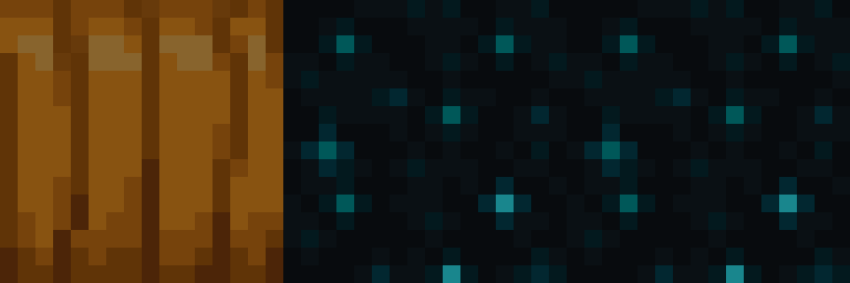
Required Materials:
1 Carved Pumpkin/Jack o'Lantern
3 Deepslate blocks
2 Sculk Sensors
Deepslate Golem Statistics:
Behavior: Passive
Healable: Yes; Sculk block
General Information:
The Deepslate Golem will attack any mob, except Players, Wardens, and other Deepslate Golems. The Deepslate Golem’s primary function is it makes the Deep Dark safer for exploration. First, you need to tame the Deepslate Golem with Sculk, and then it will follow you around. (Although it won’t follow very closely behind you and could easily get lost. I suggest holding out Sculk in your hand to make the Golem follow you more closely.) When the Deepslate Golem is within 25 blocks of a naturally-generated Sculk Shrieker, the Shrieker will not go off if you step on it, nor will it go off if it receives a vibration from a Sculk Sensor, preventing Wardens from spawning. Additionally, if a Warden comes within 25 blocks of a tamed Deepslate Golem, the Golem will shriek and the Warden will instantly disappear.
Gravel Golem:
Utility Summary: Can recycle tools and armor to give you the materials used to create the items.
Gravel Golem Information:
This is the structure for the Gravel Golem. (The more Gravel you use to build it, the larger the Golem is when it is spawned.)
Top Views:
Required Materials:
1 Carved Pumpkin/Jack o'Lantern
1-3 Gravel block(s)
2 Slime blocks
Gravel Golem Statistics:
Behavior: Passive
Healable: No
General Information:
The Gravel can recycle tools and armor. If you right-click on it while sneaking and holding any tool or armor (Except Chainmail Armor, Turtle Helmet, Leather Armor, and Wooden and Stone Tools.), it will take the item and give you back the materials that you used to create it. However, it doesn't give you all the items back. How many items it gives back depends on the size of the Golem. Small Gravel Golems give none of the items back, Medium Gravel Golems give half of the items back (Rounded down.), and the Large Gravel Golem gives all of the items back, minus one. If you right-click on the Golem while holding a Shovel, it decreases in size. If you right-click on it while holding Gravel, it increases in size. The reason you might want to use the smaller Gravel Golems instead of the Large one is because for every item you don't get back, the Golem will give you Exp. Each Diamond lost is worth 30 Exp. Each Gold Ingot lost is worth 15 Exp. Each Iron Ingot lost is worth 10 Exp. Each Copper Ingot lost is worth 5 Exp. For example, if you gave a Medium Gravel Golem a Diamond Chestplate, it would give you back 4 Diamonds and 120 Exp. Another important thing to mention, if you give the Gravel Golem any Netherite item, it will only give you back a Netherite Ingot and the corresponding Diamond item, no matter what size the Golem is. Note that you do not also receive the Netherite Upgrade Smithing Template back.
Summary:
Large size:
All items returned except 1, which is converted into Exp.
Medium size:
Half of the items are returned, rounded down; the rest is converted into Exp.
Small size:
None of the items are returned and are instead converted into Exp.
Conversions:
Each Diamond: 30 Exp
Each Gold Ingot: 15 Exp
Each Iron Ingot: 10 Exp
Each Copper Ingot: 5 Exp
End Stone Golem:
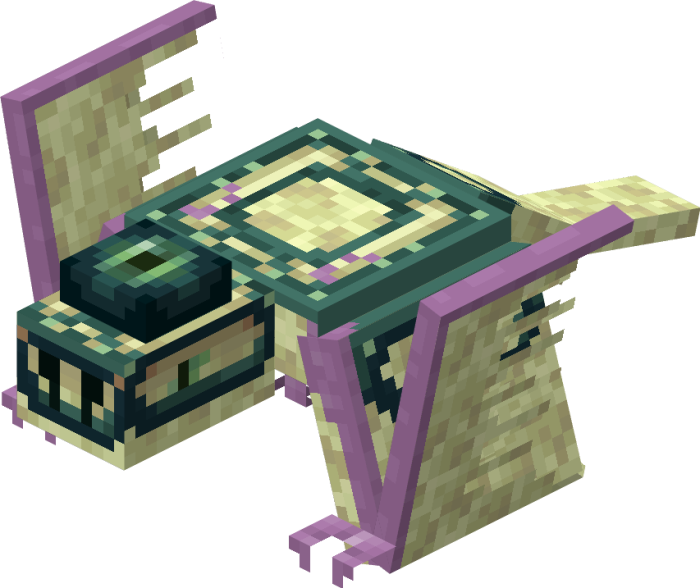
Utility Summary: Can be mounted and flown around on; can also store items if chested.
End Stone Golem Information:
This is the structure for the End Stone Golem.
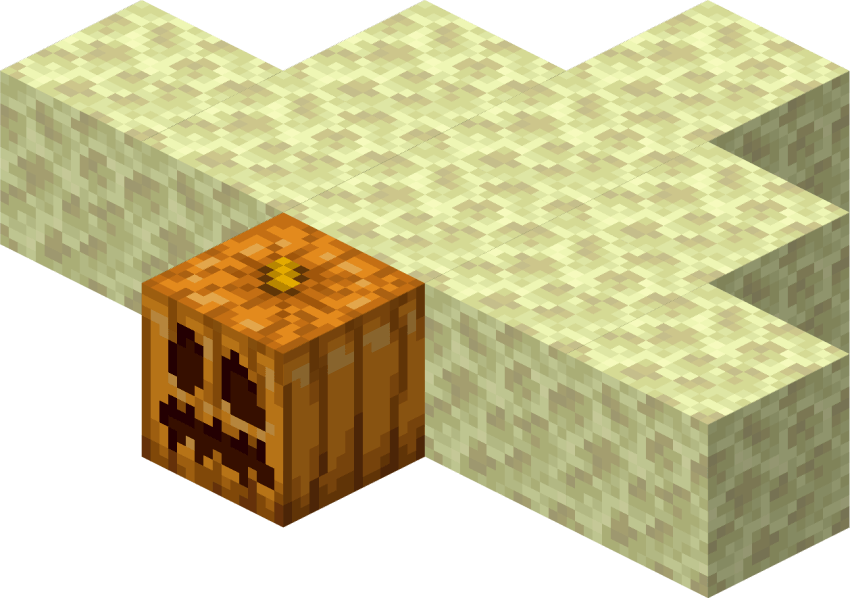
Top View:
Required Materials:
1 Carved Pumpkin/Jack o'Lantern
9 End Stone blocks
End Stone Golem Statistics:
Behavior: Passive
Healable: Yes; End Stone
General Information:
Initially, you can ride on the End Stone Golem, but not control it. To control the Golem and allow it to fly, you need to equip it with a Saddle. You can also add Chests to the Golem by right-clicking it with a Chest; this gives the Golem 15 slots for storing items. While riding, simply look up to fly up, and look down to fly down.
Prismarine Golem:
Utility Summary: Can swim and be ridden; useful for underwater exploration.
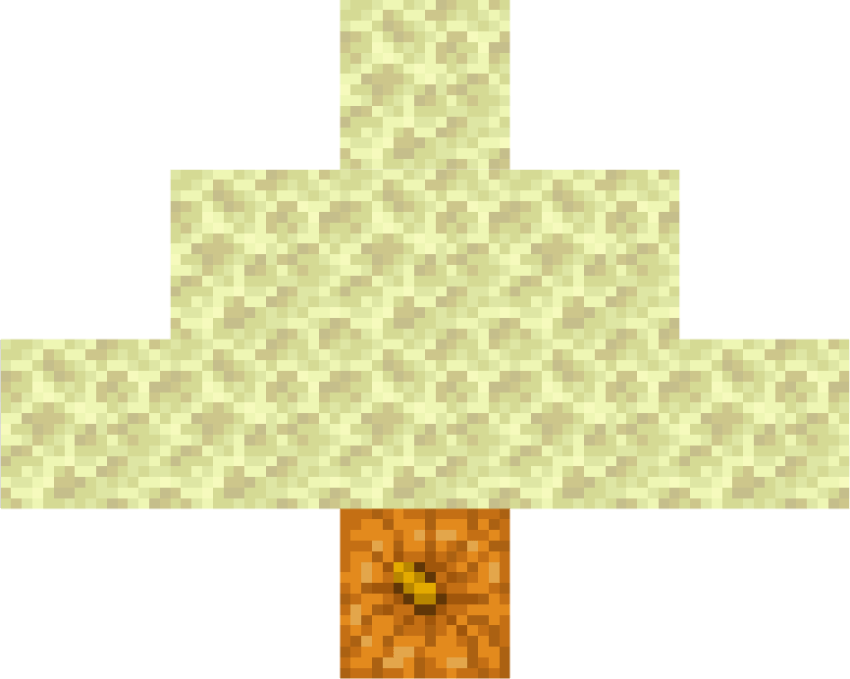
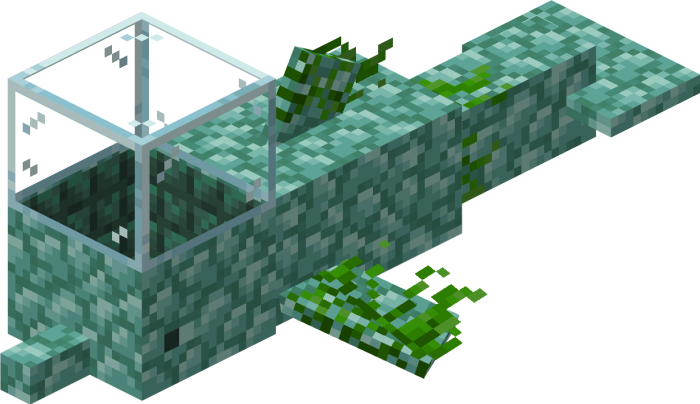
Prismarine Golem Information:
This is the structure for the Prismarine Golem. (Note: There is a Dark Prismarine block under the Glass.)
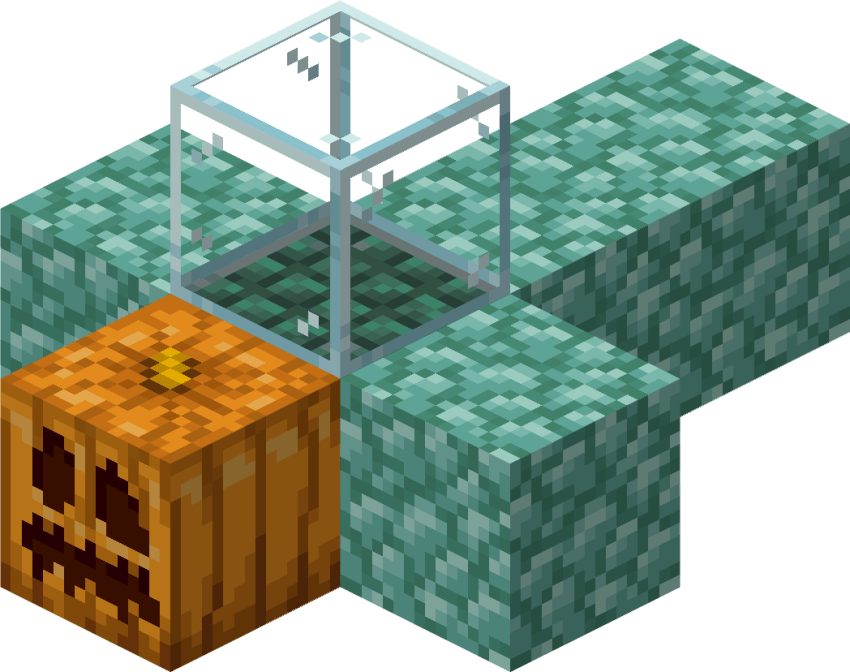
Top View:
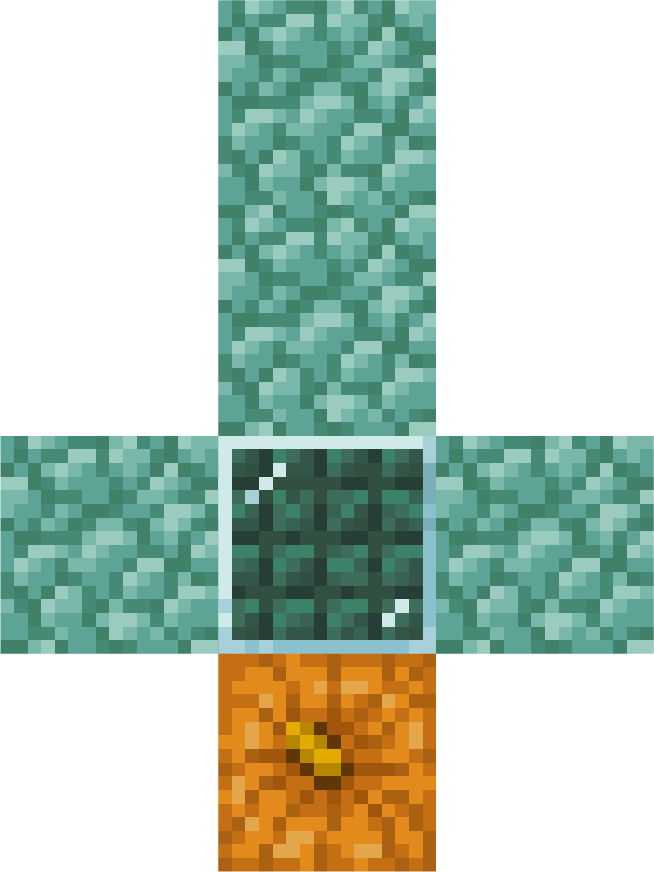
Required Materials:
1 Carved Pumpkin/Jack o'Lantern
4 Prismarine blocks
1 Dark Prismarine block
1 Glass block
Prismarine Golem Statistics:
Behavior: Passive
Healable: Yes; Prismarine Shard
General Information:
You can ride in the Prismarine Golem. While riding, do worry about running out of Oxygen because the Golem provides it. To control the Golem, look up to swim up, and look down to swim down. If no one is riding the Prismarine Golem, it may wander off. Keep it tied up when not in use.
Calcite Golem:
Utility Summary: Can shoot Arrows at monsters.
Calcite Golem Information:
This is the structure for the Calcite Golem.
Side View:

Required Materials:
1 Carved Pumpkin/Jack o'Lantern
1 Calcite block
Calcite Golem Statistics:
Behavior: Passive
Healable: Yes; Calcite block
General Information:
The Calcite Golem is similar to the Plank Golem from Minecraft Legends. Give it Arrows, and it will shoot monsters. You can give it Arrows in 2 different ways. Either open its inventory by right-clicking it, and put the Arrows in, or simply drop the Arrows at its feet. It will go over and pick them up and put them in its inventory. After the Calcite Golem has Arrows, it will start shooting them at Monsters. When the Golem shoots an Arrow, the Arrow gets used up, meaning it disappears from its inventory. The Calcite Golem only shoots normal Arrows and Tipped Arrows. No Fire Charges, and no Tridents. You can pick up Arrows that the Calcite Golem has shot, allowing you to reuse them. If you tame the Calcite Golem using Calcite, then it will follow you around and teleport to your location if you are far away, and will attack any mob that you attack, except other Calcite Golems. If you hold out Calcite in your hand, then the Calcite Golem will also follow you that way. If you right-click on the Calcite Golem while sneaking, it will sit down. While sitting, the Golem will stay in place but will still shoot arrows, making it very useful to use as a turret. It will also not teleport to you when sitting.
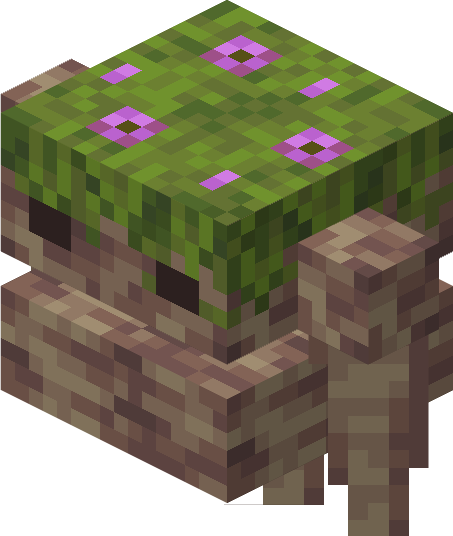
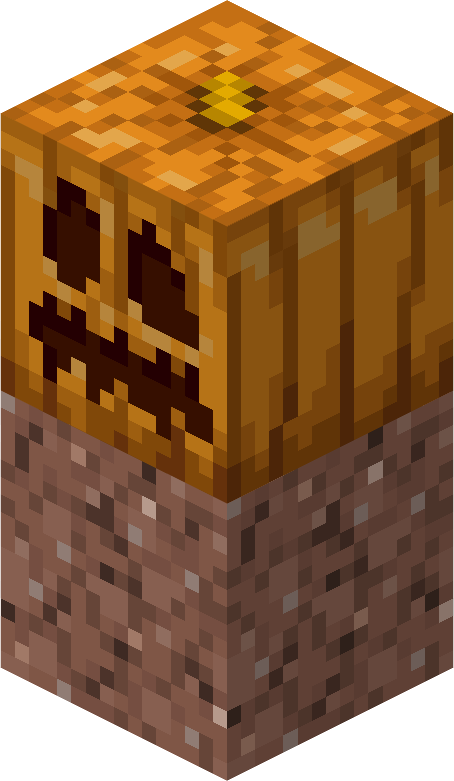
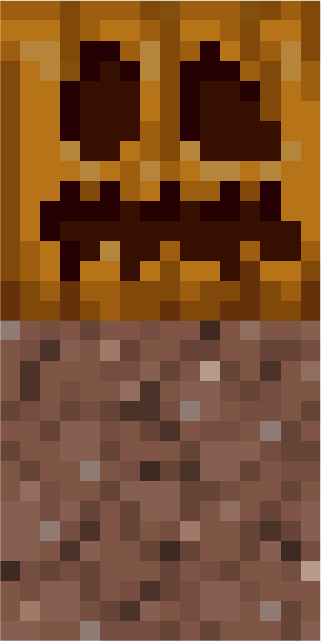
Mud Golem:
Utility Summary: Can be given Bone Meal to receive different crop seeds and saplings.
Mud Golem Information:
This is the structure for the Mud Golem.
Side View:
Required Materials:
1 Carved Pumpkin/Jack o'Lantern
1 Mud block
Mud Golem Statistics:
Behavior: Passive
Size: Medium-Small
Healable: No
General Information:
A Dirt Golem will turn into a Mud Golem if it comes into constant contact with any kind of water for over 8 to 10 minutes. If you don't want your Dirt Golems to turn into Mud Golems, then make sure you shelter them while it is raining. If you give the Mud Golem Bone Meal (Either by dropping it near the Golem, or right-clicking the Golem while holding the Bone Meal.), it will give you back either a Sapling, or a Seed. It can give you any kind of Sapling, or it can give you Wheat Seeds, a Carrot, a Potato, Beetroot Seeds, Melon Seeds, or Pumpkin Seeds.
Basalt Golem:
Utility Summary: Can ridden by two Players to cross bodies of lava; it also has an inventory for item storage.
Basalt Golem Information:
This is the structure for the Basalt Golem.
Side View:
Required Materials:
1 Carved Pumpkin/Jack o'Lantern
5 Basalt blocks
Basalt Golem Statistics:
Behavior: Passive
Healable: Yes; Basalt block
General Information:
The Basalt Golem is used for crossing lava. It may be slower than a Strider, but what it lacks in speed it makes up for in storage. If you attach a Chest to the Basalt Golem, it gets 15 slots that you can put items in, just like a Donkey. Additionally, 2 Players can ride it at the cost of only a single Saddle, as opposed to the Strider's one Saddle per person. You can also control the Basalt Golem like you would a Horse, no special item required. The Basalt Golem is faster in lava than it is on land. The Basalt Golem can have trouble climbing up blocks, but if you hold out some Basalt, or tie it to a Lead, that should help.
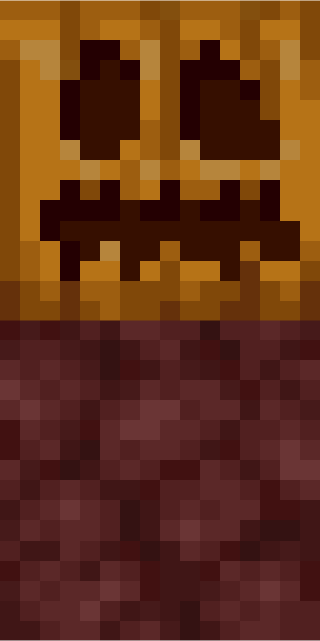
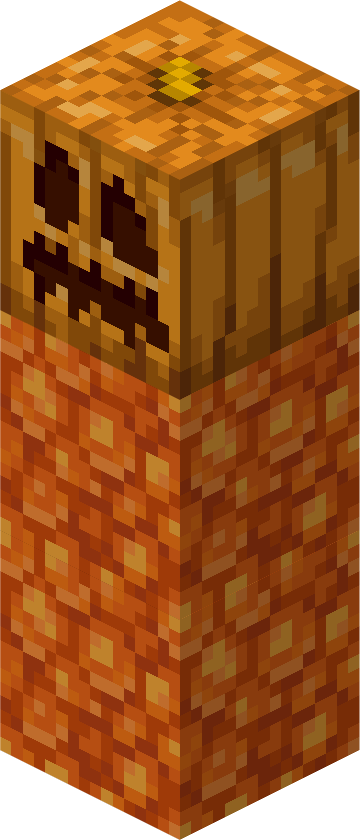
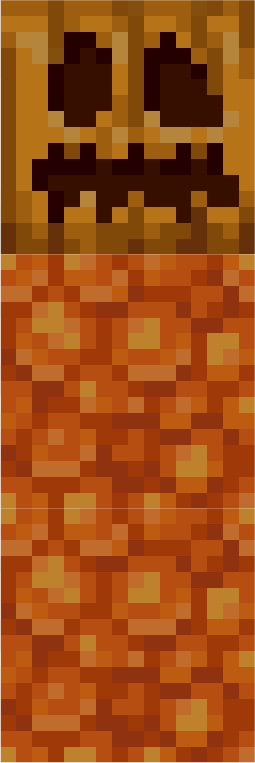
Netherrack Golem:
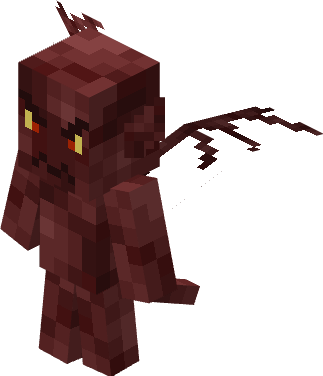
Utility Summary: Can be tamed to follow you around and attack mobs by shooting Fireballs at them.
Netherrack Golem Information:
This is the structure for the Netherrack Golem.
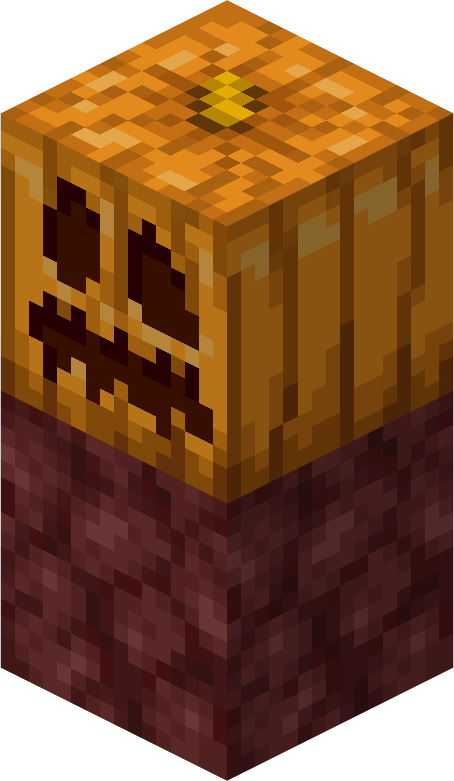
Side View:
Required Materials:
1 Carved Pumpkin/Jack o'Lantern
1 Netherrack block
Netherrack Golem Statistics:
Behavior: Neutral
Healable: No
General Information:
The Netherrack Golem is a very mischievous Golem. For 30-60 seconds, it flies around, minding its own business, but after that time is up, it starts to attack random mobs that it sees. It flies after them and shoots Fireballs. It will even attack Players. However, once another 30-60 seconds is up, it goes back to just flying around. It will also attack anything that attacks it first, including Players. You can tame the Netherrack Golem with Magma Cream. Once it's tamed, the Golem will follow you around. It will follow you faster if you hold Magma Cream in your hand. If you have a tamed Netherrack Golem and you attack a mob, the Netherrack Golem will also attack that mob by shooting Fireballs at it. However, the Netherrack Golem will not immediately attack a mob if the mob attacks you. Netherrack Golems also spawn naturally in the Nether, so if you have the Magma Cream on hand, you can hire some help. Although, there is a catch to this deal. If you don't have the Netherrack Golem attack anything for 5-6 minutes, it will get bored and start to attack you! After it stops attacking you, you have to re-tame it if you still want its help. The Netherrack Golem is also not immune to fire damage, so it often burns to death in the Nether. Netherrack Golems can also be repelled with any kind of Ice block. You can hold the Ice in your hand or place it on the ground to repel Netherrack Golems.
Dripstone Golem:
Utility Summary: Can heal friendly mobs.
Dripstone Golem Information:
This is the structure for the Dripstone Golem.
Side View:
Required Materials:
1 Carved Pumpkin/Jack o'Lantern
1 Dripstone block
Dripstone Golem Statistics:
Behavior: Passive
Healable: Yes; Dripstone block, Pointed Dripstone
General Information:
The Dripstone Golem is this Addon's equivalent to the Mossy Golem from Minecraft Legends. If you tame the Golem using a Dripstone Block or Pointed Dripstone it will follow you and teleport to your location if it is far away. You can make it sit and not teleport to you by right-clicking on it. The Dripstone Golem will look for any non-monster mob that is missing health. When it finds a mob that needs healing, it will walk over, raise its arms, and rapidly spin the upper half of its body, causing water to drip from its stalactite arms, healing all non-monster mobs around it.
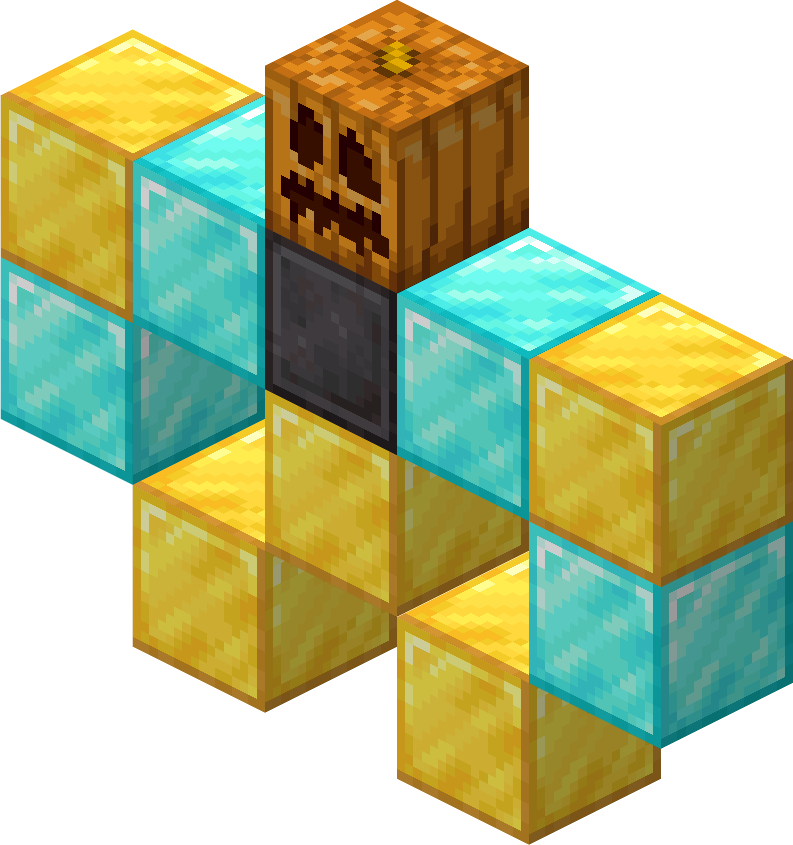
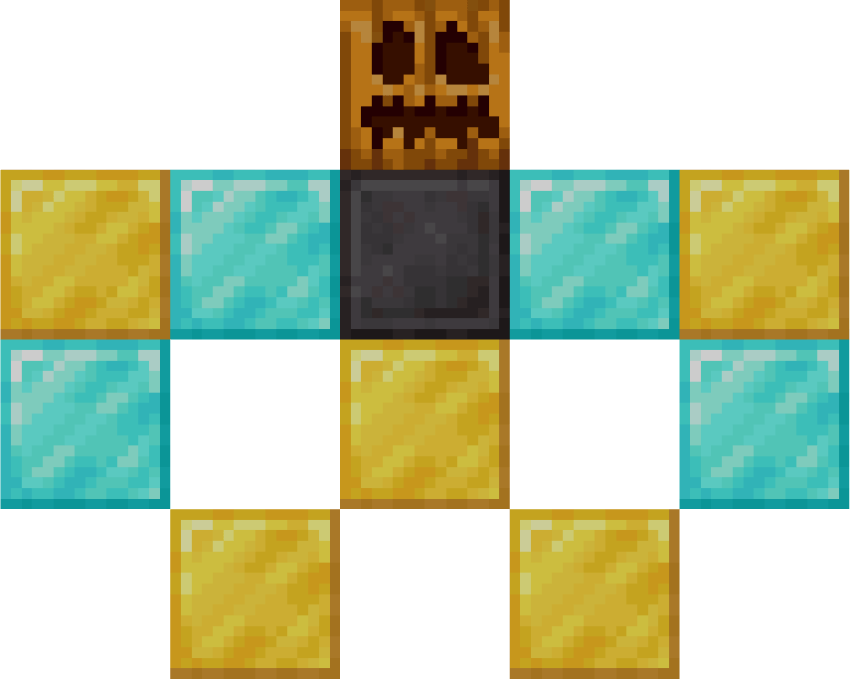
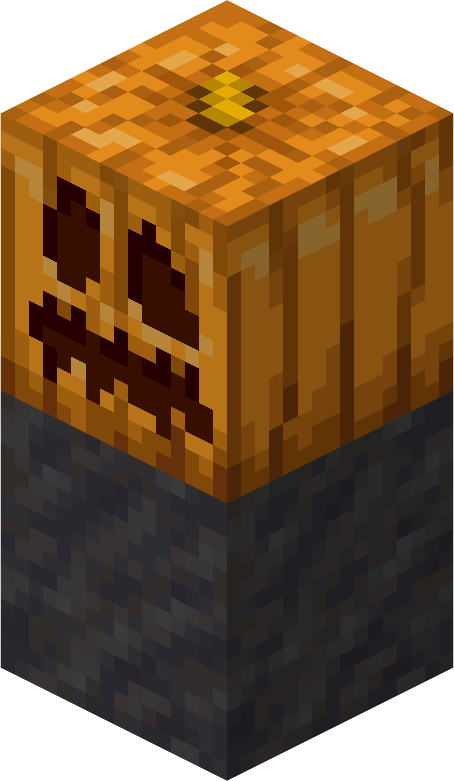
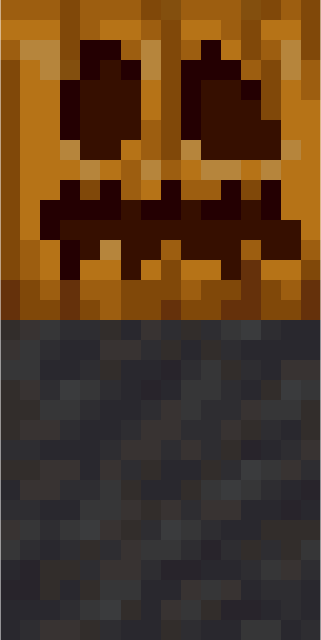
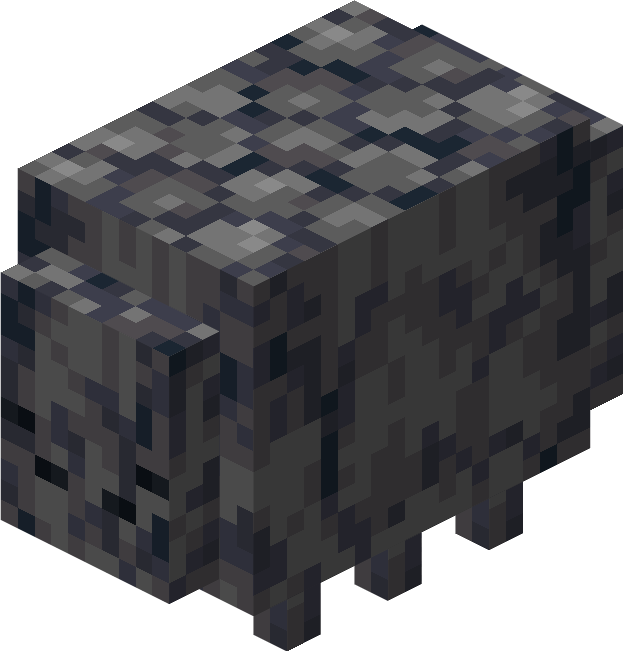
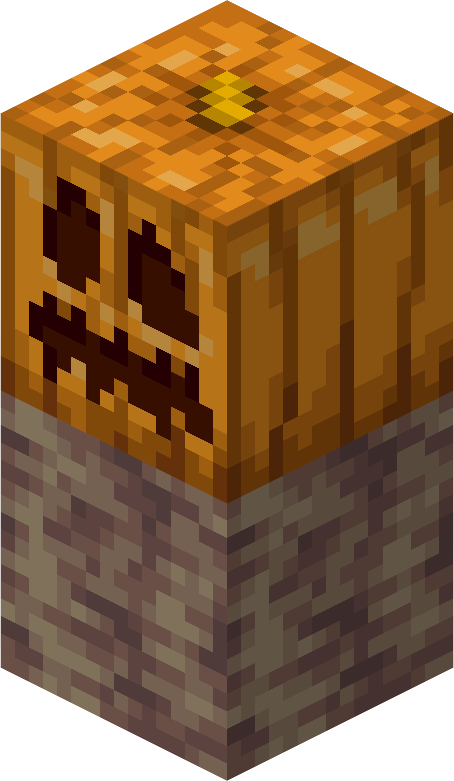
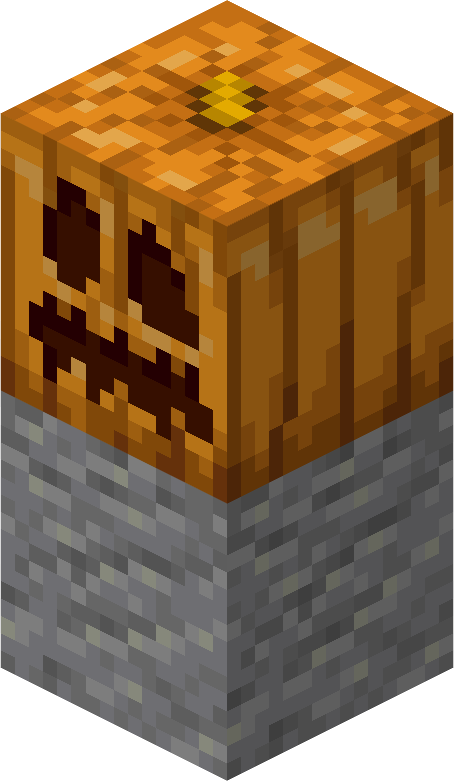
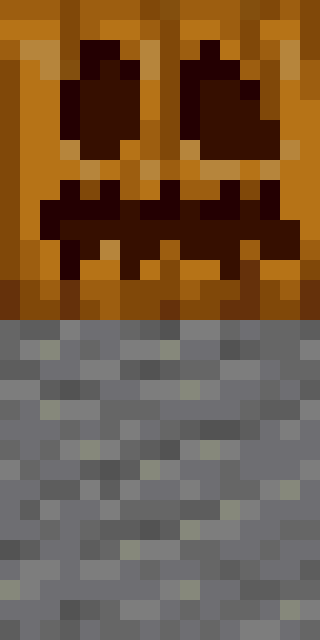
Blackstone Golem:
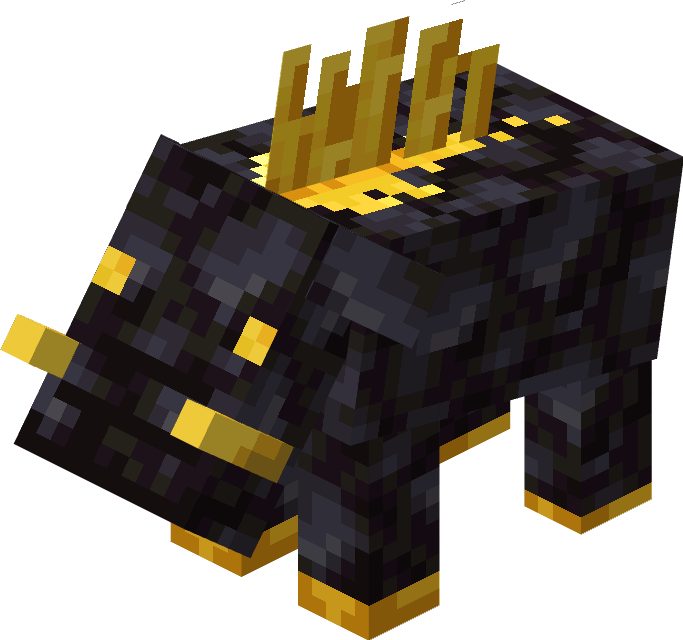
Utility Summary: Can be used as an instant lava farm.
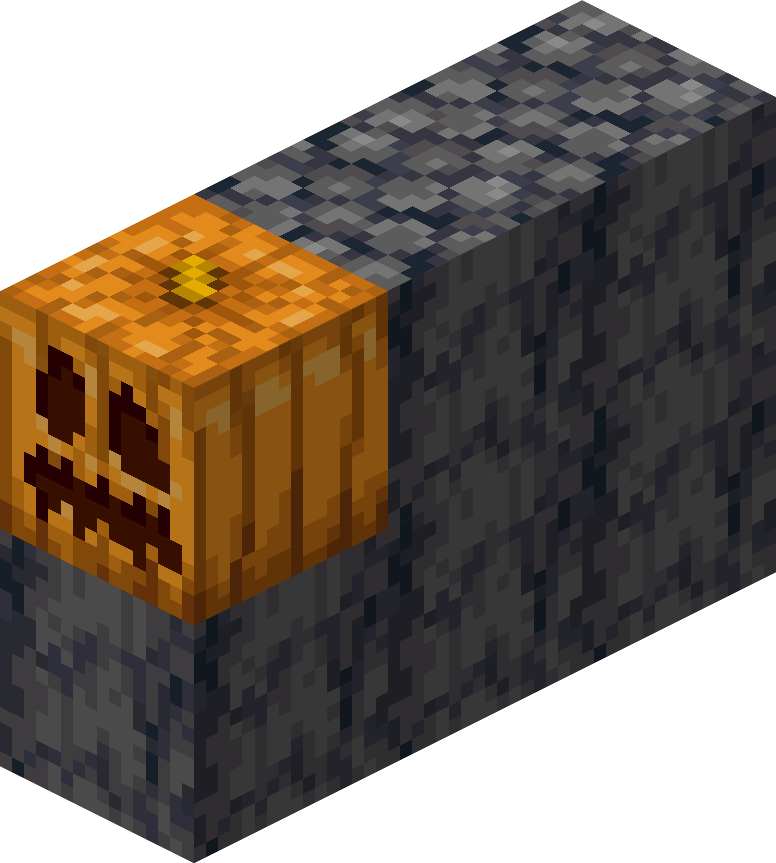
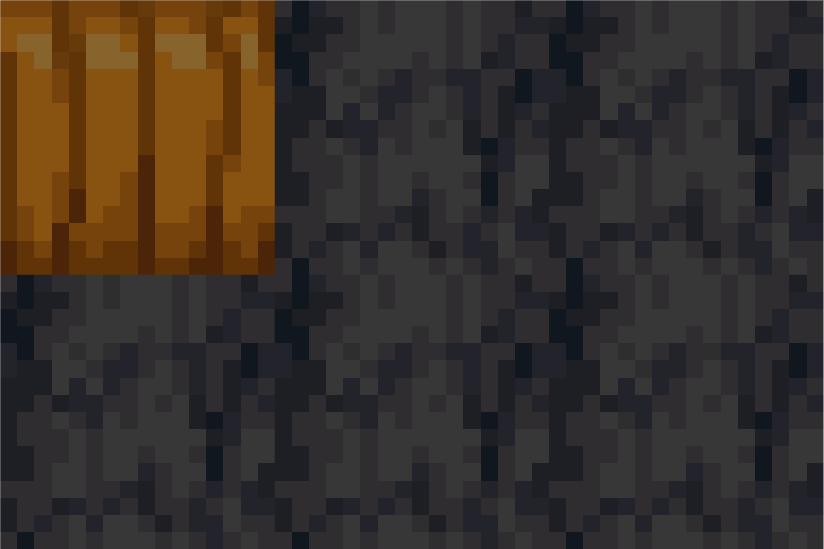
Blackstone Golem Information:
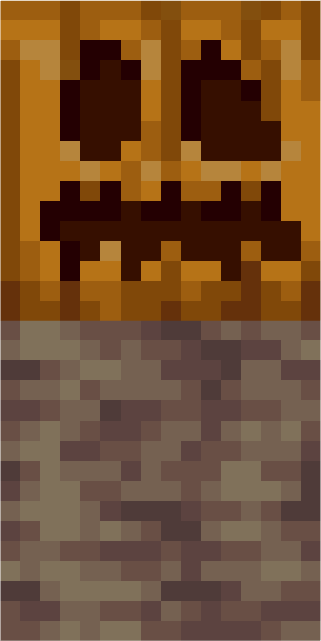
This is the structure for the Blackstone Golem.
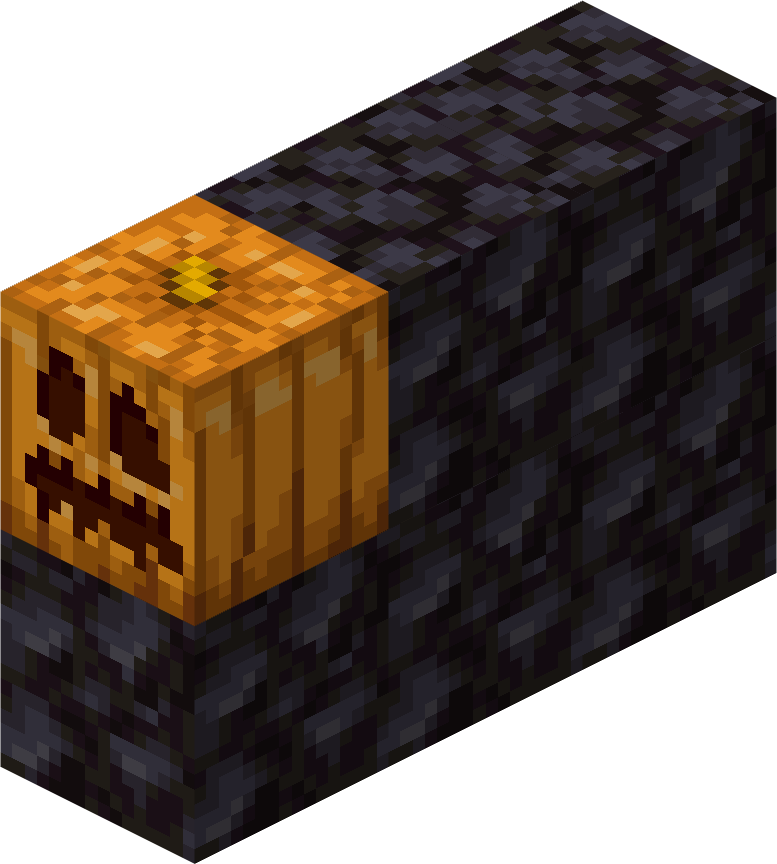
Side View:
Required Materials:
1 Carved Pumpkin/Jack o'Lantern
5 Blackstone blocks
Blackstone Golem Statistics:
Behavior: Neutral
Healable: No
General Information:
Right-click on the Blackstone Golem while holding an empty Bucket to get a Lava Bucket. The Blackstone Golem is not aggressive to begin with, but if anything attacks it (Including Players.), it will fight back.
Amethyst Golem:
Utility Summary: Can broadcast its current effects onto nearby mobs; it can also be used as an Amethyst farm.
Amethyst Golem Information:
This is the structure for the Amethyst Golem.
Side View:
Required Materials:
1 Carved Pumpkin/Jack o'Lantern
1 Amethyst block
Amethyst Golem Statistics:
Behavior: Passive
Healable: No
General Information:
When you first spawn the Amethyst Golem, it does not have an Amethyst Bud on its back. However, in 15-20 minutes, a bud will appear on the Golem. The bud goes through 3 growth stages before it turns into an Amethyst Cluster. Each stage lasts 15-20 minutes. Once the bud has turned into a cluster, you can right-click on it while holding any kind of Pickaxe to mine the cluster. It drops four Amethyst Shards when mined. Once the cluster has been mined, you will have to wait 15-20 minutes for another bud to appear on the Golem's back. The Amethyst Golem can spread mob effects, meaning if the Golem has any mob effects, any entity that is within a certain radius of the Amethyst Golem will receive the same effects that the Golem has. The size of the Amethyst Golem's bud corresponds with the size of the broadcast radius. A Golem with a cluster will broadcast its effects from further away than a Golem with a small bud. If the Amethyst Golem does not have a bud or cluster on its back, it won't broadcast any effects at all. If you right-click on the Amethyst Golem while holding an Amethyst Shard, its bud will increase in size.
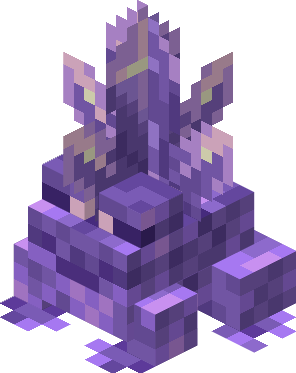
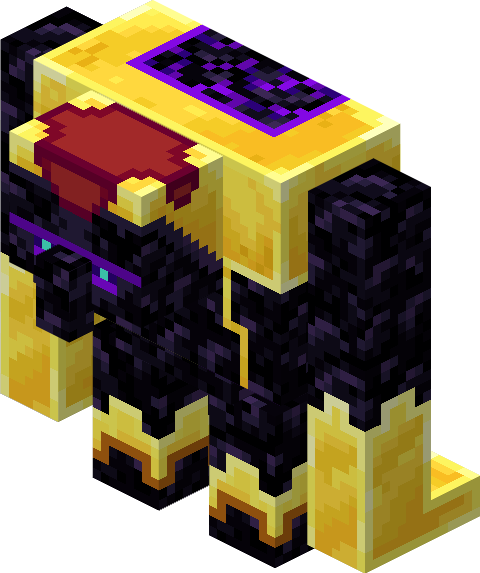
Purpur Golem:
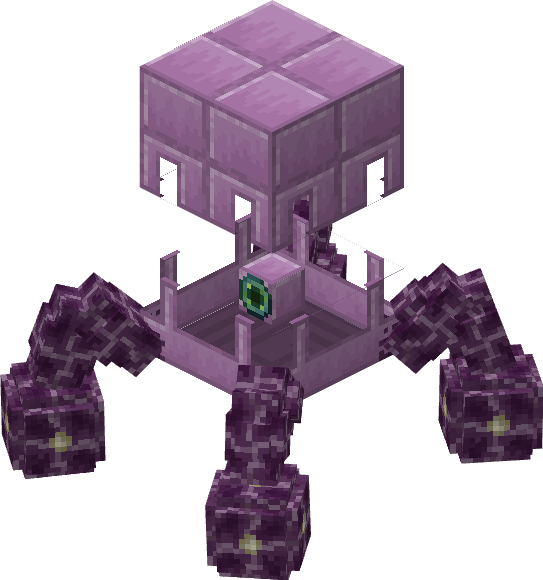
Utility Summary: Can be used as a waypoint, allowing you to teleport to any other stationary Purpur Golem; you can also hide inside it to become immune to damage.
Purpur Golem Information:
This is the structure for the Purpur Golem.
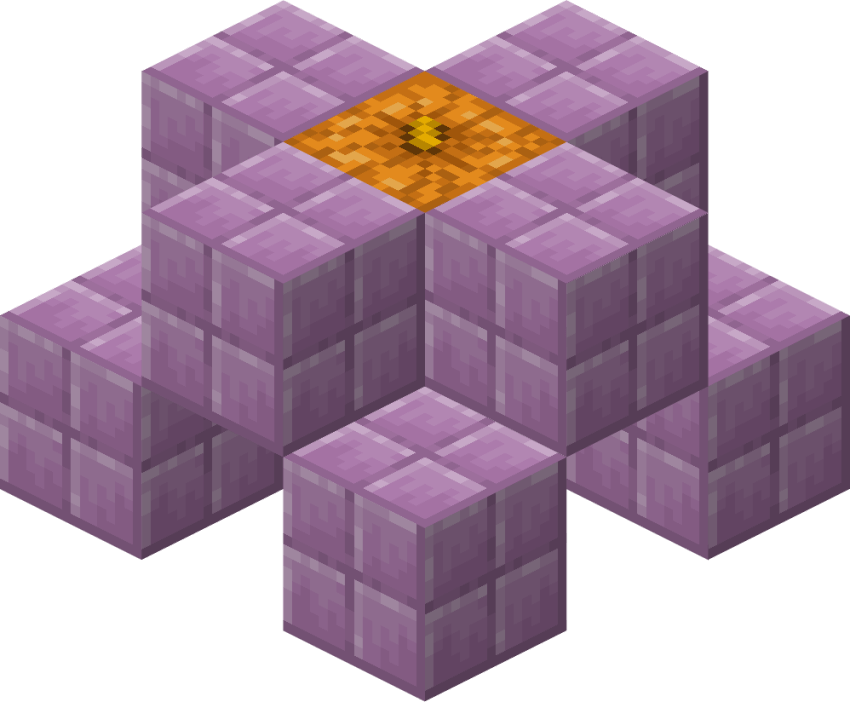
Bottom Diagonal View:
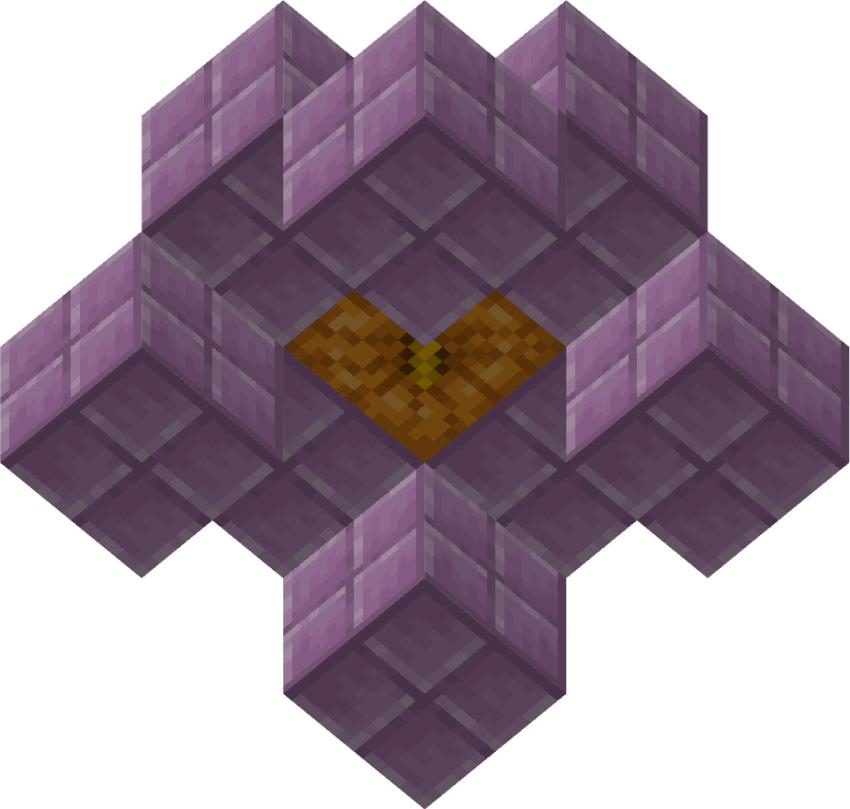
Required Materials:
1 Carved Pumpkin/Jack o'Lantern
8 Purpur blocks
Purpur Golem Statistics:
Behavior: Passive
Healable: Yes; Popped Chorus Fruit
General Information:
The Purpur Golem can either be Normal, or a Bunker. You can switch the Golem between these modes by right-clicking on it. While it is a bunker, the Purpur Golem is immune to all damage and can be used to teleport yourself. You can ride inside of it while it is a Bunker, and you will be protected from damage. If you punch the Golem while riding inside it, a menu will open and you can choose another stationary Purpur Golem to teleport to if another one exists. You can change the name of the waypoint by renaming the Purpur Golem using a Name Tag. Using the Purpur Golem waypoints to travel will cost you Experience Levels. The further you travel, the more Levels the cost is. You cannot teleport to a Purpur Golem that is in another dimension than the one you are in. You can also attach a Chest to the Purpur Golem. When you attach a Chest to the Golem, it will gain 27 inventory slots that you can put items in. If you hold out Popped Chorus Fruit in your hand, the Purpur Golem will follow you around.
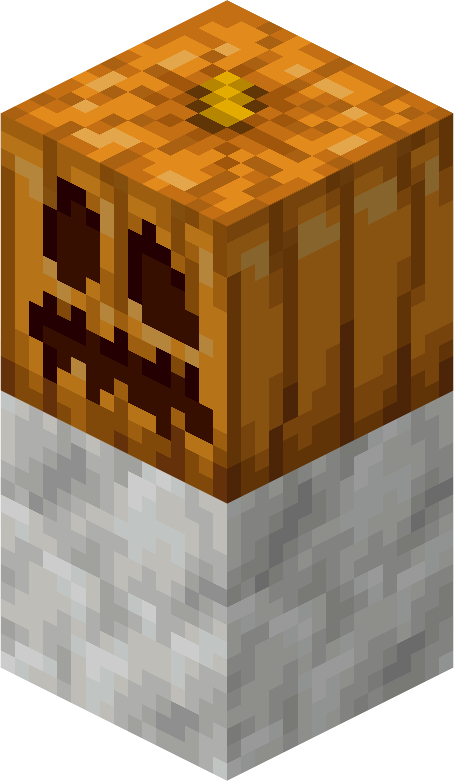
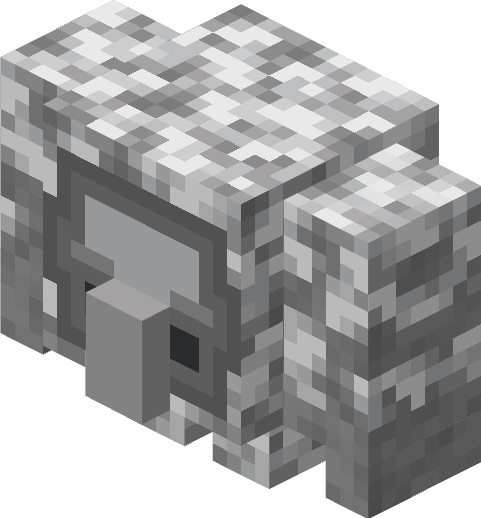
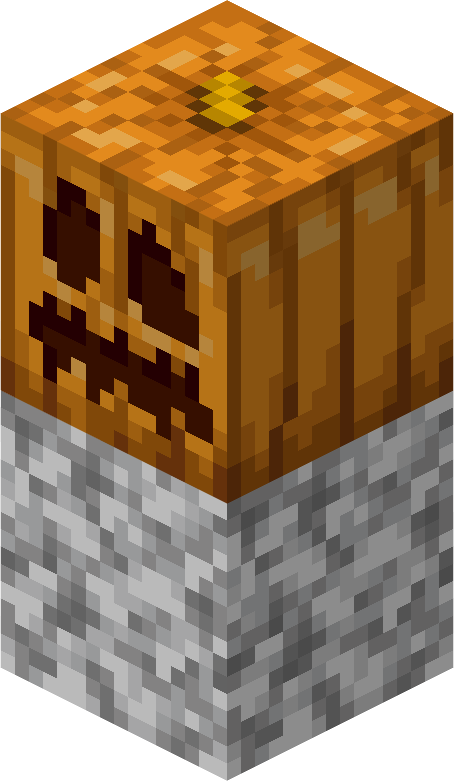
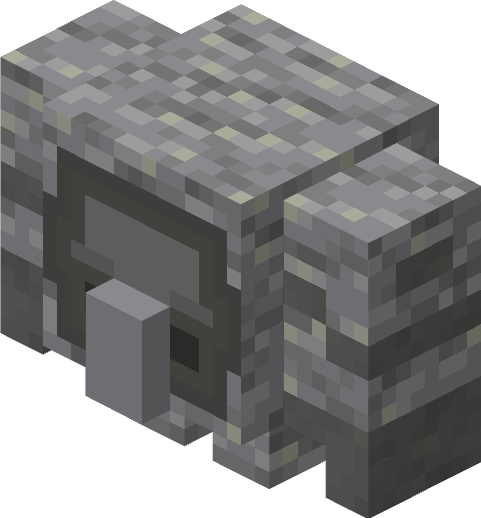
Stone Golem:
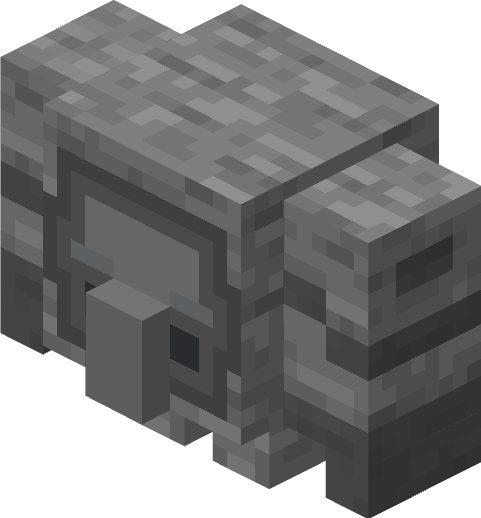
Utility Summary: Can protect you from monsters; it is a less powerful version of the Iron Golem.
Stone Golem Information:
This is the structure for the Stone Golem.
Side View:
Required Materials:
1 Carved Pumpkin/Jack o'Lantern
1 Stone block
Stone Golem Statistics:
Behavior: Passive
Healable: Yes; Stone block
General Information:
If you tame the Stone Golem with Stone, then it will follow you around and attack monsters. It will also teleport to your location if you are far away. If you hold out Stone in your hand, the Stone Golem will also follow you that way. You can also right-click on the Golem to make it sit. The Golem will not teleport to you when it is sitting.
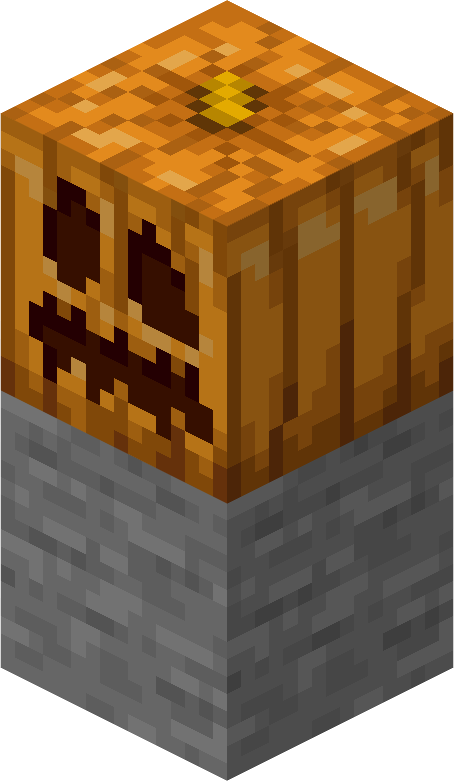
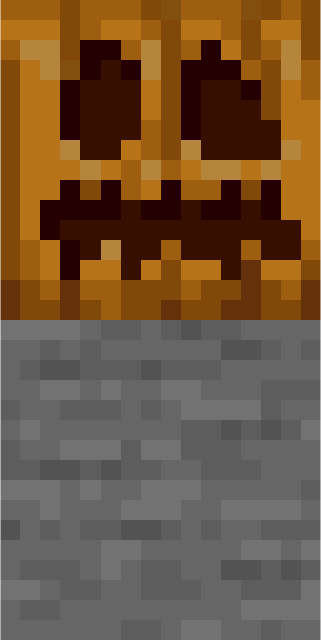
Ice Golem:
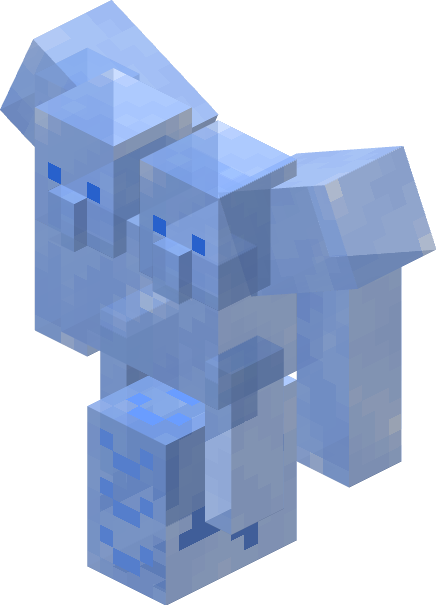
Utility Summary: Can be put in a Boat to freeze the water under it into Frosted Ice, allowing you to travel across oceans faster than normal.
Ice Golem Information:
This is the structure for the Ice Golem.
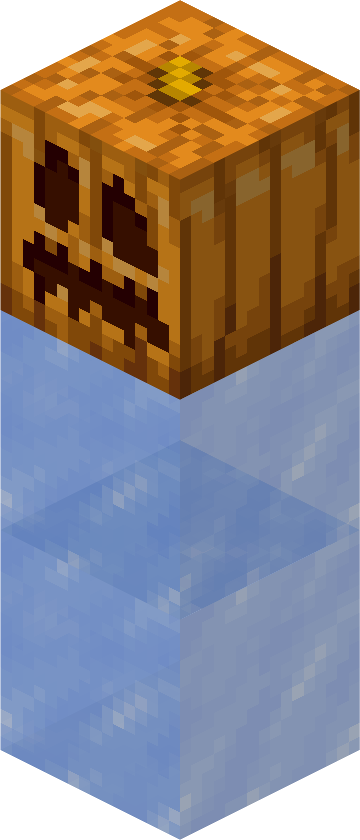
Side View:
Required Materials:
1 Carved Pumpkin/Jack o'Lantern
2 Ice blocks
Ice Golem Statistics:
Behavior: Neutral
Healable: No
General Information:
The Ice Golem is peaceful during the daytime, but at night it turns aggressive towards all other mobs around it, including Players. The Ice Golem is always aggressive towards the Magma Golem, regardless of the time of day. This Golem attacks by shooting Ice Bomb projectiles. Ice Bomb projectiles deal damage and can freeze water into Ice on impact. When this Golem walks on water, it turns into Frosted Ice. This behavior is similar to that of the Frost Walker enchantment. However, if you put the Ice Golem in a Boat, then the radius of the Ice Golem's Frosted Ice greatly increases. If you get in the Boat with the Ice Golem, you can glide across the Ice, going much faster than you would in water.
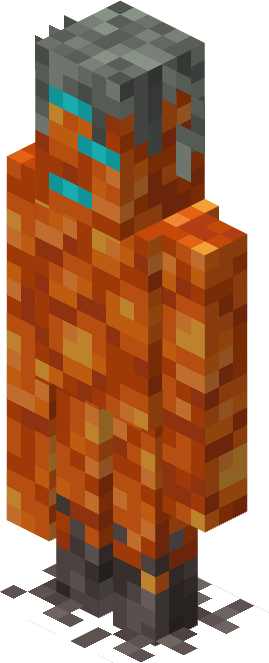
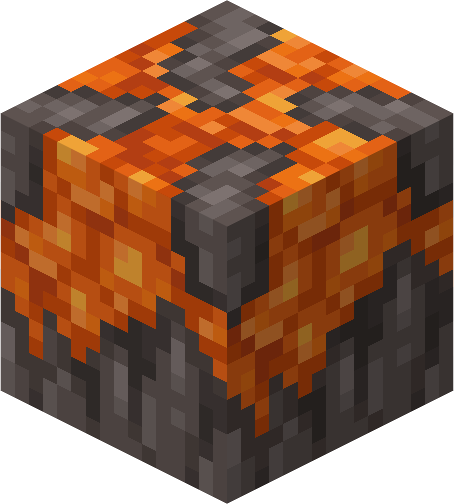
Magma Golem:

Utility Summary: Can be put in a Boat to turn lava under it into Unstable Magma, allowing you to create Magma bridges across lava.
Magma Golem Information:
This is the structure for the Magma Golem.

Side View:
Required Materials:
1 Carved Pumpkin/Jack o'Lantern
2 Magma blocks
Magma Golem Statistics:
Behavior: Neutral
Healable: No
General Information:
The Magma Golem works in about the same way as the Ice Golem does, but in reverse. Instead of being peaceful in the day and aggressive at night, the Magma Golem is instead peaceful at night and aggressive during the day. The Magma Golem shoots Fireballs instead of Ice Bombs. The Magma Golem also creates Unstable Magma when it walks over lava, instead of creating Frosted Ice when it walks over water. Unstable Magma works in in the same way as Frosted Ice does, except that it is for lava instead of water. The Unstable Magma replaces the lava, but then it starts to get cracks in it and eventually breaks, leaving just the lava again. If you put the Magma Golem in a Boat, the radius of its Unstable Magma increases, much like that of the Ice Golem's Frosted Ice. You can use this to create temporary Magma bridges across bodies of lava.
Diorite Golem:
Utility Summary: Can be used to attack specific mob types.
Diorite Golem Information:
This is the structure for the Diorite Golem.
Side View:

Required Materials:
1 Carved Pumpkin/Jack o'Lantern
1 Diorite block
Diorite Golem Statistics:
Behavior: Passive
Healable: Yes; Diorite block
General Information:
The Diorite Golem works similar to the Stone Golem, but instead of it attacking every monster you can choose what mobs the Diorite Golem will attack. The Diorite Golem has an inventory you can access by right-clicking on it. This inventory has 5 slots. To make the Diorite Golem attack a certain mob, simply put the mob's corresponding item into the Diorite Golem's inventory. This does not work for every mob, but just the ones listed below. Here is the list of mobs and their corresponding items:
Chickens: Raw Chicken
Cows: Raw Beef
Sheep: Raw Mutton
Pigs: Raw Porkchop
Zombies: Rotten Flesh
Skeletons: Bone
Creepers: Gunpowder
Spiders: String
Slimes: Slimeball
Zombified Piglins: Gold Nugget
Illagers: Emerald
Endermen: Ender Pearl
For example, if you put a Bone, some Raw Beef, and an Ender Pearl into a Diorite Golem's inventory, that Diorite Golem would only attack Skeletons, Cows, and Endermen. You can tame the Diorite Golem using Diorite. If the Golem is tamed, then it will follow you around and teleport to you if you are far away. You can also right-click on the Golem to make it sit. The Golem will not teleport to you when it is sitting.
Granite Golem:
Utility Summary: Can be used to distract and redirect monsters.
Granite Golem Information:
This is the structure for the Granite Golem.
Side View:
Required Materials:
1 Carved Pumpkin/Jack o'Lantern
1 Granite block
Granite Golem Statistics:
Behavior: Passive
Healable: Yes; Granite block
General Information:
The Granite Golem is unique among the Stone Golems due to the fact that it does not attack any mobs. Instead, when the Granite Golem sees a monster, it will immediately run up to that monster and put up its arms in a defensive posture, using them to block all damage that would otherwise have hurt the Golem. This distracts the monsters and gives you an opportunity to escape. Once the monsters are no longer near the Granite Golem, it will break its stance and continue to look for any other monsters to distract. If you want to keep the Granite Golem in this defensive posture, simply right-click on it and it will stay with its arms up, taking no damage. Right-click on it again to change it back to its roaming mode. You can tame the Granite Golem using Granite. If the Golem is tamed, then it will follow you around and teleport to you if you are far away. The Golem will not teleport to you if it is in it's defensive posture.
Andesite Golem:
Utility Summary: Can knock back monsters and other mobs, keeping them out of a certain area.
Andesite Golem Information:
This is the structure for the Andesite Golem.
Side View:
Required Materials:
1 Carved Pumpkin/Jack o'Lantern
1 Andesite block
Andesite Golem Statistics:
Behavior: Passive
Healable: Yes; Andesite block
General Information:
Like its other Stone cousins, the Andesite Golem specializes in combat. However, the Andesite Golem does something none of the other Stone Golems can do. When the Andesite Golem sees a monster, it will rush up to it and smash its hands together, creating a knockback attack that will send the monster flying. This knockback attack will only launch monsters. However, like the Granite Golem, if you right-click on the Andesite Golem, it will stay in place. Once it is staying in place, any mob (Including Players.) that comes near it will trigger its knockback attack and be flung away, not just monsters. If you right-click on the Golem again, it will be changed back into its roaming mode. You can tame the Andesite Golem with Andesite. A tamed Andesite Golem will not launch its owner while it is staying in place. Like the other Stone Golems, a tamed Andesite Golem will follow its owner while it is in its roaming mode and teleport to its owner if they are far away. The Golem will not teleport to its owner if you right-click on it to make it stay in place.
Obsidian Golem:
Utility Summary: Can be used in mob farms to transport items back to a storage Chest.
Obsidian Golem Information:
This is the structure for the Obsidian Golem.
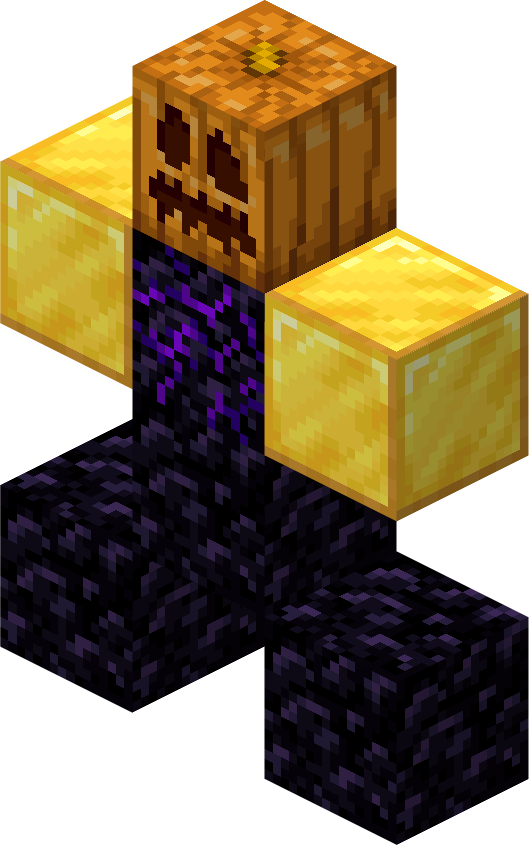
Side View:
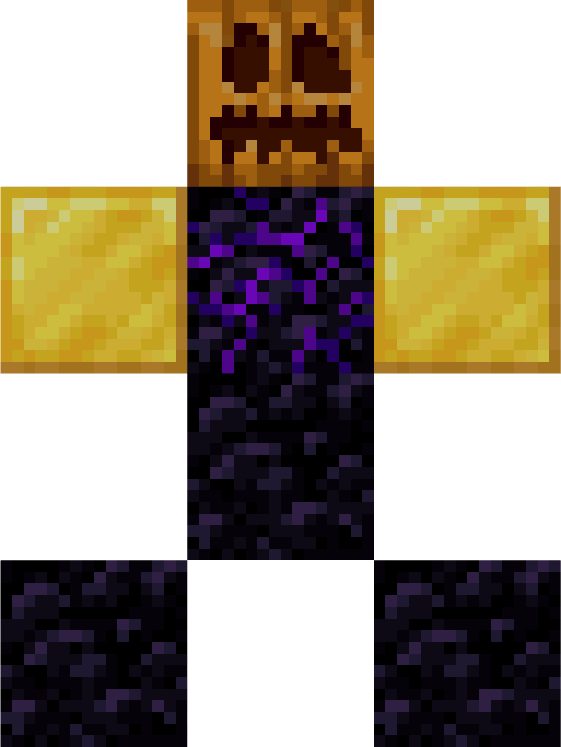
Required Materials:
1 Carved Pumpkin/Jack o'Lantern
3 Obsidian blocks
1 Crying Obsidian block
2 Gold blocks
Obsidian Golem Statistics:
Behavior: Neutral
Healable: No
General Information:
All Obsidian Golems have the same inventory. If you right-click on an Obsidian Golem, you will see that it has the standard Chest inventory with 27 slots. However, if you put an item in its inventory and then open a different Obsidian Golem's inventory, you will find that the same item you put in the first Obsidian Golem's inventory is also in the second Golem's inventory. Likewise, if you take the item out and go back to the first Obsidian Golem and open its inventory, you will find that the item has been removed from that inventory as well. This feature works across dimensions, meaning that an Obsidian Golem in the Overworld still has the same inventory as an Obsidian Golem in the Nether. Another feature of Obsidian Golems is that they will also attack anything they see, except Players and other Obsidian Golems. They will also try to pick up any items that are on the ground, making them a must for any advanced mob farm. To add on to this, they even load the chunks around them. Unfortunately, mobs will not spawn in a chunk only loaded by an Obsidian Golem and not a Player, but crops will continue to grow. The Obsidian Golem's inventory is also able to be siphoned using Hoppers, meaning you can easily transport items out of its inventory, taking them directly into your storage Chests.
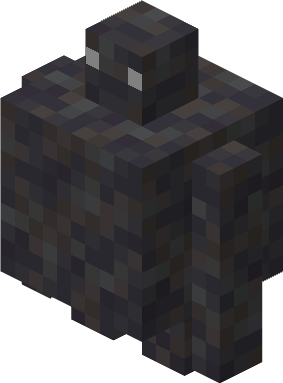
Bone Golem:
Utility Summary: Can be flown like a drone; your camera will follow the Golem as it flies.
Bone Golem Information:
This is the structure for the Bone Golem.
Side View:
Required Materials:
1 Carved Pumpkin/Jack o'Lantern
1 Bone Block
Bone Golem Statistics:
Behavior: Passive
Healable: Yes; Bone, Bone Meal
General Information:
If you right-click on the Bone Golem, you can fly it like a drone. To fly the Bone Golem, point your camera in the direction you want the Golem to go, and it will fly in that direction. Even though your camera is following the Bone Golem, you can still move your Player character. Sneak to disconnect yourself from the Bone Golem and return your camara back to your Player. You can make the Bone Golem follow you around by holding out Bones or Bone Meal in your hand.
Sculk Golem:
Utility Summary: Can store Experience points within itself.
Sculk Golem Information:
This is the structure for the Sculk Golem.
Side View:
Required Materials:
1 Carved Pumpkin/Jack o'Lantern
2 Sculk blocks
Sculk Golem Statistics:
Behavior: Neutral
Healable: Yes; Sculk block
General Information:
If you attack the Sculk Golem, it will attempt to bite you. If it successfully bites you (Don't worry, the attack does little to no damage.), it will consume some of your Experience and get visually fatter. The more Experience it eats, the fatter and slower it gets. The Sculk Golem can eat a maximum of 1395 Experience points, which is the amount required to reach Level 30 if you do not have any Levels. To retrieve your Experience from the Sculk Golem, right-click on it and it will spit out all of the Experience points it was storing. Another way to collect your Experience is killing the Golem, but that is not recommended over the other option. The Sculk Golem will also occasionally take naps. This is purely aesthetic and has no gameplay impact, but it is pretty cute. The fatter the Sculk Golem is, the more often it takes naps.
Resin Golem:
Utility Summary: Can guard a specific area of one's choosing, killing all mobs that enter whilst being invincible.
Resin Golem Information:
This is the structure for the Resin Golem.
Side View:
Required Materials:
1 Carved Pumpkin/Jack o'Lantern
2 Resin blocks
Sculk Golem Statistics:
Behavior: Neutral
Healable: Yes; Resin Clumps
Resin Golem Heart:
Resin Golem Heart Crafting:

(The recipe is shapeless.)
General Information:
When built, this Golem will be spawned with a block called a Resin Golem Heart.
You can also craft the Resin Golem Heart using a Pale Oak Log and a Block of Resin. The Resin Golem will be linked to this Heart and will attack any mob that gets within 8 blocks of the Heart, including Players. The Golem will also stay within 8 blocks of the Heart. When linked, the Resin Golem will take no damage from attacks, similar to a Creaking. Upon breaking the Resin Golem Heart, the Resin Golem will become motionless and will be able to take damage. Placing a Resin Golem Heart near it will link it to the new Heart. Moreover, the Resin Golem can also be tamed using Resin Clumps. If the Resin Golem is tamed and linked to a Resin Golem Heart, it will not attack its owner. If the Golem is tamed and not linked to a heart, and its owner is nearby and has a Resin Golem Heart in their inventory, then the Resin Golem will link to their owner instead of a Heart, and will follow them around and attack any mob that comes withing 8 blocks of their owner. However, if the Golem is linked to its owner instead of a Resin Golem Heart, it will be able to take damage. If the Resin Golem is linked to its owner and they place down a Resin Golem Heart, the Resin Golem will automatically link to the new Heart.
Experiments are NOT required for this Addon.
Thank you for viewing my Addon! Have a nice day.
Join my Discord server for the latest news about my Addons! https://discord.gg/jtYjEdBKKR


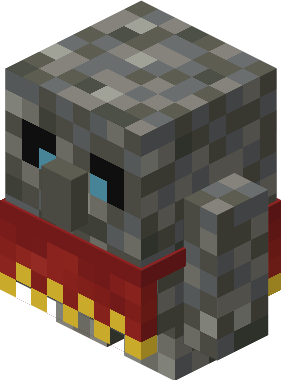
![[1.1.1 Hotfix] Piglin Conquest by ForeverAPigman; The Rogue Horde project image](https://media.forgecdn.net/avatars/thumbnails/1799/736/256/256/639139527929176919.png)