


Description
Important
Use version 0.1.1+ for the latest version of Hytale (2026.02.17).
If you're on the previous version, use version 0.1.0.
You can read this information in the google doc, if you prefer:
https://docs.google.com/document/d/1QEx2OEsehDNb8C7NgbI19sY5svF0M6ZyCRJFSVfUsgM/edit?usp=sharing
About
Takedown is a plugin for creators who want to add custom animations for entity interactions. Such as a finisher animation when a mob only has 10% health left. Or a high-five animation for 2 players.
All the animations are configured directly in the asset editor, no external configuration files or need to learn plugin development to use it.
Included example animation:
Getting started
The plugin includes an example animation to get started.
Step 1.
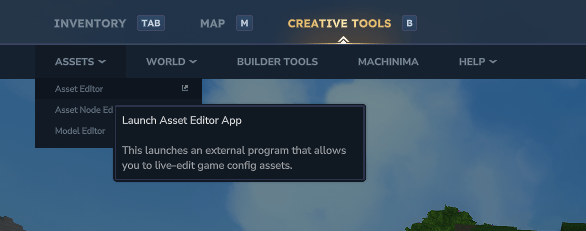
Open the asset editor
1. Open the chat and type /op self
2. Press Tab
3. Click Creative Tools -> Assets -> Assets Editor
Step 2.
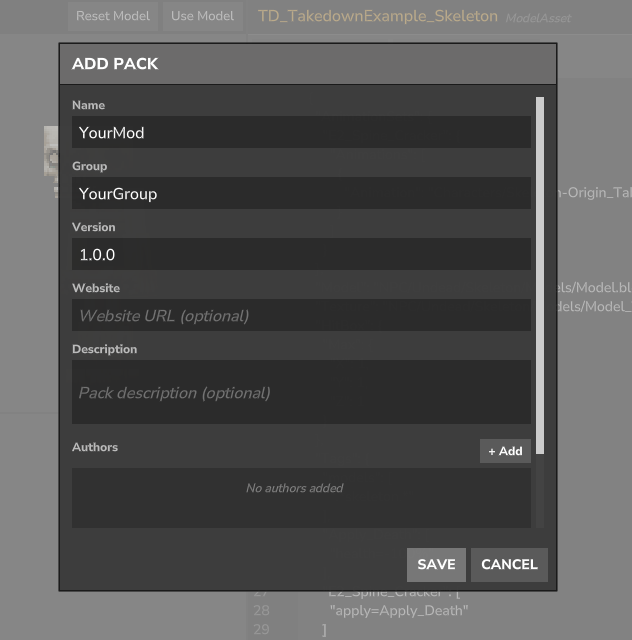
Create your asset pack
1. Click the "..." button the top left and select Add Pack
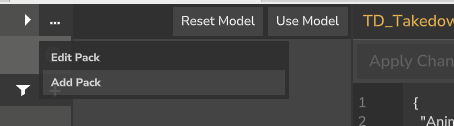
2. Give the pack a name and group and click Save
Step 3.
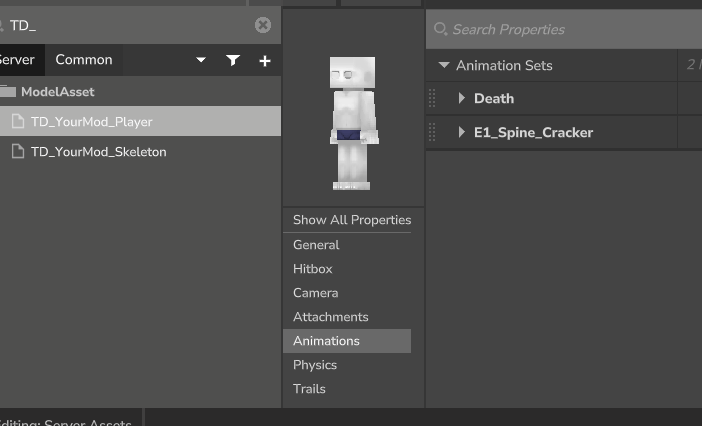
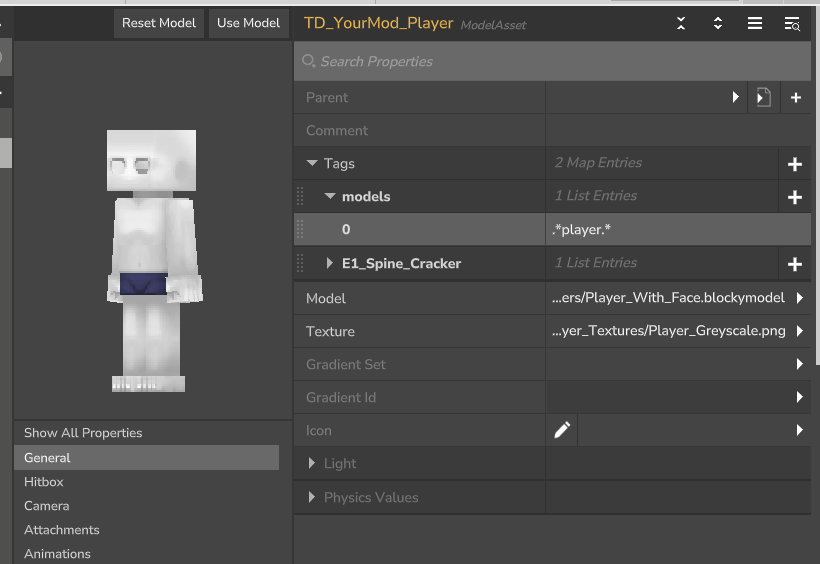
Add the example player animation
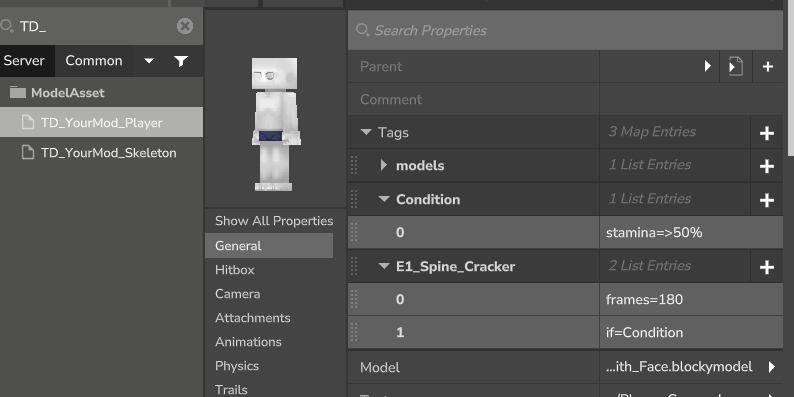
1. Click the "+" button in the top left

2. Give it the Unique Asset ID: TD_YourMod_Player (Replace YourMod with anything you want)
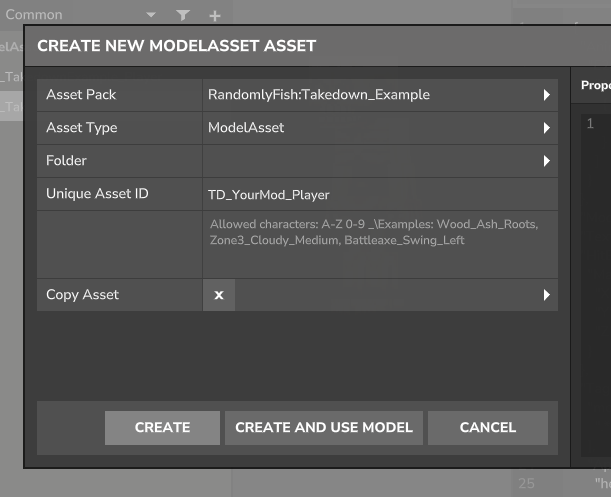
It's crucial that the Unique Asset ID starts with TD_ and includes at least 2 underscores, otherwise it won't work.
3. Copy this code
{"AnimationSets": {"Death": {"Animations": [{"Animation": "Characters/Animations/Damage/Default/Death.blockyanim"},{"Animation": "Characters/Animations/Damage/Default/Death2.blockyanim"}]},"E1_Spine_Cracker": {"Animations": [{"Animation": "Characters/Origin_Takedown_Spine_Cracker.blockyanim"}]}},"Model": "Characters/Player_With_Face.blockymodel","Texture": "Characters/Player_Textures/Player_Greyscale.png","HitBox": {"Max": {"X": 1,"Y": 1,"Z": 1}},"Tags": {"models": [".*player.*"],"E1_Spine_Cracker": ["frames=180"]},"Camera": {"PositionOffset": {"Z": -20,"Y": -3}}}
4. Click on Source and paste the code from above
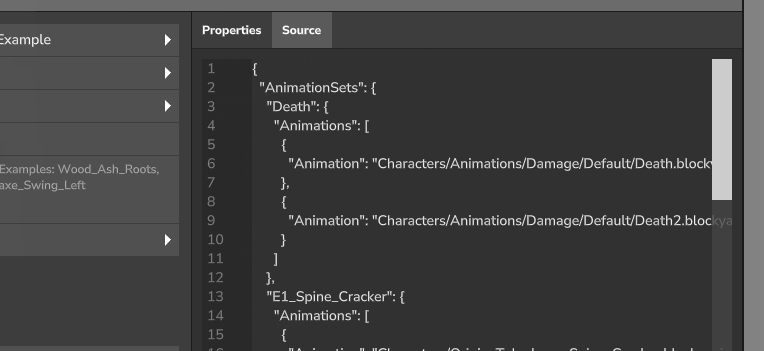
5. Click Create
Step 4.
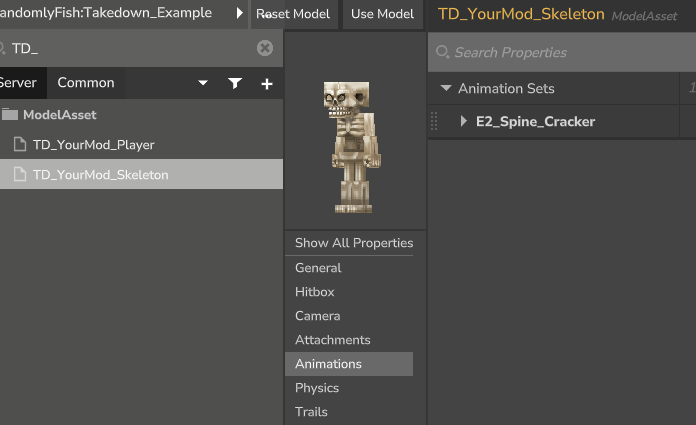
Add the example skeleton animation
Repeat the previous steps for adding the player animation.
Instead of TD_YourMod_Player, use TD_YourMod_Skeleton for the Unique Asset ID.
And for the code, use this:
{ "AnimationSets": { "E2_Spine_Cracker": { "Animations": [ { "Animation": "Characters/Skeleton-Origin_Takedown_Spine_Cracker.blockyanim" } ] } }, "Model": "NPC/Undead/Skeleton/Models/Model.blockymodel", "Texture": "NPC/Undead/Skeleton/Models/Model_Textures/White.png", "HitBox": { "Max": { "X": 1, "Y": 1, "Z": 1 } }, "Tags": { "models": [ ".*skeleton.*" ], "Apply_Death": [ "health=-100%" ], "E2_Spine_Cracker": [ "apply=Apply_Death" ] }}
Step 5.
Testing it
If everything was done correctly, if you hit any skeleton mob in the game, it should play this animation:
Configuring animations
Settings like what mobs can use certain animations, the conditions needed for it to play, what happens when an animation finishes, etc are configured through the Asset Editor.
Naming rules
There are rules that must be followed for the name of animations in order for them to work with the plugin.
Player example:
Mob example:
Model naming
The names of each model must start with "TD_" and include at least 2 underscores. This is a requirement to reduce the risk of multiple mods using the same names.
Animation naming
The name of the animations must start with "E#_" for them to be used at the start of a takedown.
"E1" and "E2" are short for Entity 1 and Entity 2.
"E1" is generally used for the entity who attacks/performs the action.
"E2" is generally used for the entity who takes damage/receives the action.
The plugin determines that animations are linked based on both the name of the model and that the name of the animations matches.
The framework technically supports an unlimited number of entities, by increasing the number next to "E", such as E3, E4 and so on.
For animations that are part of a takedown, but not at the start, you may add any prefix, such as "Kill_E1_Spine_Cracker" or "Cripple_E1_Spine_Cracker".
Reusing animations for multiple entities
To reuse the same animations for entities who use different models you can configure the models tag:
With it set to ".*player.*" it means that these animations can be used for any entity which uses a player model (model with the word player in the name).
If you want to target a model with the exact name, you can just use "Player".
You can add multiple values to the models tag to target different models.
If you make changes to this, it's recommended to use the /td-reset command, to clear the cache for the plugin.
Available entities
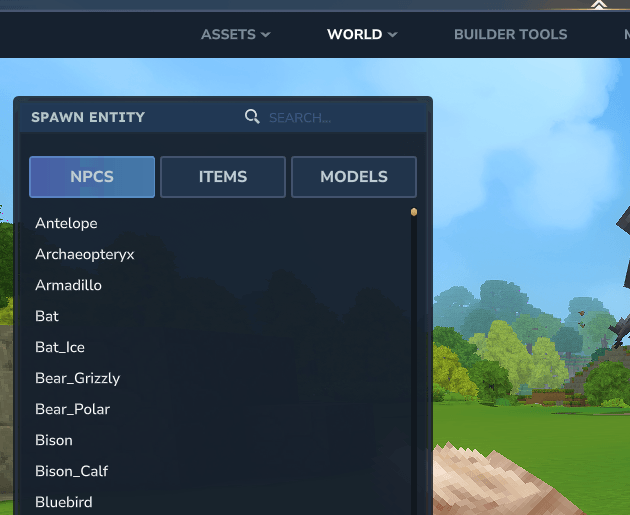
To find out the names of the available entity models, you can use the Spawn Entity menu.
- In creative mode, press Tab to open the inventory
2. Click World -> Spawn Entity
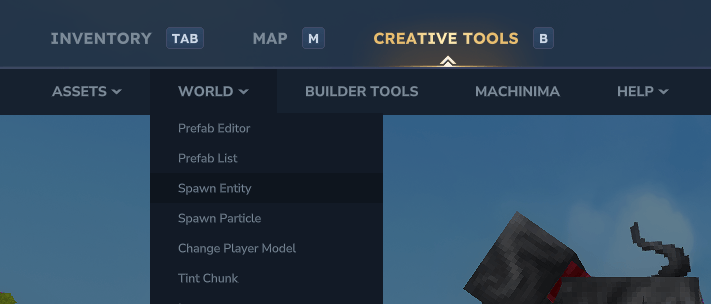
3. Search the available entities
The names in this list are the same as the model assets.
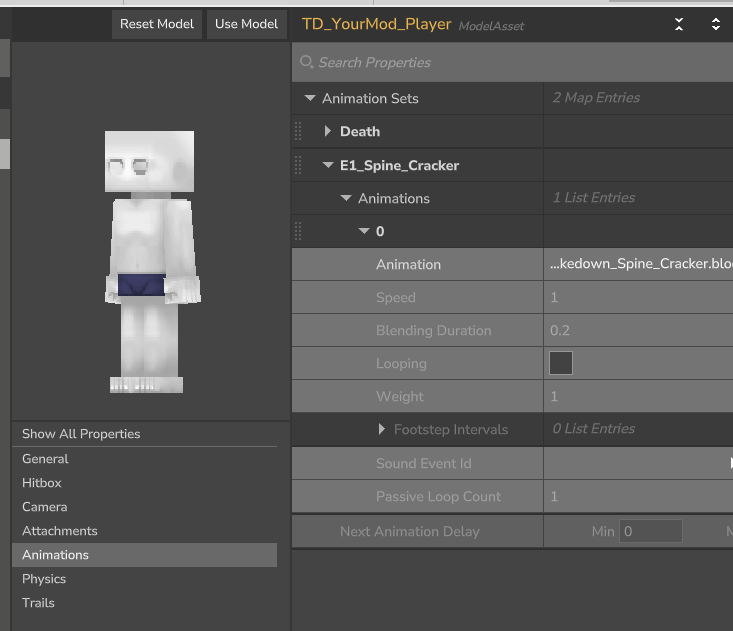
General animation settings
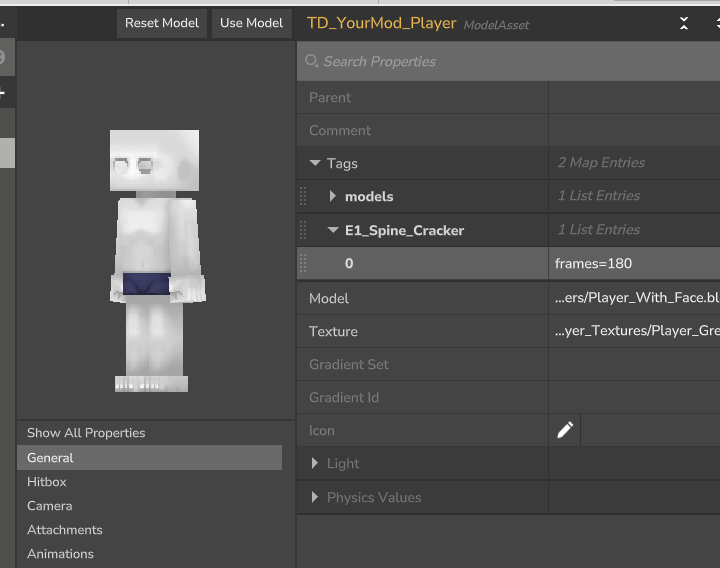
In the Animations tab you can find the standard settings, such as which file to use, speed and looping:
In the General tab, you configure additional settings using a tag by the same name as the animation:
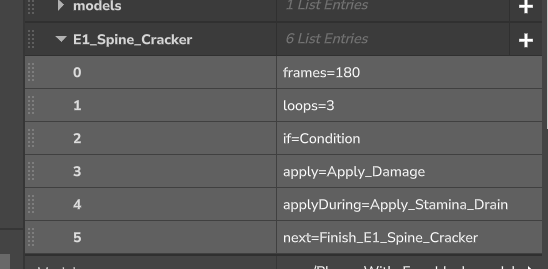
Settings overview
frames - the number of frames in the animation. This is mandatory for the animation to play
loops - the number of times the animation should loop
if - the condition needed for this animation to play
apply - the stats to modify at the end of the animation
applyDuring - the stats to modify every tick during the animation
next - the animation to play after. If not included, it will stop once the current animation is done
For both frames and loops, this is only required for any animation with "E1" in the name.
For animations with "E2" and above, it will use the same values as the "E1" animation.
It may look like this
Adding condition
To control when an animation can be played, you can add conditions.
Example:
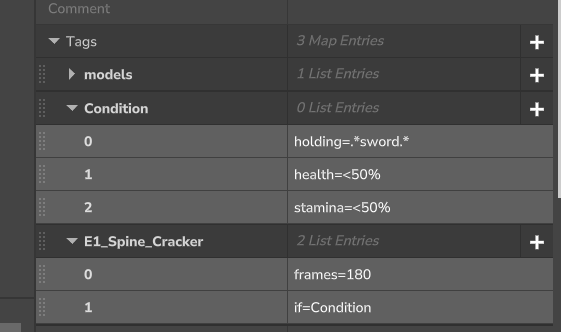
This will require that the entity holds any sword and has less than 50% stamina and health.
You can use any name you want instead of "Condition".
This allows you to reuse and set up multiple conditions for different animations.
Condition settings overview
holding - What item the entity must hold.
Set this to "holding=" for when you want the entity to not hold anything.
health / stamina / mana - The amount of health/stamina/mana the entity needs.
"<" for less than, ">" for greater than and "%" for percentage of the max value.
attachments - Which model attachments the entity needs.
It checks against the file name of the model attachment.
Adding conditions per entity
Each condition, such as health, is specific to the entity who will play the animation.
To add conditions that check the stats for both entities, you will need to define them per entity.
Attacker Example:
Defender Example:
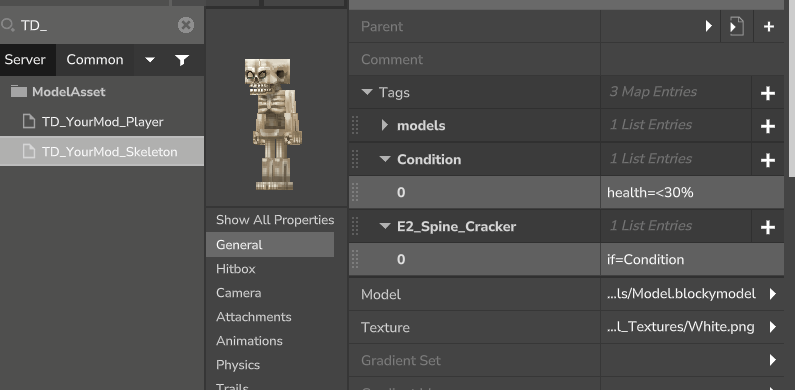
In this example, it will use both conditions from the attacker and defender to determine if the takedown can be initiated.
The attacker needs more than 50% stamina and the defender needs less than 30% health.
Adding apply effects
Apply effects can be used to alter the stats of entities after or during the takedown animation.
You can add an apply effect like this:
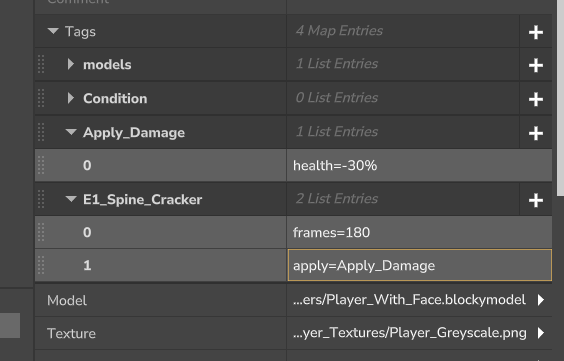
This will reduce the entity's health by 30%.
You can use any name you want instead of "Apply_Damage".
This allows you to configure multiple apply effects for different animations.
To apply effects every tick, you may use the applyDuring tag. Keep in mind that since it is applied every tick (30 times per second by default), you will need to adjust the stats accordingly.
Apply effect settings overview
health / stamina / mana - What amount to modify this stat by.
You may exclude the "%" to use flat values instead.
Branching animations
Takedowns can include multiple animations in a sequence using the next setting.
The different possible options can be defined like this: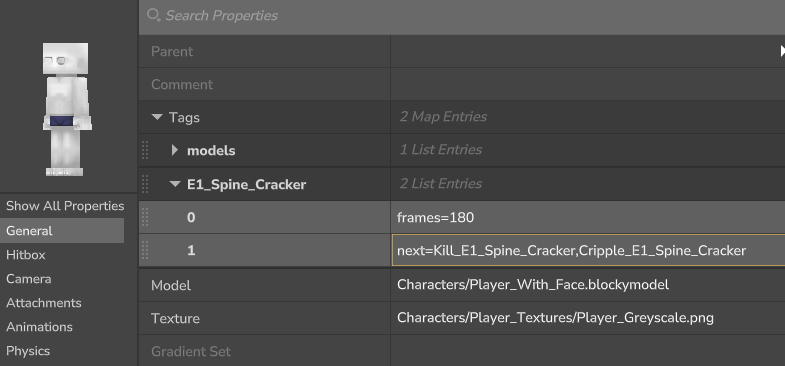
In this case, it will first check if it can play "Kill_E1_Spine_Cracker", if the conditions are not met, it will then check if it can play the next animation: "Cripple_E1_Spine_Cracker".
The conditions for the defender is:
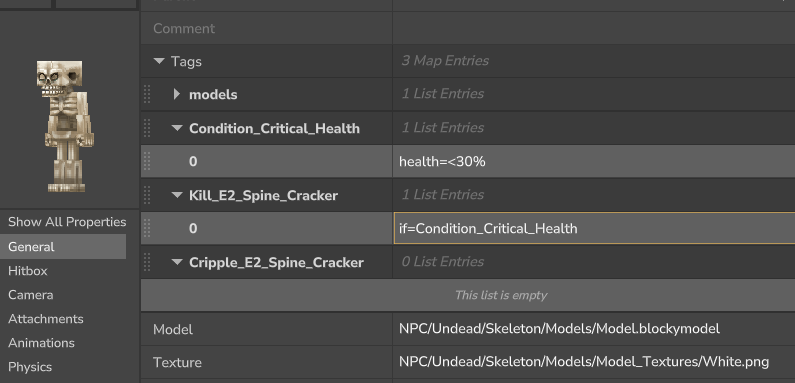
Since no conditions are set for "Cripple_E2_Spine_Cracker", that animation will always play, if the condition is not met.
How to create animations
There are some specific steps you need to take when creating animations for Takedown, so even if you know how to animate in blockbench, this information is still important.
Animations are created in Blockbench.
When creating animations, you will need to set Snapping to 60.
Installing Blockbench
You can get Blockbench from here:
https://www.blockbench.net/
You will also need to install the Hytale Models plugin for Blockbench:
In Blockbench: File > Plugins.
Where to find Hytale assets
You can find the official Hytale assets as part of your game installation.
Hytale/install/release/package/game/latest/Assets.zip
How to use 2 blockymodels in the same Blockbench project
The Hytale Models plugin requires all groups to have unique names.
If you try to add 2 models into one project, it will rename the groups that conflict, while keeping the names that don't.
The issue with that is that Hytale requires the names of the groups to stay the same for the animation to work in game.
So, to work around this we want to add our own prefix, that we can easily remove later.
Adding prefix
For adding prefix in the blockymodel file, I would recommend using a text editor with a replace feature, such as VSCode:
https://code.visualstudio.com/
- Open the .blockymodel file in VSCode
- Press Ctrl/Command + F to search
- Expand the search box to show the replace field
- For the search field, enter: "name": "
- For the replace field, enter: "name": "Mob- (Or any other prefix that makes sense)
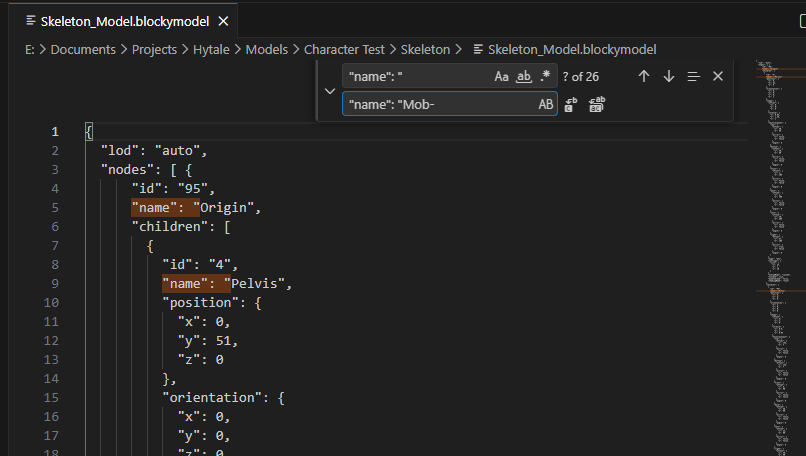
6. Click the Replace All button next to the replace field
If done correctly, you should now see:
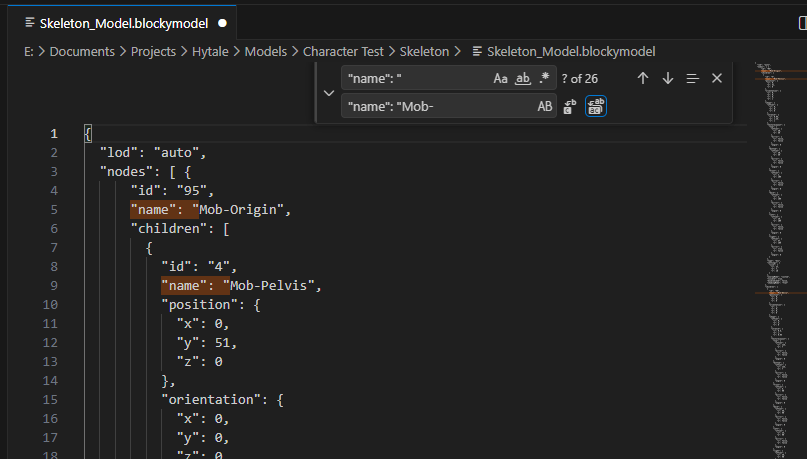
7. Save the file
If your animation includes 2 blockymodels, you can keep the names as is in the other blockymodel file.
Putting the models in the same project
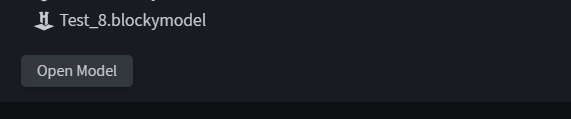
First open one of the blockymodels.
From the home screen: click Open Model at the bottom
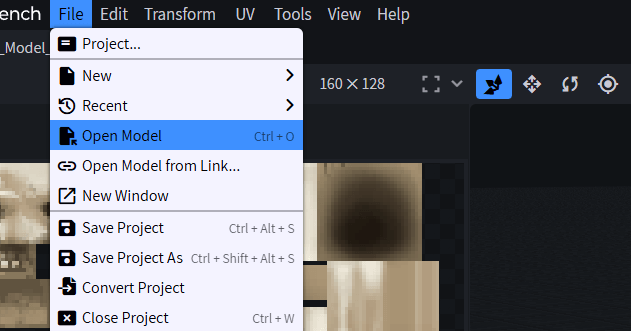
With a model already open: go to File > Open Model
Then do the same for the second model, so that you have both models open at the same time
In the outliner, copy the group:

Open the second model and paste the group into the outliner:
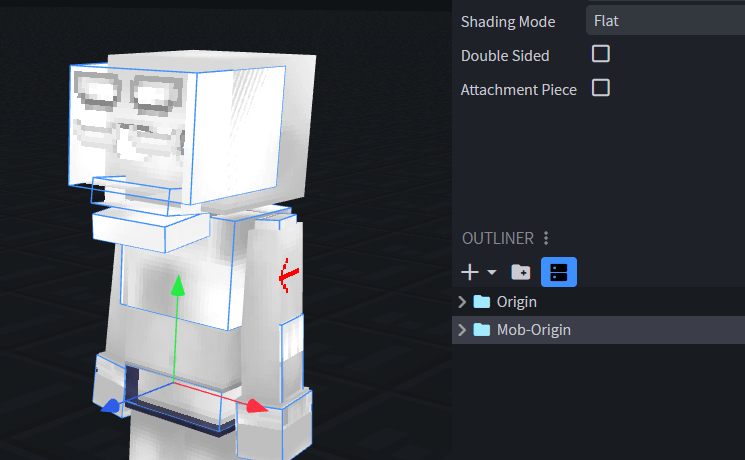
You should now have both models in the same blockbench project.
Saving the blockyanim files
Each model needs its own blocky anim file.
Before proceeding, make sure that the file is saved.
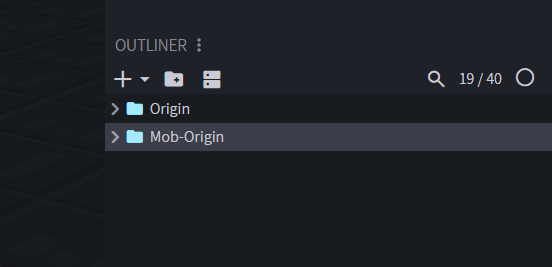
On the Edit tab, from the outliner, delete one of the model groups:
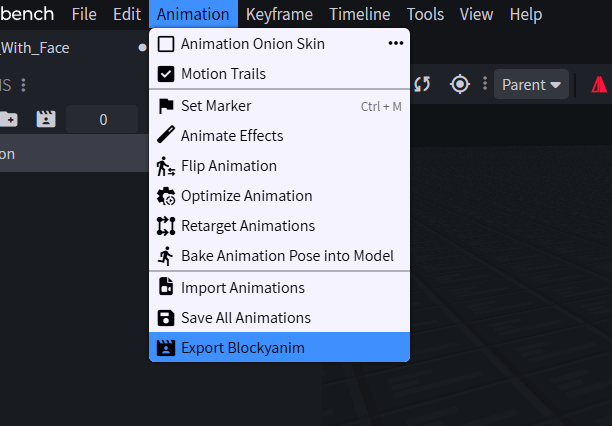
Then on the Animate tab, Select Animation > Export Blockyanim
IMPORTANT
Do not undo and save.
When you undo, it will only bring back the model you removed, but not its animations. The animation will be completely gone.
Instead, close the model and open up the one you saved from earlier.
Then remove the other model and export the blockyanim for the other one.
You should now have 2 blockyanim files, one for the model with the "Mob-" prefix (or the prefix you used).
Removing prefix from blockyanim file
Like in the steps for adding prefix, you will need to open the blockyanim file in a text editor with a replace feature.
Open the blockyanim file and replace "Mob- with ":
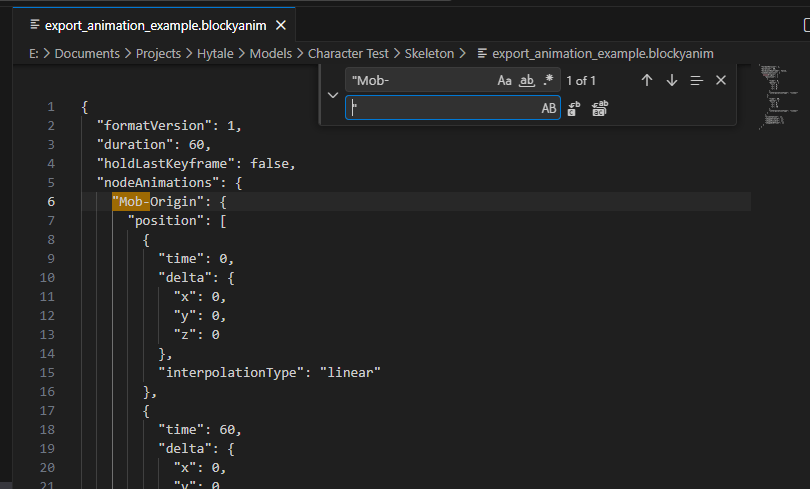
Then save the file.